
Proper camellia maintenance is essential for keeping your camellias healthy and blooming year-round. This comprehensive guide to camellia maintenance covers everything from pruning and fertilizing to seasonal care, ensuring your plants thrive for decades. Whether you’re maintaining young plants or established camellias, understanding these camellia maintenance fundamentals will help you achieve beautiful, healthy blooms.
Creating a thriving camellia garden requires carefully selected products and specialized tools designed to meet the unique needs of these acid-loving flowering shrubs. Garden Edging Border supports successful camellia cultivation. Fabric Grow Bags supports successful camellia cultivation. Self Watering Planters ensures consistent moisture for optimal camellia growth. Sphagnum Peat Moss provides the ideal growing medium for camellias. Bloom Booster Fertilizer supplies essential nutrients for healthy growth and vibrant blooms. Iron Sulfate Fertilizer supplies essential nutrients for healthy growth and vibrant blooms. Pine Straw Needle helps maintain soil acidity and moisture retention. Cedar Chips Mulch helps maintain soil acidity and moisture retention. Hedge Shears Manual is essential for maintaining camellia shape and health. Hand Pruners Bypass supports successful camellia cultivation. Sprinkler System Timer supports successful camellia cultivation. Rain Gauge Moisture supports successful camellia cultivation. Diatomaceous Earth Organic supports successful camellia cultivation. Beneficial Insects Ladybugs supports successful camellia cultivation. Bamboo Plant Stakes supports successful camellia cultivation. Plant Rings Hoops supports successful camellia cultivation. Antidesiccant Spray Plant protects camellias from cold damage. Plant Protector Cones supports successful camellia cultivation. Moisture Meter Probe provides the ideal growing medium for camellias. Ph Test Strips provides the ideal growing medium for camellias. Garden Statues Decorative supports successful camellia cultivation. Garden Shed Storage supports successful camellia cultivation. Fertilizer Spreader Handheld supplies essential nutrients for healthy growth and vibrant blooms. Wheelbarrow Heavy Duty supports successful camellia cultivation.

Understanding Camellia Maintenance Needs
Practical camellia maintenance tips can be found at Gardening Know How.
Camellias are remarkably forgiving plants, but they do respond well to proper care. The maintenance needs of camellias evolve as plants mature. Young plants need more attention during their first few years, while established plants become increasingly self-sufficient. Understanding this progression helps you provide appropriate care at each stage of your camellia’s life.
The key to successful camellia maintenance lies in understanding their natural growth patterns and providing care that supports rather than interferes with their growth cycle. Camellias are long-lived plants that can thrive for decades with minimal intervention once established, making them excellent investments for your landscape.
Additional resources on camellia maintenance are available from International Camellia Society.
Watering Camellias: From Establishment to Maturity
First Two Years: Establishing Roots
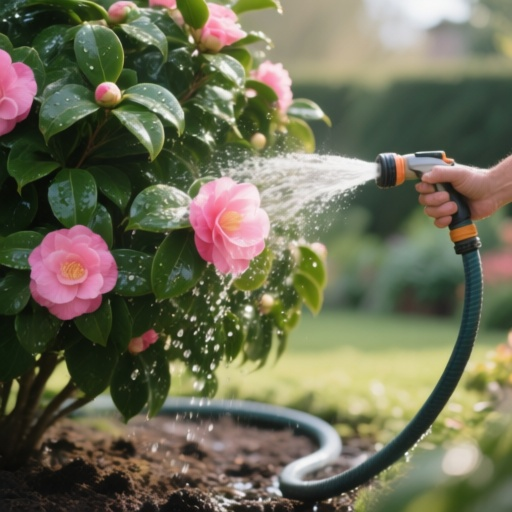
During the first couple of years after planting, camellias need regular watering to establish their root systems. Young plants are still developing their root structure and haven’t yet developed the extensive root system that allows mature plants to access deeper soil moisture.
Watering Guidelines for New Plants:
- Water regularly when rainfall doesn’t provide adequate moisture
- Provide consistent moisture during dry periods
- Avoid letting young plants become drought-stressed
- Monitor soil moisture and water when the top few inches of soil feel dry
- Water deeply to encourage deep root development
Signs Your Young Camellia Needs Water:
- Soil feels dry to the touch
- Leaves may begin to droop slightly
- New growth appears slow or stunted
- Plant looks less vibrant than usual
Established Plants: Minimal Watering
As camellias mature, they become more drought-tolerant and require less frequent watering. Established plants develop extensive root systems that can access deeper soil moisture, making them more resilient to dry periods.
Watering Mature Camellias:
- Water occasionally during hot, dry weather (maybe twice a month)
- Established plants can handle some dryness
- Deep, infrequent watering is better than frequent shallow watering
- Monitor plants during extended dry periods
- Reduce watering frequency compared to young plants
Understanding “Moist but Well-Drained”:
This phrase is key to camellia success. The soil should retain moisture but never become waterlogged. Well-drained soil allows excess water to drain away, preventing root rot while keeping roots moist enough to support healthy growth.
The Role of Mulch in Camellia Maintenance
Mulch plays a crucial role in camellia maintenance, serving multiple important functions:
Moisture Retention: Organic mulch helps soil retain moisture long after garden soil has dried. This is especially important during hot weather when plants need consistent moisture.
Temperature Regulation: Mulch helps moderate soil temperature, keeping roots cooler in summer and providing some protection in winter.
Weed Suppression: A layer of mulch suppresses weeds that compete with camellias for water and nutrients.
Soil Improvement: As organic mulch decomposes, it adds valuable organic matter to the soil, improving soil structure and fertility.
Preventing Soil Compaction: Mulch prevents heavy rain from compacting soil and creating “soup bowls” that hold water around plant roots.
Mulching Guidelines:
- Apply 2-3 inches of organic mulch around the base of plants
- Keep mulch away from the trunk to prevent rot
- Use bark mulch, compost, or leaf mold
- Replenish mulch as it decomposes
- Avoid piling mulch too high against the trunk
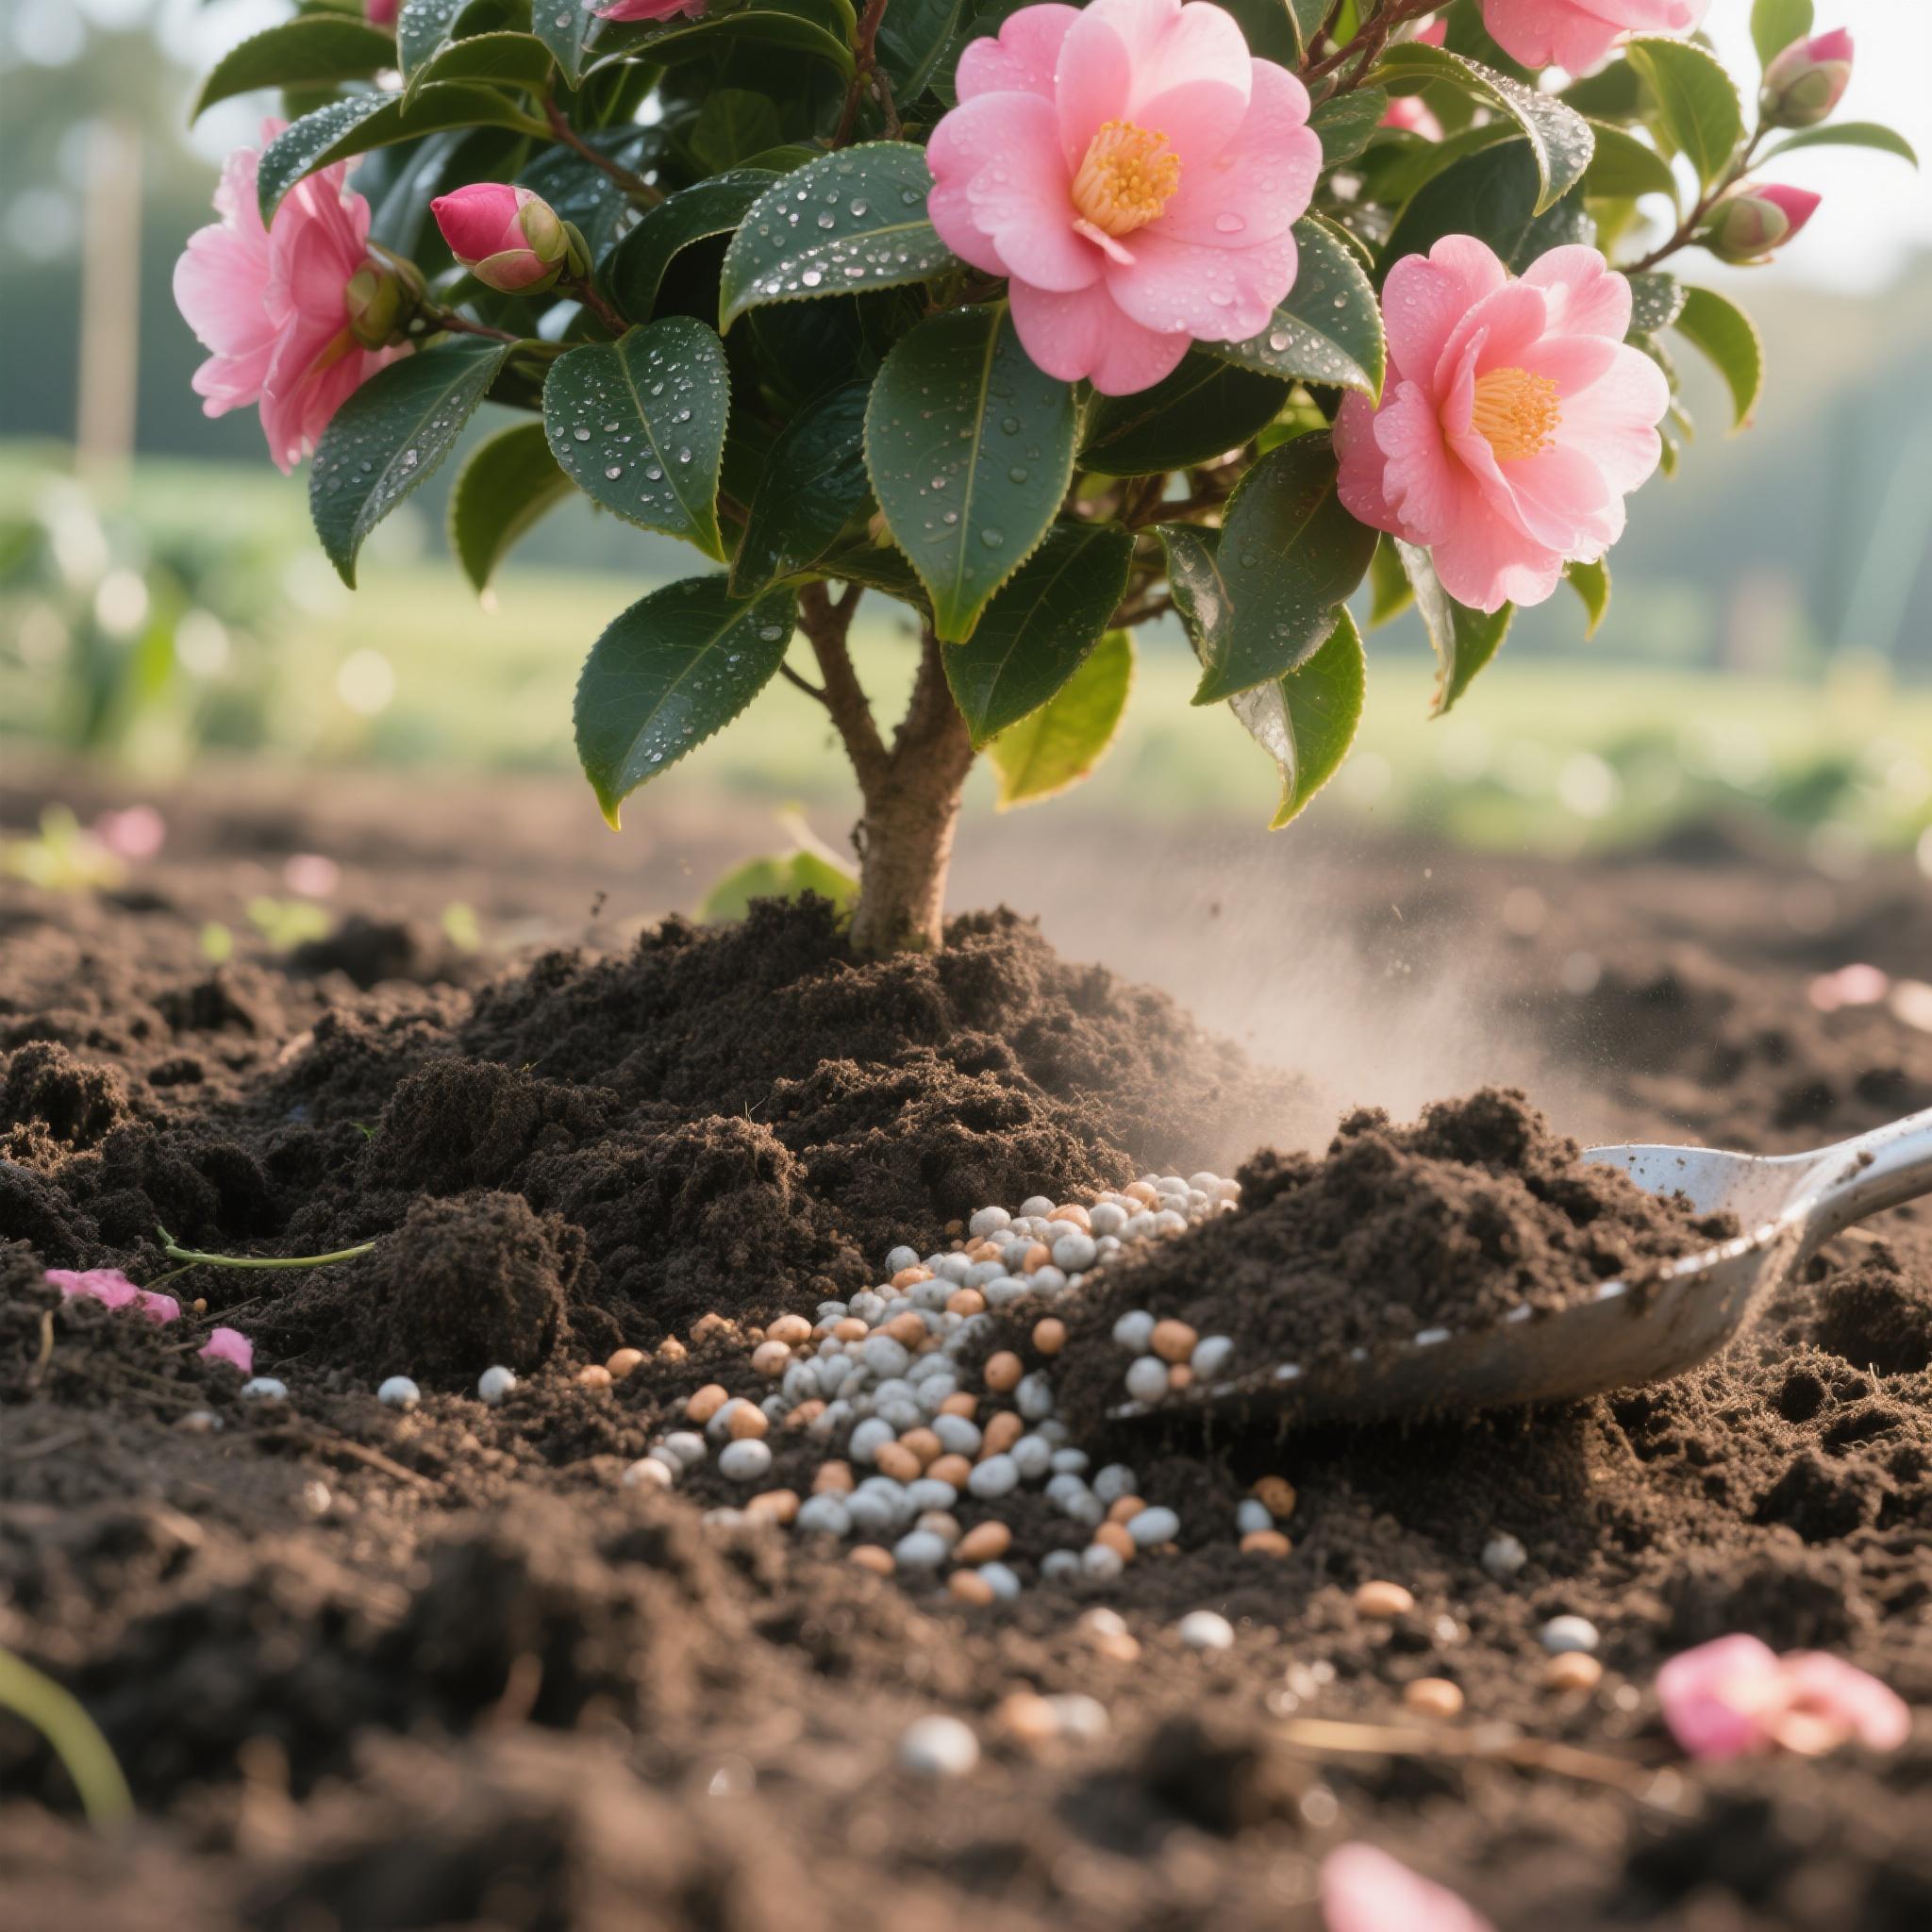
Fertilizing Camellias: Evolving Strategies
Research-based camellia maintenance guidelines are available through University of Georgia Extension.
Early Years: Balanced Fertilizer
During the first few years, camellias benefit from regular fertilization to support their rapid growth and establishment. A balanced fertilizer provides the essential nutrients needed for healthy development.
Initial Fertilizing Approach:
- Use a balanced fertilizer like 8-8-8 or 10-10-10
- Broadcast by hand around the base of plants
- Apply in early spring, late spring, and early summer
- Avoid fertilizing after mid-summer to prevent tender growth before winter
- Water thoroughly after fertilizing
Why 8-8-8 Instead of 10-10-10:
Using a slightly lower concentration (8-8-8) provides a safety margin when broadcasting fertilizer by hand. This prevents accidental over-fertilization that could burn roots, especially important when measuring precise doses for each plant isn’t practical.
Transitioning to Organic Fertilizers
As camellias mature and you gain experience, many gardeners transition to organic fertilizers that provide slower, more sustained nutrient release.
Organic Fertilizer Options:
- Hollytone or similar organic formulas: Typically 4-3-4 or similar ratios
- Acid-loving plant fertilizers: Formulated specifically for camellias, azaleas, and rhododendrons
- Slow-release organic fertilizers: Provide nutrients over an extended period
- Compost and organic matter: Natural soil improvement
Benefits of Organic Fertilizers:
- No risk of root burn from over-application
- Provides slow, sustained nutrient release
- Improves soil structure and health
- Contains micronutrients naturally
- Supports beneficial soil organisms
Application Guidelines:
- Follow package directions for application rates
- Apply in early spring, late spring, and early summer
- Avoid fertilizing during bloom period
- Water thoroughly after application
- Consider soil test results when selecting fertilizers
Recommended Fertilizers for Camellias
Having the right fertilizer makes all the difference in camellia maintenance. Here are some excellent products I’ve personally used and recommend for keeping your camellias healthy and blooming beautifully. Each product has its strengths, and I’ve included my personal experiences with each to help you choose what works best for your situation.
1. Camellia & Azalea Fertilizer
Description: Specialized acid-loving plant fertilizer with slow-release formula
My Experience: I’ve been using this specialized camellia fertilizer for the past three years, and it’s made a noticeable difference in my plants’ overall health and bloom production. The slow-release formula means I only need to apply it a few times per year, which is perfect for busy gardeners. What I love most is how it’s specifically formulated for acid-loving plants—my camellias have never looked better, with deeper green foliage and more abundant blooms. The best part is that it doesn’t burn the roots even if I accidentally apply a bit too much, which gives me peace of mind.
2. Organic Camellia Food
Description: Organic granular fertilizer for acid-loving plants, promotes strong roots and vibrant blooms
My Experience: For those who prefer an organic approach, this camellia food is fantastic. I’ve used it on my younger camellias to encourage strong root development and a more natural, steady growth. It’s gentle on the plants and slowly releases nutrients, which I find ideal for building long-term soil health. Plus, knowing it’s organic gives me confidence that I’m not introducing harsh chemicals into my garden ecosystem. It’s a bit more work to apply than liquid, but the results are worth it.
3. Liquid Camellia Fertilizer
Description: Concentrated liquid fertilizer for quick nutrient uptake and vibrant color
My Experience: When my camellias need a quick boost, especially after a heavy bloom cycle or if they look a little stressed, I reach for this liquid fertilizer. It’s easy to mix and apply, and the plants absorb the nutrients almost immediately. I’ve seen a rapid improvement in leaf color and overall vigor within days of application. It’s particularly useful for container-grown camellias that might need more frequent feeding. Just be careful not to over-fertilize, as liquid formulas are more potent.
4. Slow-Release Camellia Plant Food
Description: Long-lasting, slow-release plant food for camellias, azaleas, and rhododendrons
My Experience: This slow-release plant food is a game-changer for low-maintenance camellia care. I apply it once in early spring, and it feeds my plants for months. It’s perfect for gardeners who want consistent feeding without the hassle of frequent applications. I’ve noticed my camellias maintain a steady, healthy growth throughout the season, and the blooms are consistently strong. It’s especially great for larger beds where individual plant feeding can be time-consuming.
Disclosure: As an Amazon Associate, I earn from qualifying purchases. This means that if you click on the product links above and make a purchase, I may receive a commission at no additional cost to you. This disclosure is in accordance with Amazon’s affiliate program requirements.
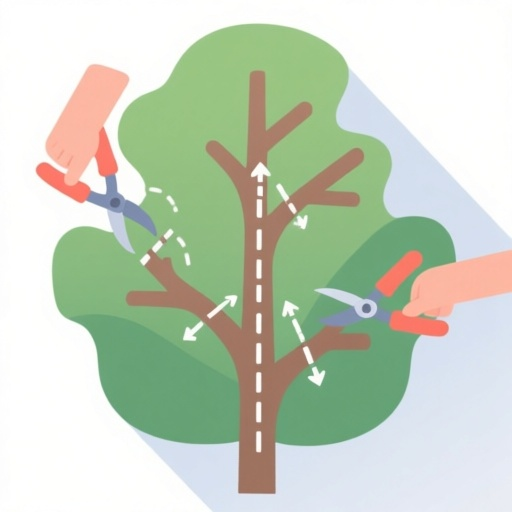
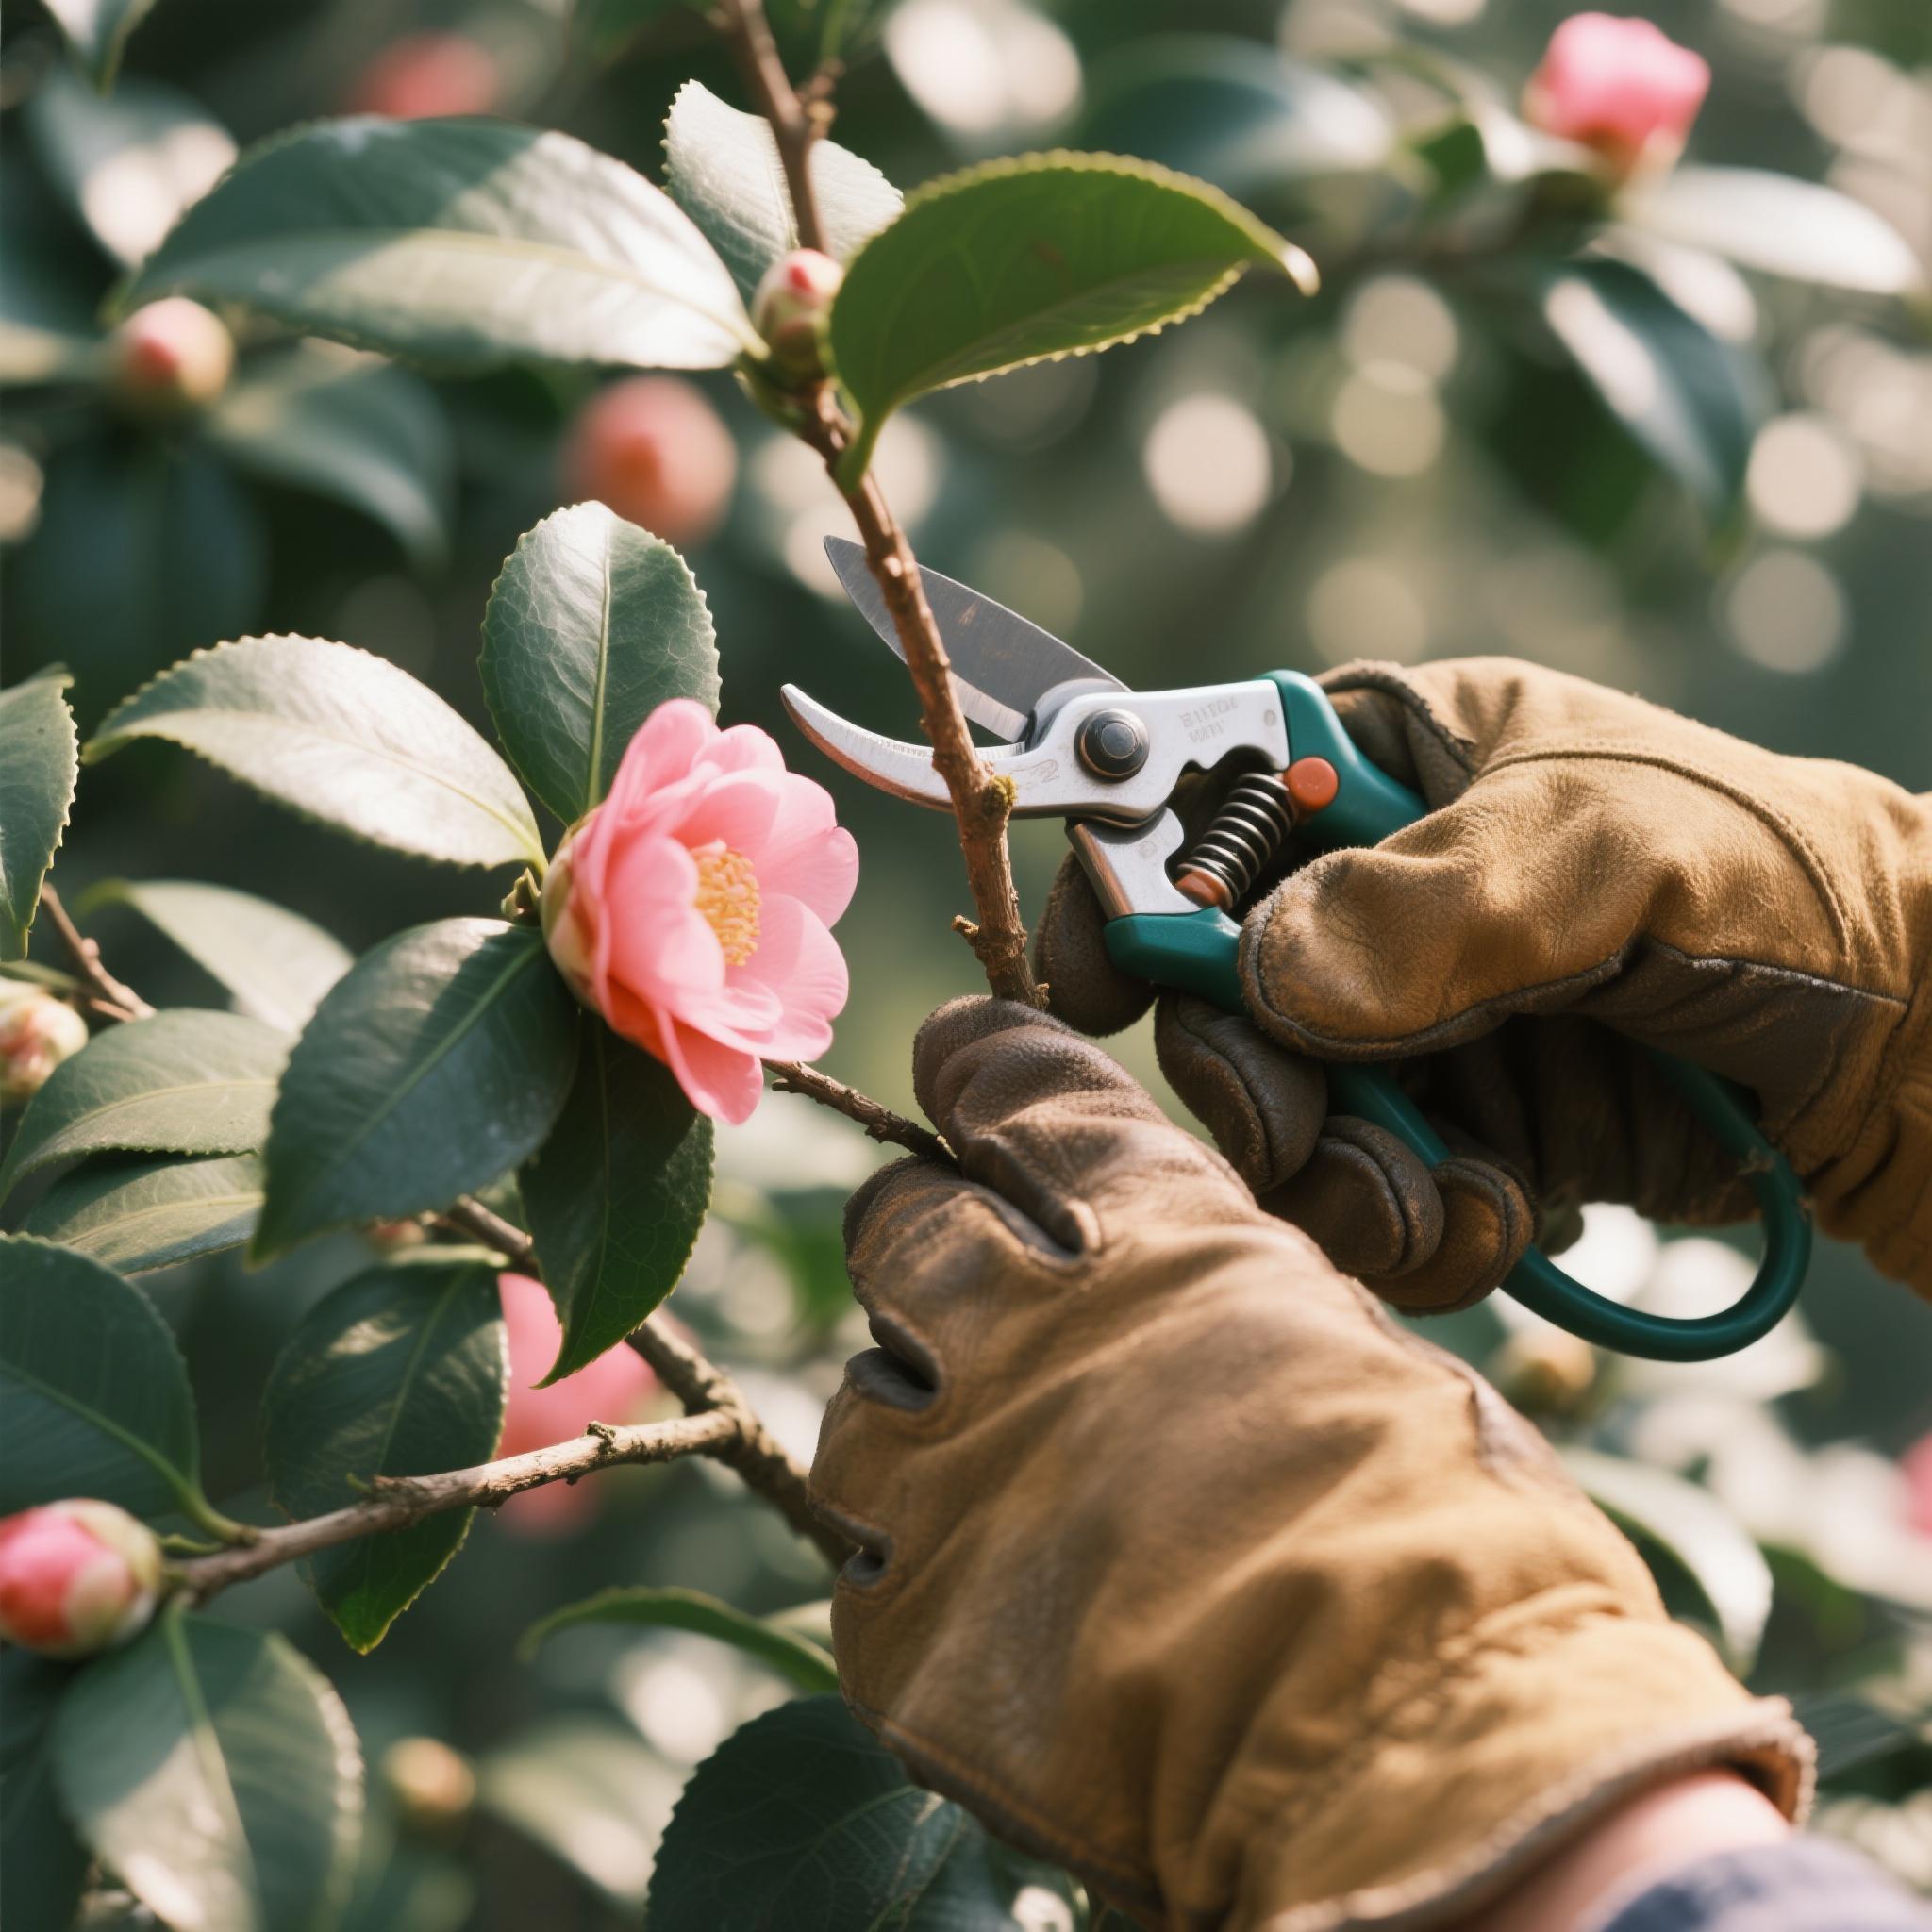
Pruning Camellias: Timing and Technique
More detailed information about camellia maintenance can be found at Clemson University Extension.
When to Prune
The golden rule of camellia pruning is timing: prune immediately after flowering ends. This timing is crucial because it allows the plant to develop new growth that will produce next season’s flower buds.
Why Timing Matters:
- Pruning too late removes next season’s flower buds
- Early pruning gives plants time to set buds for next year
- Post-flowering pruning coincides with natural growth cycle
- Allows plants to recover before winter
Pruning Schedule:
- Early-flowering varieties (fall/winter): Prune in late winter or early spring
- Late-flowering varieties (spring): Prune in late spring or early summer
- Always prune after flowers fade completely
- Avoid pruning during hot summer months
Pruning Techniques
Basic Pruning Goals:
- Remove dead or damaged branches
- Shape the plant if desired
- Maintain good air circulation
- Remove crossing or rubbing branches
- Encourage healthy growth
Pruning Steps:
1. Remove dead or damaged wood first: Cut back to healthy tissue
2. Thin out crowded branches: Remove branches that cross or rub
3. Shape gradually: Make small cuts rather than drastic pruning
4. Maintain natural form: Camellias have attractive natural shapes
5. Clean cuts: Use sharp, clean tools to prevent disease
What to Avoid:
- Heavy pruning during growing season
- Removing more than one-third of plant at once
- Pruning too late in season (removes flower buds)
- Pruning during hot, dry weather
- Leaving stubs that can invite disease
Special Considerations:
- Sasanqua varieties: Often need more shaping than japonicas due to lankier growth
- Japonica varieties: Generally maintain better natural form
- Young plants: Light pruning to encourage branching
- Mature plants: Minimal pruning to maintain shape and health
Essential Pruning Tools for Camellia Maintenance
Having the right pruning tools makes all the difference when maintaining camellias. Over the years, I’ve tried many different tools and found these to be the most effective for various pruning tasks. Each tool serves a specific purpose, and together they give you everything you need for proper camellia maintenance. Here’s why each one is worth having in your gardening toolkit.
1. Fiskars Bypass Pruning Shears
Description: Professional-grade bypass pruning shears with 1-inch cut capacity, forged steel construction, and replaceable blade
Why You’d Want This: These are my go-to pruning shears for most camellia maintenance tasks. The bypass design makes clean cuts without crushing stems, which is essential for healthy camellia growth. I’ve used these for years, and the replaceable blade means I can keep them sharp without buying a whole new tool. The forged steel construction handles thick camellia branches up to 1 inch with ease, and the soft-grip handles prevent hand fatigue during long pruning sessions. Perfect for precision pruning and shaping camellias.
2. Professional Pruning Loppers
Description: Heavy-duty loppers for cutting larger branches and reaching higher parts of camellia bushes
Why You’d Want This: When I need to tackle thicker branches or reach into the center of mature camellia bushes, these loppers are indispensable. I have several established camellias that have grown quite large, and these loppers allow me to cut branches up to 2 inches in diameter without damaging the plant. The extended reach is perfect for getting into those hard-to-reach spots without having to contort myself into awkward positions. I especially appreciate using these for structural pruning and removing deadwood that’s out of hand-pruner range.
3. Precision Pruning Snips
Description: Fine-point snips for delicate cuts, deadheading, and intricate shaping
Why You’d Want This: For deadheading spent camellia blooms or making very precise cuts on smaller branches and new growth, these snips are a must-have. They allow for surgical precision, which is crucial when you want to remove a single spent flower without damaging nearby buds or leaves. I also use them for light shaping of young camellias or for collecting cuttings for propagation. Their small size and sharp blades make them incredibly versatile for detailed work.
4. Fiskars SoftGrip Pruner with Replaceable Blade
Description: Ergonomic bypass pruner with comfortable SoftGrip handles and a durable, replaceable blade
Why You’d Want This: This is another excellent option for general pruning, very similar to my primary shears but with an even more pronounced ergonomic design. The SoftGrip handles are incredibly comfortable, which is a huge plus during extended pruning sessions. The replaceable blade feature is, again, a major selling point for me, ensuring longevity and consistent sharpness. It’s a reliable workhorse that makes pruning less of a chore and more enjoyable.
5. Ratchet Pruning Shears
Description: Ratchet action pruning shears for easier cutting of thick branches with less effort
Why You’d Want This: If you have hand strength issues or just want to make pruning thicker camellia branches easier, ratchet shears are a revelation. They work by cutting in stages, multiplying your hand strength with each squeeze. I’ve found them incredibly useful for branches that are just a bit too thick for standard bypass pruners but not quite large enough to warrant loppers. They reduce strain and fatigue, making pruning accessible and less strenuous for everyone.
6. Folding Pruning Saw
Description: Compact folding saw for removing larger branches and deadwood
Why You’d Want This: For those really thick, woody camellia branches—especially when doing rejuvenation pruning or removing old, dead wood—a pruning saw is essential. This folding saw is compact and safe to carry, but it’s incredibly effective. I use it for anything over 2 inches in diameter that my loppers can’t handle. The sharp teeth make quick work of tough wood, and the folding design means it stores easily without taking up much space. It’s a must-have for serious structural pruning.
Disclosure: As an Amazon Associate, I earn from qualifying purchases. This means that if you click on the product links above and make a purchase, I may receive a commission at no additional cost to you. This disclosure is in accordance with Amazon’s affiliate program requirements.
Month-by-Month Camellia Care Calendar
Keeping your camellias happy year-round is like maintaining a great friendship—it requires attention, care, and knowing what they need at different times. Here’s your complete month-by-month guide to camellia care, based on the natural rhythm of the seasons and your plants’ needs.
January: Enjoy the Show!
What to Do:
- Enjoy your camellias as they bloom! This is their moment to shine—take time to appreciate the beauty
- Pick up and remove all dead blooms and put them in a trash container (don’t compost them—this prevents Camellia Flower Blight from spreading)
- Water if dry to get the best blooms possible—moisture during bloom ensures flowers last longer
Why It Matters: Dead blooms left on the plant can rot and create fungus that infects and reinfects the plant. Think of it like cleaning up after a party—you want to remove the mess before it causes problems.
February: Propagation and Preparation
What to Do:
- If you wish to propagate through grafting, now is the time to take scions and graft—this is the traditional method for creating exact duplicates
- Continue to pick up and remove all dead blooms and put them in a trash container
- This is a good time to photograph your camellias—document their beauty for your records
- Visit gardens with camellias to see different varieties and get inspiration
Why It Matters: February is the optimal time for grafting because the plant is still dormant but preparing for spring growth. Taking scions (young branches or buds) now ensures they’re ready for grafting when the timing is right.
March: Spring Cleaning for Your Camellias
What to Do:
- The camellias should be finishing up blooming now. If they stopped, it’s safe to begin pruning
- Check for diseases or insects—if scale or insects are present, spray with insecticide/fungicide/miticide oil
- Fertilize with 13-6-6 or Azalea/Camellia fertilizer—water in after applying to prevent root burn
- Continue removing dead blooms to prevent disease
Why It Matters: March is the transition month—plants are moving from bloom to growth. Pruning now gives plants time to set buds for next season. Fertilizing now supports the new growth that’s about to happen.
April: Final Pruning and Fertilizing Window
What to Do:
- If your camellias have stopped blooming, now is the time to prune and fertilize
- You can prune later, but you will cut off buds and you’ve caused the tree to waste energy forming the pruned buds
- Complete any spring pruning that wasn’t finished in March
Why It Matters: This is your last chance to prune before buds set. Pruning later is like canceling plans after you’ve already made them—the plant wasted energy creating those buds that you’ll now remove.
May: Mulching and air layering Season
What to Do:
- Mulch with pine straw 2 to 4 inches now if you did not when you pruned
- Do not pile up pine straw or any mulch around the base of the tree—move it back from the base 6 to 10 inches (this prevents the dreaded “volcano mulch” that causes root rot)
- If you wish to propagate through air layering, now is the time to air layer—this is the perfect timing for successful air layering
- Optional to fertilize a second time if you want to give plants an extra boost
Why It Matters: May is prime time for air layering because the plant is actively growing but not yet stressed by summer heat. Mulching now helps retain moisture as temperatures rise. Remember: mulch should be like a donut, not a volcano—keep it away from the trunk!
June: Heat and Water Management
What to Do:
- You will need to water if it is hot and dry—camellias need consistent moisture during hot weather
- Monitor soil moisture regularly—check if the top few inches of soil feel dry
- Continue monitoring for pests—hot, dry weather can stress plants and make them more susceptible
Why It Matters: June is when many regions start getting hot and dry. Your camellias are putting energy into growth, and they need water to support that growth. Think of it like keeping someone hydrated during a workout.
July: Bud Setting and Propagation Time
What to Do:
- It is now too late to prune as the buds have set—pruning now would remove next season’s flowers
- If you wish to propagate using cuttings, now is the time to take those cuttings from new growth—new growth is ideal for cuttings
- This is the last time this year to safely add fertilizer if you wish—any later and new growth won’t harden off before winter
Why It Matters: July is when camellias set their flower buds for next season. Pruning now would be like cutting off next year’s flowers before they even form. This is also prime time for taking cuttings because the new growth is still flexible and full of growth hormones.
August: Hot Weather Care and Seed Collection
What to Do:
- You will need to water if it is hot and dry—continue monitoring soil moisture
- Seed pods should be reaching maturity—collect and plant if desired—remember, seeds won’t be exact duplicates of the parent
- Start watching for spider mites over the next few months and spray with an oil-based insecticide if needed
Why It Matters: August heat can stress plants, and spider mites love hot, dry conditions. Catching pests early prevents bigger problems later. Seed collection is fun if you want to experiment, but remember that seeds won’t produce exact duplicates.
September: Fall Blooming Begins
What to Do:
- If you wish to show blooms this fall, now is the time to begin gibbing (applying gibberellic acid treatment)
- You can repeat gibbing every other week through November if desired
- If you want bigger blooms, you can remove all but one bud per terminal end of a branch
- Sasanqua camellias should begin blooming now—enjoy the early fall color!
Why It Matters: Gibbing is a technique that uses plant hormones to promote flowering. If you’re planning to show your camellias or want spectacular blooms, this is the time to start. Sasanqua varieties naturally bloom earlier, so you’ll start seeing flowers now.

October: Air Layer Removal and Planting Time
What to Do:
- Continue gibbing if desired—maintain your gibbing schedule if you want continued blooms
- Check your air layers if you air layered—they can safely be removed from the mother plant now
- Now is a good time to plant new camellias—fall planting gives plants time to establish roots before winter
Why It Matters: October is perfect for removing air layers because roots have had the entire growing season to develop. Fall planting is ideal because the soil is still warm but air temperatures are cooler, reducing stress on new plants.
November: Continuation and Preparation
What to Do:
- Continue gibbing throughout the blooming season if desired—maintain your schedule for continued blooms
- Remove all air layers if you have not already—don’t leave them on through winter
- Plant new camellias—fall planting season continues
- Japonica camellias may begin blooming now—the main camellia season begins!
Why It Matters: November is when japonica varieties typically start their blooming season, which extends through spring. This is the main event for camellia enthusiasts—months of beautiful blooms ahead!
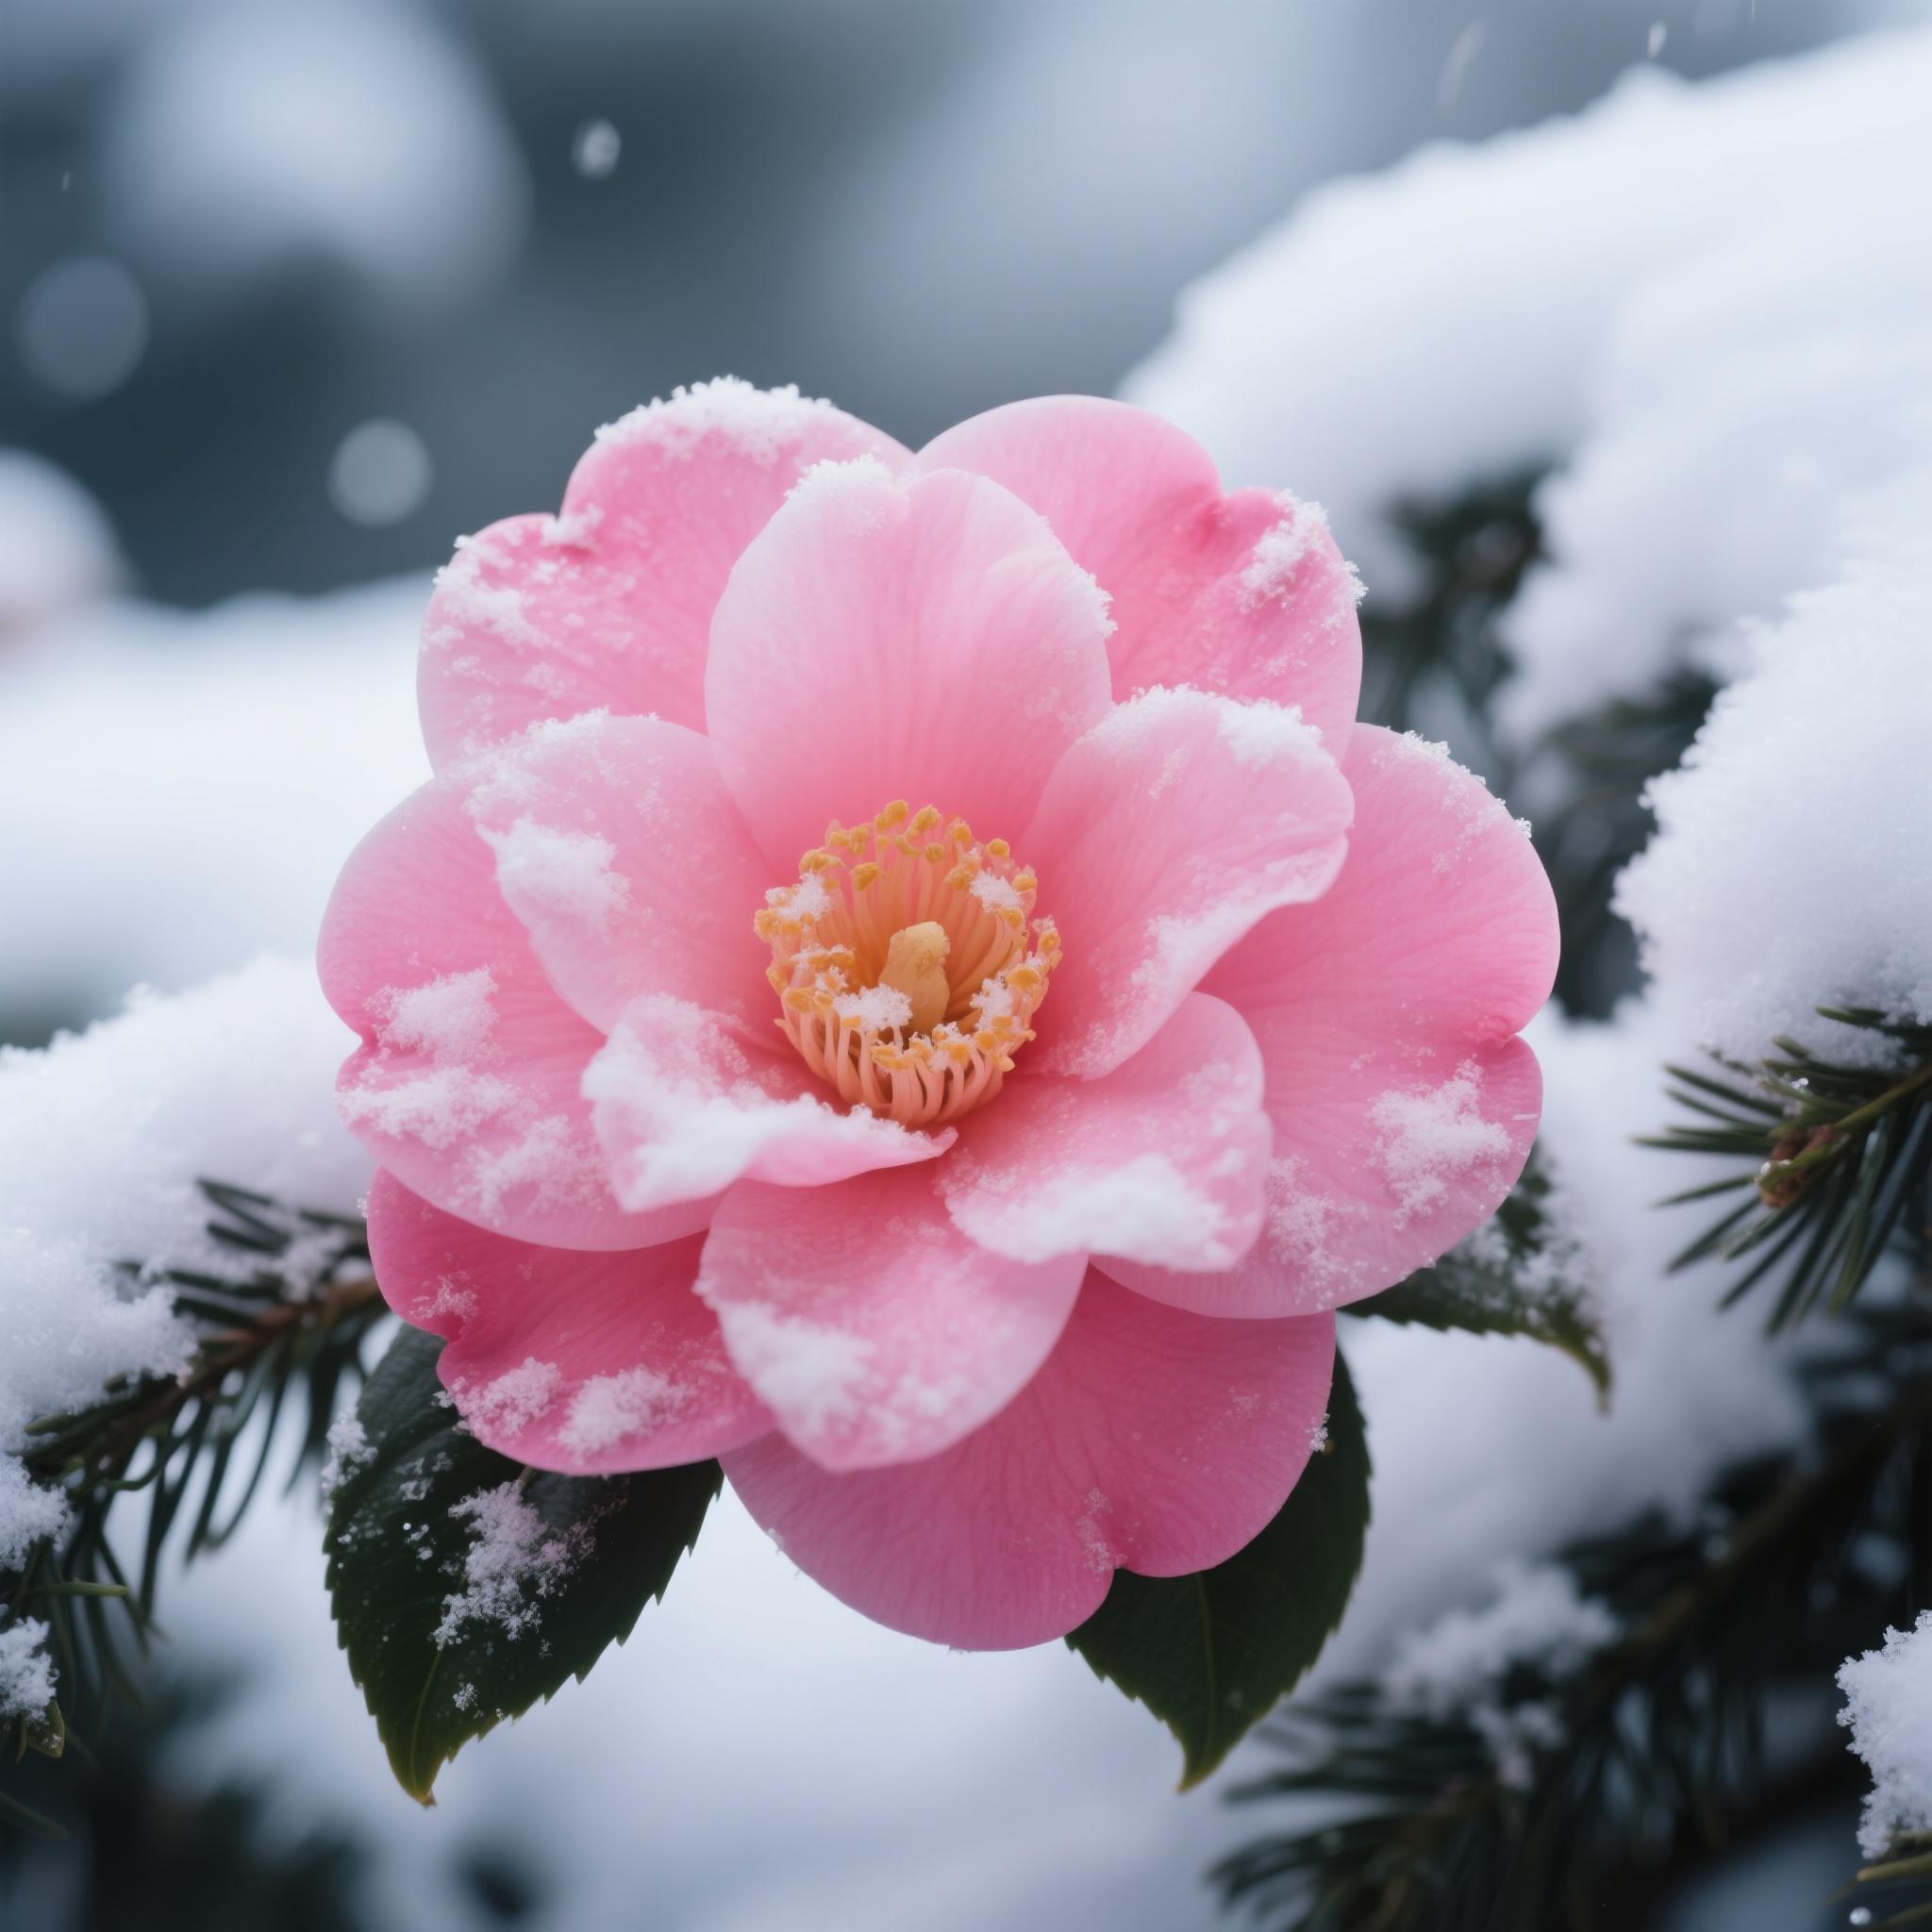
December: Winter Care and Holiday Enjoyment
What to Do:
- It is a good time to spray for scale and insects if problems are observed—winter is a good time to treat pests
- Enjoy your camellias through the holidays by floating them in bowls or dipping them in wax for decoration
- Monitor for winter damage if you’re in colder climates
- Plan for next year’s maintenance based on this year’s observations
Why It Matters: December is when camellias are often at their peak bloom, making them perfect for holiday decorations. Floating blooms in bowls or dipping them in wax preserves their beauty for indoor enjoyment. Winter is also a good time to address pest problems while plants are less stressed.
Fun Holiday Tip: Camellia blooms make beautiful floating centerpieces! Simply float blooms in shallow bowls of water. For longer-lasting decorations, dip blooms in melted paraffin wax—they’ll stay beautiful for weeks.

Seasonal Maintenance Summary
Spring Maintenance (March-May)
After Flowering:
- Prune camellias after flowers fade completely
- Remove spent flowers to prevent disease
- Apply first fertilizer application
- Refresh mulch if needed
- Check for pests and diseases
Early Spring:
- Monitor for new growth
- Begin watering routine as needed
- Check winter damage
- Plan for any needed plantings
Summer Maintenance (June-August)
Early Summer:
- Apply second fertilizer application (if desired)
- Monitor watering needs during hot weather
- Check mulch depth and refresh if needed
- Monitor for pests and diseases
- Provide shade protection if needed
Mid-Summer:
- Continue watering as needed
- Avoid fertilizing after mid-summer
- Monitor for heat stress
- Check soil moisture regularly
- Take cuttings if propagating
Maintaining Soil Health
Healthy soil is the foundation of healthy camellias. Maintaining good soil conditions supports all other maintenance efforts.
Soil pH:
- Camellias prefer slightly acidic soil (pH 6.0-6.5)
- Test soil periodically to monitor pH
- Amend soil if pH becomes too alkaline
- Use acidifying fertilizers if needed
Soil Structure:
- Maintain good drainage to prevent root rot
- Add organic matter to improve soil structure
- Avoid compacting soil around plants
- Use mulch to prevent soil compaction
Nutrient Management:
- Monitor plant health for nutrient deficiencies
- Adjust fertilization based on plant needs
- Consider soil testing for specific nutrient needs
- Use organic matter to improve soil fertility naturally
Troubleshooting Common Maintenance Issues
Yellowing Leaves:
- May indicate nutrient deficiency or pH problems
- Check soil pH and adjust if needed
- Ensure adequate fertilization
- Check for root problems
Poor Blooming:
- May result from improper pruning timing
- Check that plants aren’t being pruned too late
- Ensure adequate light and nutrients
- Verify plants aren’t stressed by drought
Weak Growth:
- May indicate nutrient deficiency
-
Pingback: Growing Camellias: Complete Guide to Beautiful Blooms
Comments are closed.