
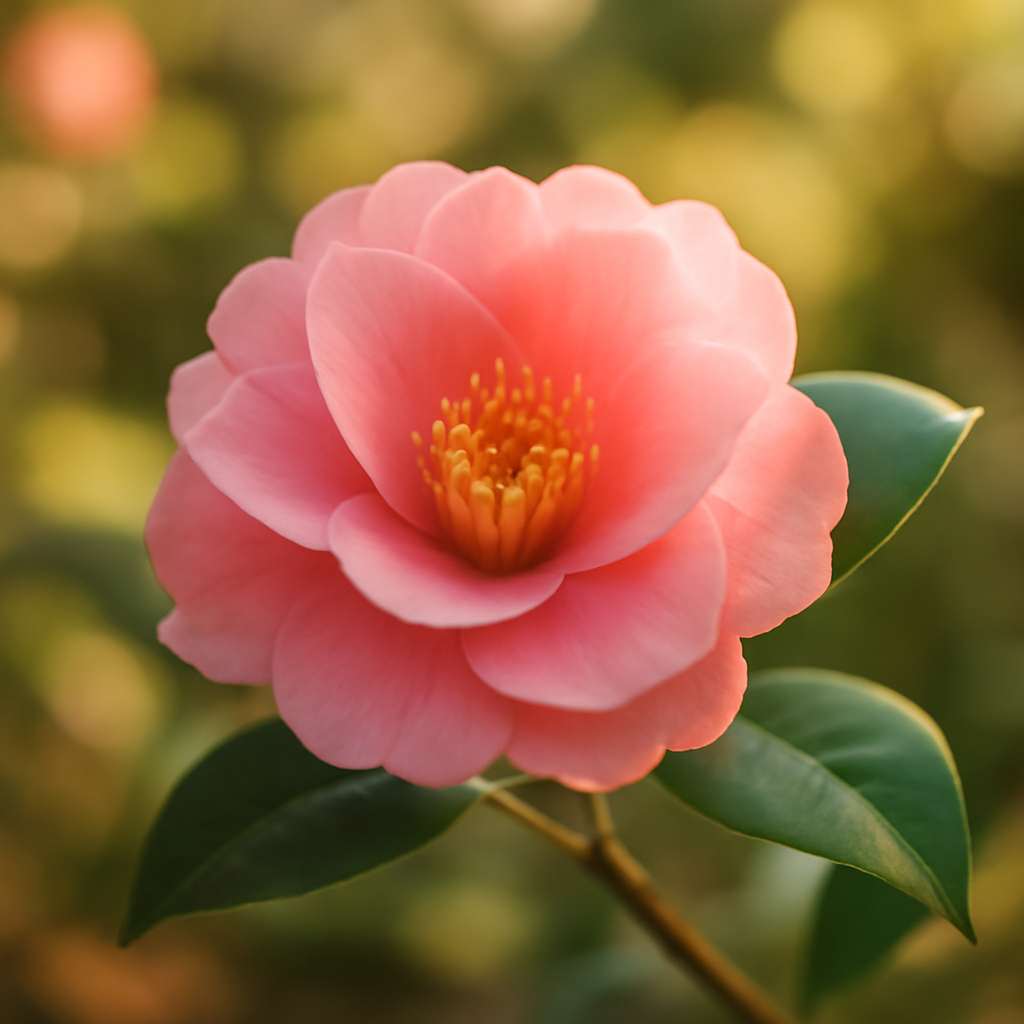
Air Layering Camellias is an ancient propagation technique that has been used by gardeners for centuries to create camellia maintenance from existing ones. This method is particularly effective for camellias, allowing you to propagate your favorite varieties while the branch remains attached to the parent plant. Unlike cuttings, air layering camellias gives new plants a head start with an established root system, making it one of the most reliable ways to growing camellias.
Disclosure: This post contains affiliate links. If you make a purchase through these links, I may earn a small commission at no additional cost to you. This helps support the blog and allows me to continue providing free gardening content.
What I Recommend
When you’re air layering camellias, keeping that moss ball consistently moist is absolutely critical—I’ve lost count of how many promising layers dried out because I wasn’t paying close attention. Sphagnum peat moss is really the gold standard for this technique; it holds moisture beautifully while still allowing air circulation, which is exactly what developing roots need. I always keep a bag on hand during propagation season.
A quality pair of bypass hand pruners is essential when you’re making that initial cut into the camellia branch—you want a clean, sharp cut that won’t crush the delicate tissue. Dull pruners will damage the branch and compromise your chances of successful rooting, so don’t skimp on this tool. I’ve used the same pair for over fifteen years.
Once your air-layered camellia develops roots and you remove it from the mother plant, I always pot it up in fabric grow bags rather than traditional plastic pots. These breathable containers encourage healthier root development and prevent waterlogging, which is especially important for young camellia rooted cuttings that are still getting established. The air-pruning effect really does make a difference in my success rate.
I always use iron sulfate fertilizer on my newly rooted air-layered camellias once they’re established in their pots, since camellias are acid-loving plants and iron helps prevent chlorosis while promoting that deep green foliage. A light application every few months during the growing season keeps them looking vibrant as they develop into mature plants. It’s been part of my routine for years.
Selecting the Right Branch
Learning how to air layer camellias is a valuable skill. the key to successful air layering starts with choosing the right branch. Look for healthy, upright branches that are actively growing. The branch should be at least the diameter of your pinky finger or larger, typically ranging from one foot to about two and a half feet in length.
What to Look For:
- Healthy branches: Choose branches that are vigorous and show no signs of disease or stress
- Upright growth: Vertical branches work best for air layering
- Adequate size: Branch should be at least pinky-finger diameter or larger
- Active growth: Select branches that are actively producing new leaves
- Good location: Branches that receive filtered light work better than those in strong sun
What to Avoid:
- Previously pruned branches or side branches (these rarely make attractive plants)
- Weak or spindly branches
- Branches showing signs of disease or stress
- Branches in deep shade or very strong sun
- Branches that are too small or too large
Remember: You cannot get good results from a weak branch. Healthy parent plants produce healthy air layers, so start with the best material available.
Step-by-Step Air Layering Process
Step 1: Prepare Your Materials
Before you begin, gather all necessary materials:
- Sharp knife or pruning shears: Clean, sharp tools for making cuts
- Rooting medium: Sphagnum moss, peat moss, or specialized rooting medium
- Plastic wrap or aluminum foil: To wrap and secure the air layer
- Twine or plant ties: To secure the wrapping
- Rooting hormone (optional): Can help encourage root development
- Water: To moisten the rooting medium
Recommended Product: MIIIM Air Layering Propagation Kit
10 PCS Air Layering Propagation Kit with Zip Ties, Reusable Half Transparent Grafting Ball. Best For: I’ve used this kit for multiple camellia air layering projects and it’s made the process so much easier than traditional plastic wrap methods. The transparent balls let me monitor root development without disturbing the air layer, and the zip ties keep everything secure. The reusable design means I can use it season after season, making it a great investment for serious gardeners.
Step 2: Make the Cut
Select a spot on the branch about 12 to 18 inches from the tip. Using a sharp knife, make two parallel cuts around the branch, about 1 to 1.5 inches apart. These cuts should penetrate through the bark and into the cambium layer (the green layer just under the bark), but not deeply into the wood.
Cutting Technique:
- Make two horizontal cuts completely around the branch
- Remove the bark and cambium between the two cuts (this is called “girdling”)
- Scrape the exposed wood to remove any remaining cambium tissue
- This prevents the branch from healing back together and forces root development
Recommended Product: Rooting Hormone Powder
Professional-grade rooting hormone to accelerate root development. Best For: While not strictly necessary, this rooting hormone has definitely improved my success rates. I apply it to the cut area before wrapping, and I’ve noticed roots developing 2-3 weeks earlier than without it. For harder-to-root camellia varieties, this makes a noticeable difference.
Recommended Product: Pruning Shears for Air Layering
Sharp, precision pruning shears for clean cuts. Best For: Having the right tools makes all the difference. These shears are incredibly sharp and make clean cuts every time, which is crucial for successful air layering. The ergonomic design reduces hand fatigue, which is important when you’re doing multiple air layers. I’ve used them for two seasons now and they’re still as sharp as day one.
Step 3: Apply Rooting Medium
Moisten your rooting medium thoroughly (sphagnum moss works excellently). Squeeze out excess water so it’s moist but not dripping. Wrap a generous amount of the moist medium around the cut area, forming a ball about the size of a baseball or larger.
Wrapping Tips:
- Ensure the medium completely covers the cut area
- Make sure there are no air pockets
- The medium should be firmly but not tightly packed
- Use enough medium to provide space for root development
Recommended Product: Sphagnum Moss for Air Layering
Premium sphagnum moss for optimal root development. Best For: This sphagnum moss has been my go-to for air layering camellias. It holds moisture perfectly and creates the ideal environment for root development. I’ve noticed faster root growth and higher success rates compared to other mediums. The quality is consistent, and it stays moist longer, reducing the need for frequent checking.
Step 4: Secure the Wrap
Wrap the entire area with plastic wrap or aluminum foil, ensuring it’s completely sealed to retain moisture. Secure the ends with twine or plant ties to prevent water from entering or escaping.
Securing Tips:
- Make sure the wrap is tight enough to stay in place
- Ensure complete coverage to prevent moisture loss
- Check that the wrap won’t slide or come loose
- Consider using aluminum foil for branches in strong sun (it reflects heat)
Recommended Product: Plant Ties for Securing Air Layers
Flexible plant ties for securing air layer wraps. Best For: These plant ties are perfect for securing air layer wraps. They’re strong enough to hold everything in place but flexible enough not to damage the branch. Unlike string or twine, they don’t rot or break down over the 4-6 month air layering period. I’ve had air layers stay perfectly secure even through heavy rain and wind.
Step 5: Monitor and Wait
After wrapping, monitor the air layer periodically. The process typically takes 4 to 6 months, with roots developing during the growing season. You may be able to see root development through clear plastic wrap, or you can gently check by feeling for firmness in the medium.
Monitoring Tips:
- Check monthly for moisture levels
- Ensure the wrap remains secure
- Watch for signs of root development
- Be patient—roots need time to develop
Factors Affecting Success
Several factors influence the success rate of air layering:
Plant Health: Healthy parent plants produce successful air layers. Weak or stressed plants rarely produce good results, even with the best technique.
Branch Selection: Upright branches in good health work best. Previously pruned branches or side branches typically don’t produce attractive plants.
Light Conditions: Branches in strong sun may be less successful than those receiving filtered light. Consider the location when selecting branches.
Timing: Mid-spring timing, after flowering and during active growth, provides the best conditions for root development.
Technique: Proper girdling, adequate medium, and secure wrapping all contribute to success.
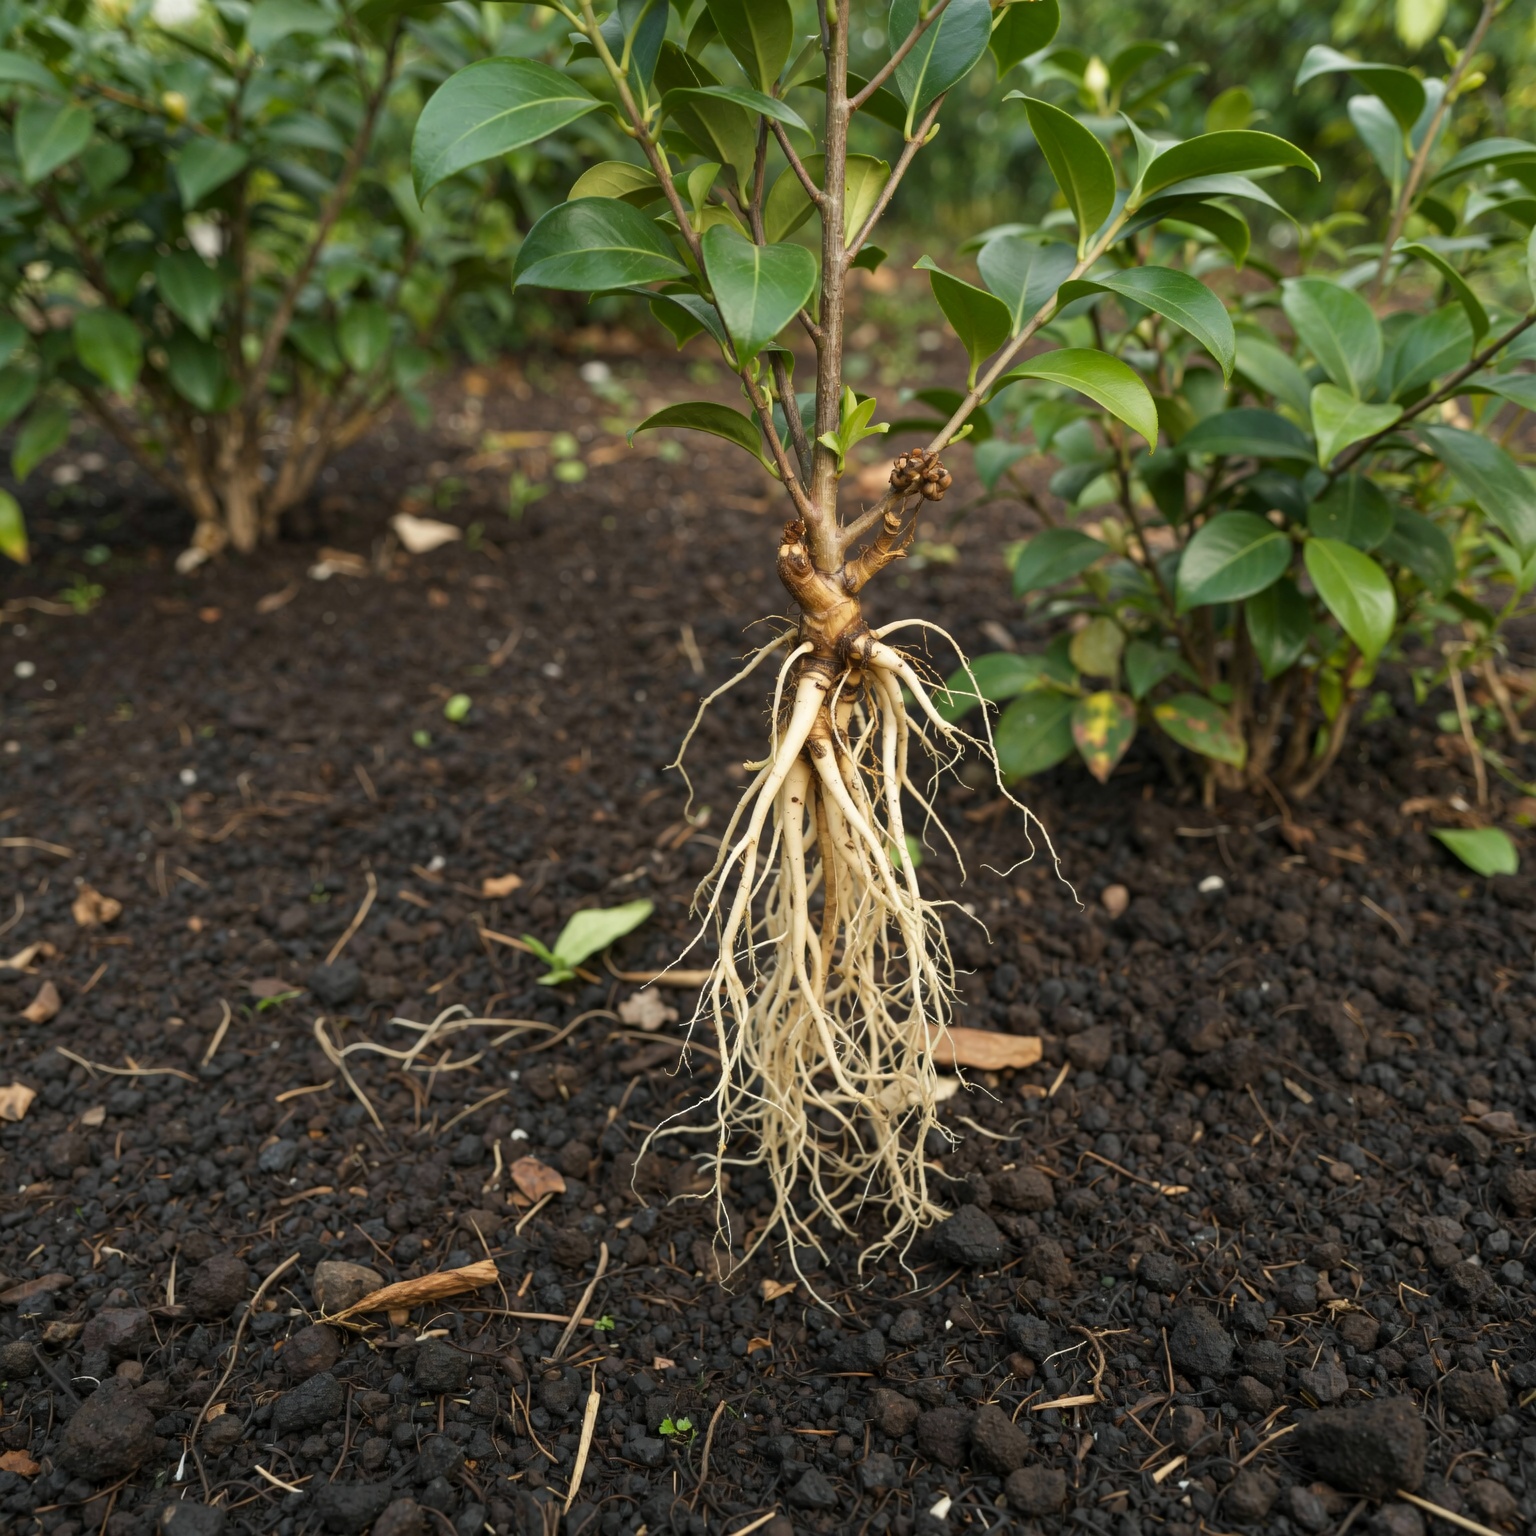
Removing and Potting Air Layers
After 4 to 6 months, typically in fall, you can check if the air layer has developed sufficient roots. Gently remove the wrapping to inspect root development. You should see a network of fine white roots throughout the medium.
When to Remove:
- Roots should be visible and well-developed
- Typically ready in fall after spring air layering
- Roots should be white and healthy-looking
- The medium should be filled with roots
How to Remove:
1. Cut the branch below the air layer, leaving a few inches below the root ball
2. Carefully remove the wrapping material
3. Keep the root ball intact with the medium
4. Pot immediately in a container with well-draining soil
Potting Tips:
- Use a container large enough to accommodate the root ball
- Use well-draining camellia soil suitable for camellias
- Plant at the same depth as the root ball
- Water thoroughly after potting
- Provide filtered light and protection during establishment

Caring for New Air-Layered Plants
After potting, your new camellia needs careful attention during its first year:
Light: Provide filtered light or partial shade, similar to the parent plant’s conditions.
Watering: Keep the soil consistently moist but not waterlogged. The new root system is still developing and needs regular moisture.
Protection: Protect from extreme temperatures, especially during the first winter. Consider moving container plants to a protected location.
Fertilization: Wait until the plant is established before fertilizing, typically after several months of growth.
Gradual Acclimation: If moving from container to ground, gradually acclimate the plant to its new location.
Troubleshooting Common Problems
No Root Development: If roots haven’t developed after 6 months, the branch may not have been healthy enough, the cuts may not have been deep enough, or the medium may have dried out. Try again with a different branch.
Medium Drying Out: If the wrapping wasn’t secure, the medium may dry out. Check wrappings periodically and re-moisten if necessary.
Branch Dieback: If the branch above the air layer dies, the air layer may still be viable. Remove it and pot it immediately.
Weak Root Development: Ensure the parent plant is healthy and the branch receives adequate light and nutrients during the air layering process.
Tips for Success
Multiple Air Layers: Air layer 3 to 4 branches per plant to account for some failures. Not all air layers will be successful, so having backups ensures you get at least one good plant.
Healthy Parent Plants: Start with healthy, well-established plants. You cannot get good results from weak or stressed plants.
Proper Timing: Mid-spring timing, after flowering and during active growth, provides the best conditions.
Adequate Medium: Use enough moist medium to provide space for root development.
Secure Wrapping: Ensure the wrap is completely sealed to retain moisture throughout the process.
Patience: Air layering takes time. Allow 4 to 6 months for roots to develop before checking.
Final Thoughts
Air layering is one of the most reliable methods for propagating camellias, allowing you to create new plants that are identical to your favorites. This ancient technique, used by gardeners for centuries, offers high success rates and produces vigorous new plants. Whether you’re propagating heirloom varieties, sharing plants with friends, or expanding your camellia collection, air layering is a valuable skill that every camellia enthusiast should learn.
With proper technique, timing, and patience, you can successfully propagate your favorite camellias and enjoy the satisfaction of creating new plants from your existing collection. The technique may seem mysterious at first, but with practice, it becomes a straightforward and rewarding way to expand your garden.

As an Amazon Associate, we earn from qualifying purchases.