I’ll never forget the day I successfully air layered my ‘Donation’ camellia for the first time. That plant had been in my garden for nearly fifteen years—a reliable, generous bloomer with those stunning pink semi-double flowers. For years, I’d watched visitors admire it and ask if they could buy a cutting. But I’d been nervous about taking cuttings; so many failed to root, and I wasn’t confident enough to risk damaging a healthy branch.
Then I discovered air layering camellias. Within three months, I had a rooted plant ready to pot. The success was astounding. Since then, I’ve air layered dozens of my named cultivars—’Brushfield’s Yellow’, ‘Nicky Crisp’, and many others. I now propagate almost exclusively this way. If you’re serious about propagating your prized camellia varieties true-to-type, air layering is the gold standard. It’s reliable, it’s forgiving, and—honestly—it feels like magic.
Why Air Layering Is the Best Way to Propagate Camellias
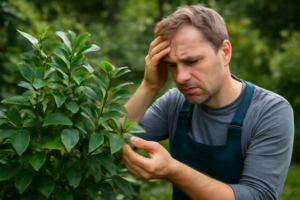
Before I dive into the how, let me explain the why. Camellias are notoriously tricky to propagate from cuttings. In my experience, semi-hardwood cuttings succeed maybe 40–60% of the time—even with bottom heat and a misting propagator. Many wilt. Others develop callus but never root. It’s frustrating.
Air layering is different. Success rates jump to 80–90% in my garden across three climate zones. The reason? The branch never detaches from the mother plant. It stays nourished, never dries out, and never suffers the physiological shock that kills cuttings.
There’s another crucial advantage: genetic fidelity. Any plant grown from a vegetative piece—not seed—is genetically identical to its parent. This is what vegetative propagation means, and it matters enormously for named cultivars. ‘Donation’ camellias grown from seed are unpredictable; they may flower pink, white, or striped. But an air-layered ‘Donation’ is a true genetic clone. It will flower exactly like the parent.
Seed propagation is cheaper and easier, but it’s worthless for maintaining named varieties. You lose the cultivar. Air layering preserves everything you love about a plant.
When to Air Layer Camellias
Timing is everything. I air layer camellias in late spring to early summer—late May through June in the UK and northern hemisphere. This is when growth is vigorous and sap is flowing freely through the plant.
During this window, the cambium layer (the thin ribbon of tissue that produces new growth) is active and responsive. It’s far more likely to generate roots quickly. Attempting air layering in winter or autumn is usually futile; the plant is dormant or slowing down, and rooting takes much longer—or fails entirely.
If you’re in a warm climate (zone 8 or higher), you have a longer window. I’ve had success into July and even August. But in cooler zones, stick to May and June. This timing ensures your rooted plant is established by autumn, ready to survive winter.
What You’ll Need — Tools and Materials
Air layering requires minimal equipment. However, quality matters. Dull knives bruise bark and invite disease. Here’s exactly what I use:
- A sharp, clean knife (I prefer a small pruning knife or craft knife). Sterilise it with rubbing alcohol or a quick flame.
- Rooting hormone powder containing IBA (indole-3-butyric acid). My go-to brands are Dip’N’Grow or Rootone. Liquid IBA also works well.
- Sphagnum moss—living or dried. I soak it in water, then wring it out firmly. It should feel moist but never soggy.
- Clear polythene wrap or plastic bags. Transparency is crucial; you need to watch root development without disturbing the layer.
- Grafting tape or electrical tape to seal everything securely.
That’s genuinely all you need. I keep mine in a small gardening box by the potting bench. Simple and effective.
How to Air Layer a Camellia — Step by Step
Now for the core process. I’ll walk you through each stage. If you follow these steps carefully, success is almost guaranteed. I’ve used this method successfully on ‘Donation’, ‘Brushfield’s Yellow’, ‘Nicky Crisp’, and dozens of others.
Step 1–4: Preparing the Branch
Step 1: Select a healthy branch. Look for pencil-thick growth from this year’s new wood or last year’s stems. Avoid very young, tender tips or old, woody branches. Mid-growth is ideal. The branch must be flexible enough to bend slightly without snapping. On my ‘Donation’, I typically choose stems that are 30–50cm long.
Step 2: Remove leaves. Strip away all leaves from the lower 10–15cm of the branch, leaving the upper foliage intact. This is your future plant; it needs healthy leaves to photosynthesise and feed the rooting zone. The bare section of stem is where the magic happens.
Step 3: Make the girdle cuts. Using your sharp, clean knife, make two clean cuts through the bark, down to the wood, spaced 3–4cm apart. The bark between these cuts is the “girdle” that you must remove completely. Be thorough. Any remaining bark will heal and bridge the wound, blocking root formation.
I learned this the hard way on my first attempt at air layering ‘Brushfield’s Yellow’. I left small strips of bark intact, thinking I’d be gentler on the plant. Result? No roots. The bark healed over, the cambium never formed root primordia, and I had to wait until next year to try again.
Step 4: Scrape the cambium. Now comes the detail work. The exposed wood will have a thin, slippery greenish layer—the cambium. Gently scrape it with the back of your knife blade, working all the way around the stem. Don’t gouge into the wood itself; just remove the cambium layer. This prevents the wound from callusing over without producing roots. In my experience, this single step dramatically improves rooting success.
Step 5–8: Applying Moss and Plastic
Step 5: Apply rooting hormone. Dust the exposed, scraped wood generously with IBA rooting hormone powder. Alternatively, paint it with liquid IBA according to product instructions. The hormone signals the plant to produce roots at this wound site. Don’t skimp; a generous coating is fine and won’t harm the plant.
Step 6: Pack the moss. This is critical: the moss must be moist but not waterlogged. I soak a handful of sphagnum moss in water, then wring it out firmly—you should barely be able to squeeze any water from it. Now pack this moss around the wound and girdle, creating a ball roughly cricket-ball sized (or larger if you prefer). The moss is a reservoir; it keeps the wound consistently moist while allowing air circulation.
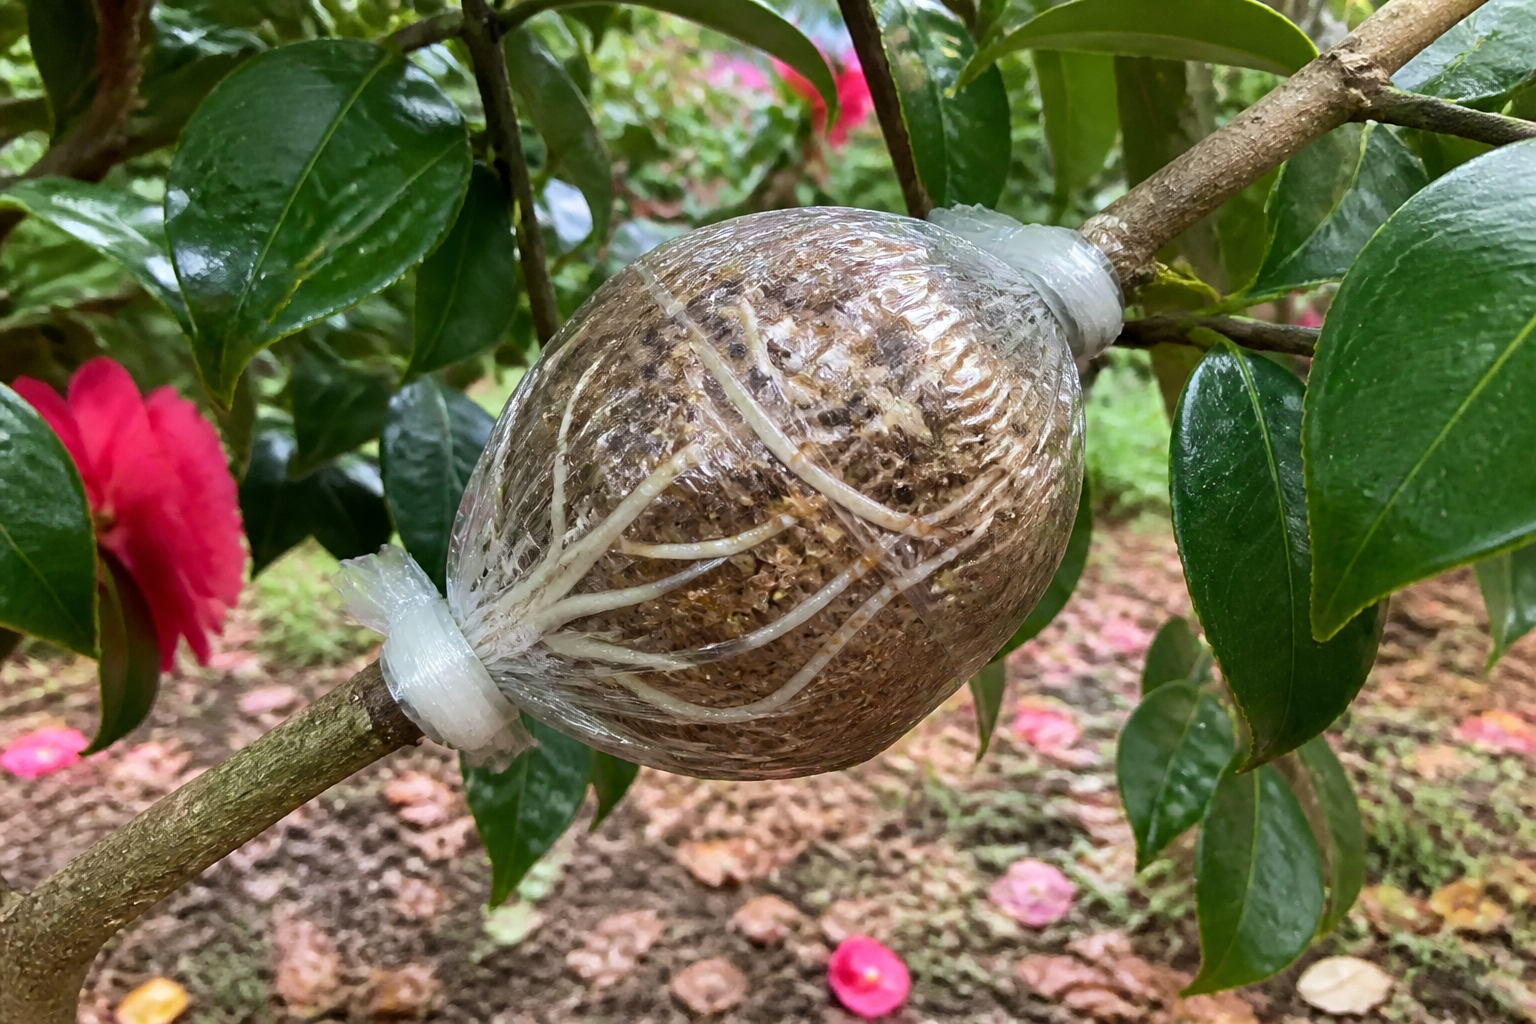
Step 7: Wrap with clear polythene. Cover the moss ball with clear plastic wrap or a clear polythene bag. Wrap it tightly so no air gaps remain. Fold the plastic over the top and bottom of the ball, sealing both ends with grafting tape or electrical tape. The plastic creates a humidity chamber. Roots will form inside, visible through the clear plastic.
Why clear plastic? Because you need to monitor progress without opening the layer. If you use opaque wrapping, you can’t see when roots appear, and you risk leaving the layer on too long (which causes rot) or removing it too early.
Step 8: Be patient. Now wait. Roots typically appear in 8–12 weeks during the growing season. I check every two weeks by gently squeezing the plastic to feel for firmness (which suggests root development) and by looking for white roots visible through the clear plastic.
Step 9–10: Severing and Potting Up
Step 9: Know when to sever. Once you see white roots 2–3cm long (not just callus—actual roots with root tips), the layer is ready. Don’t be tempted to cut earlier. Premature severing leaves the young plant dependent on these fragile roots immediately. Wait until roots are visible and substantial.
Using a clean, sharp knife, sever the branch cleanly just below the moss ball. Make a single decisive cut. This separates your new plant from the mother plant.
Step 10: Pot up carefully. Remove the polythene wrap, but leave the sphagnum moss intact around the roots. Do not wash it away or disturb it. The moss is now the plant’s growing medium; those new roots are adapted to it. Pot the whole thing—roots, moss, and all—into a pot of ericaceous (lime-free) compost, the size depending on root mass. A 4–5 inch (10–13cm) pot is typical for my layers.
Water gently and place the pot in bright, indirect light. Keep it moist but not waterlogged for 4–6 weeks. This is the critical establishment phase. The new plant is acclimating to independent growth. Protect it from direct sun and drying winds during this period.
After 4–6 weeks, if new growth appears, you’re home free. Gradually expose it to more light and treat it as an established young plant.
Common Air Layering Mistakes (and How to Avoid Them)
Even after all these years, I occasionally see air layers fail. Most failures trace back to one of three mistakes.
Mistake One: Incomplete bark removal or poor cambium scraping. If the bark ring isn’t fully removed, or the cambium isn’t properly scraped, the wound heals over without producing roots. The plant essentially seals itself and refuses to root. Solution: be ruthless. Remove all bark. Scrape that cambium thoroughly. When in doubt, scrape again.
Mistake Two: Moss that’s too wet or too dry. Soggy moss invites rot and fungal disease. Bone-dry moss fails to support root formation. The moss should feel like a well-wrung-out sponge—moist, but no standing water. Check periodically. If rain has saturated the plastic, squeeze gently to release excess water. If the moss feels dry, carefully open a corner of the plastic and mist it lightly.
Mistake Three: Cutting from the mother plant too soon. I’ve been impatient before. You see a few white tips (sometimes callus, not true roots) and you sever the branch. Two weeks later, the new plant fails. The roots weren’t established enough to sustain independent life. Wait for white roots at least 2–3cm long. It’s worth the extra week or two.
Growing Camellias from Cuttings — an Alternative Method
Sometimes air layering isn’t practical. Perhaps the branch is too high to reach, or you’re propagating a dwarf variety with finer stems. Semi-hardwood cuttings are a legitimate alternative, though less reliable than air layering.
When to take cuttings: Late summer to early autumn (August–September) is ideal. At this point, new growth has firmed up but isn’t fully woody.
How to take cuttings: Select healthy, vigorous shoot tips. Cut cleanly just below a leaf node, removing 10–15cm of stem. Strip lower leaves, retaining the top two or three. Dip the cut end in IBA rooting hormone powder—the standard formulation (0.3–0.8%), not the high-strength version for hardwood.
Rooting medium: Insert cuttings into a 50/50 mix of perlite and grit (or bark chips). This blend drains quickly, preventing rot while staying consistently moist. Water well, then cover with clear polythene or place in a propagator. Bottom heat of 18–21°C (64–70°F) significantly boosts success.
Rooting takes 10–14 weeks. Once you see roots emerging from the drainage holes, pot up into ericaceous compost and treat as described above. Expect 40–60% success with cuttings, versus 80–90% with air layering. Still worthwhile, but more wasteful.
A note on water rooting: I’ve seen recommendations to root camellia cuttings in water. In my honest opinion, don’t bother. Roots formed in water are physiologically different from soil roots. When you pot them up, they often fail to transition. The success rate is abysmal. Stick to a solid rooting medium (perlite, grit, bark) and you’ll see far better results.
Final Thoughts: Your Path to Free Camellias
Air layering camellias transformed how I propagate my collection. I’ve gone from buying new varieties (expensive!) to creating them myself. That ‘Donation’ I air layered fifteen years ago has since produced five offspring in friends’ gardens. My ‘Brushfield’s Yellow’ is now in three different gardens.
The beauty of air layering is that it feels almost risk-free. You’re not sacrificing a cutting that might fail; you’re simply encouraging a branch to root while still connected to its food source. Success rates of 80–90% mean you’ll rarely be disappointed.
If you have a camellia cultivar you love—whether ‘Nicky Crisp’, ‘Donation’, ‘Brushfield’s Yellow’, or any other named variety—air layering is your path to multiplying it. Pick a healthy branch in late May or June, follow the steps methodically, and by early autumn you’ll have a rooted plant ready to pot.
Start simple. Pick one branch. One layer. Watch it root. You’ll understand why I’m so devoted to this method. Happy propagating.
“` —