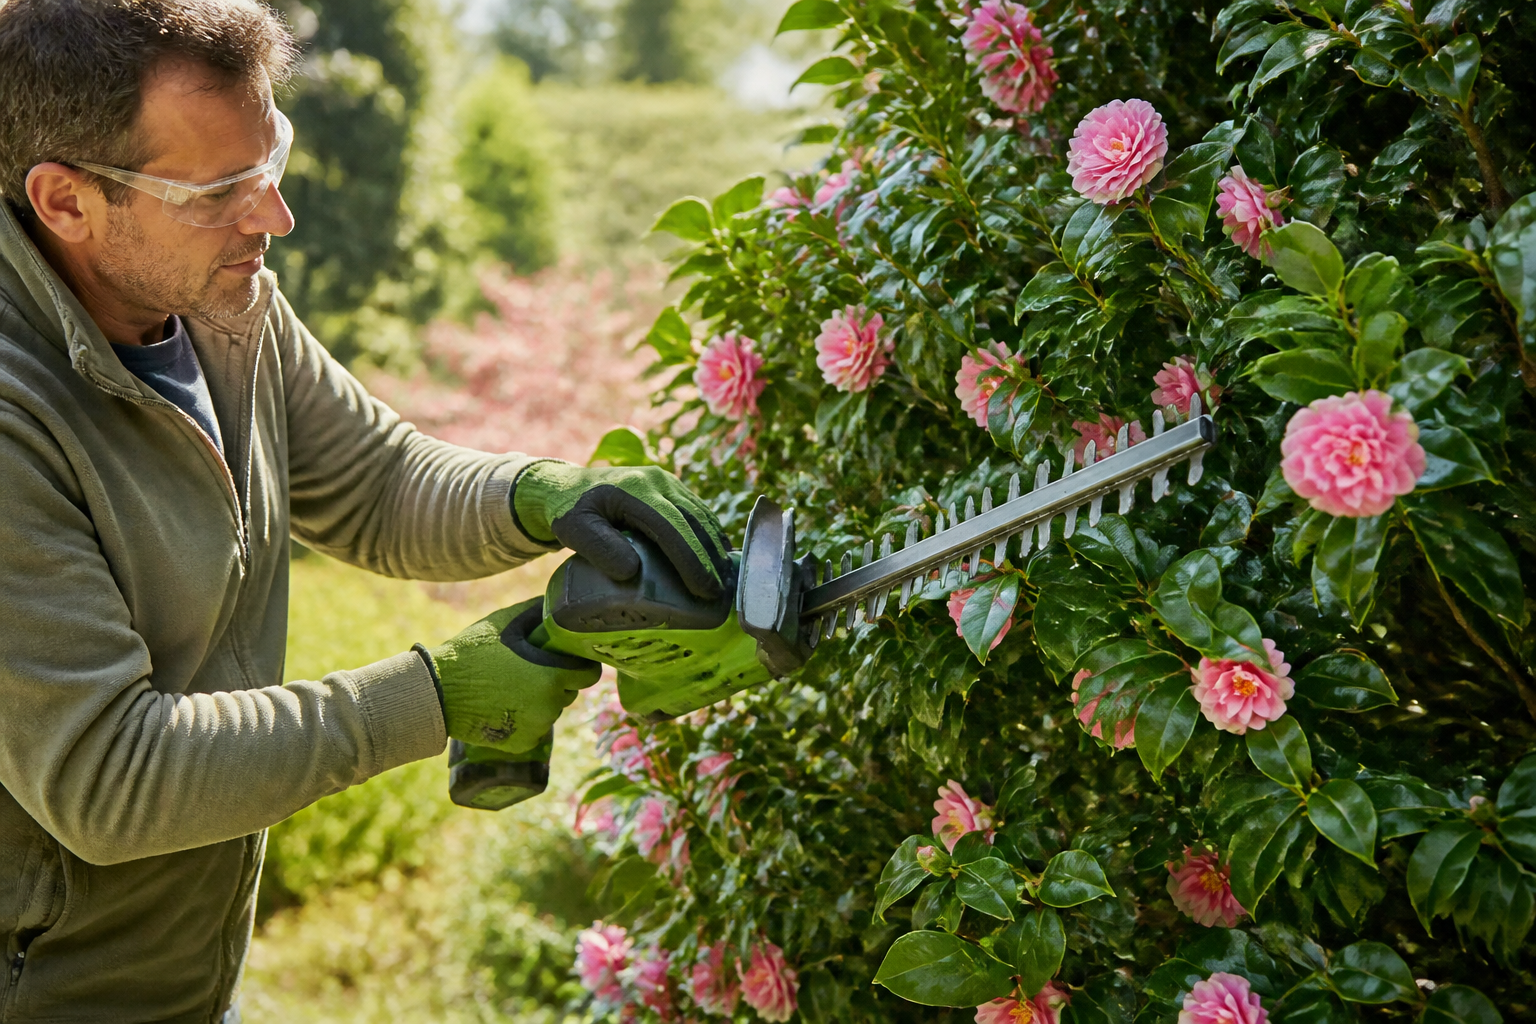
I’ve seen it happen dozens of times in gardens across North Carolina and Georgia: a gardener eager to tidy up their camellias reaches for a hedge trimmer in late spring and gives the whole plant a quick shear. It looks fantastic immediately—neat, compact, uniform. Then comes autumn, and nothing happens. No buds. No flowers. Just green foliage on a plant that should be putting on a show.
The confusion is completely understandable. Camellias look so similar to boxwoods and privets—plants that practically beg to be shaped with a camellia trimmer or hedge trimmer. But camellias aren’t formal hedging plants. They’re flowering shrubs with specific timing requirements. Use the wrong tool at the wrong moment, and you’ve essentially pruned away your entire next season’s flowers.
I learned this lesson the hard way. More on that in a moment. For now, here’s what you need to know: yes, a hedge trimmer works on camellias. But it only works well if you understand when, why, and how to use it. In this guide, I’ll walk you through the right tools, the right timing, and the mistakes I’ve made so you don’t have to repeat them.
The Short Answer — Yes, But Timing Is Everything
Can you use a hedge trimmer on camellias? Absolutely. But there’s a critical catch: timing determines whether you get a beautifully shaped plant or one that won’t bloom for a year.
Hedge trimmers work beautifully for light shaping and maintaining the overall form of mature camellias. They’re fast, efficient, and leave a neat finish. However, they’re not suitable for renovation pruning, removing dead wood, or cutting large branches. For those jobs, hand tools are essential.
Here’s the non-negotiable rule: prune camellias immediately after they finish blooming. Not weeks later. Not in early summer. Right after the last flowers fade.
Why? Because camellias set their flower buds on new wood during the current growing season. If you prune late, you’re cutting off the branches that would have carried next year’s blooms. It’s not that the plant dies or fails to grow—it will look perfectly healthy. You’ll just have no flowers.
When to Prune Camellias (Getting the Timing Right)
The timing window is narrow, and it depends on which type of camellia you’re growing.
Japonica Camellias
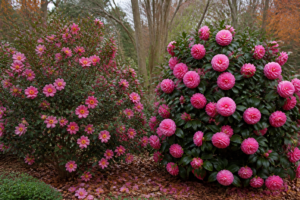
Most camellia japonicas bloom from November through March, depending on your zone and cultivar. ‘Bob’s Tinsie’, ‘Elegans’, and ‘Pink Perfection’ are all japonicas that finish blooming by late April in my Zone 8a garden.
Prune these right after their final flowers drop. For me, that’s typically late April through May. After that window closes, don’t touch them with a camellia trimmer or any cutting tool until next winter.
Sasanqua Camellias
Sasanquas bloom earlier—September through November in most zones. My ‘Yuletide’ and ‘Shishi Gashira’ finish by early December. Prune these in late January or very early February, right after their blooms fade.
This timing is crucial. Waiting until March or April with a sasanqua means you’ll cut next winter’s flower buds.
My Biggest Mistake
I made a decision I deeply regretted about eight years ago. My ‘Yuletide’ sasanqua had grown overgrown and leggy. Instead of pruning it in January when I should have, I waited until May because the weather was nicer and I had more free time.
That autumn and winter? Not a single red flower. My most reliable bloomer—the one I bought specifically for Christmas color—looked like a green shrub with nothing special about it. I learned my lesson that year.
The plant didn’t suffer. It came back beautifully the following season with pruning at the right time. But that lost year taught me never to compromise on timing, no matter how convenient the alternative might seem.
Hedge Trimmers for Camellias — When They Work and When They Don’t
Electric and cordless hedge trimmers are genuinely useful for camellia maintenance. But they have clear limits.
Where Hedge Trimmers Excel
I use my cordless hedge trimmer for light shaping. It’s perfect for maintaining the general outline of mature plants, tightening up the edges, and keeping a camellia’s form consistent from year to year.
For example, my ‘Pink Perfection’ japonica has reached about six feet tall and eight feet wide. After bloom ends in late April, I use the hedge trimmer to shorten protruding branches by a few inches and even out the canopy. The job takes fifteen minutes instead of an hour with hand pruners.
The results look natural because I’m making shallow cuts across the outer foliage. The plant recovers quickly and leafs out beautifully through the summer.
Where Hedge Trimmers Fail
Don’t reach for a hedge trimmer when you need to remove dead wood. A standard trimmer will chop unevenly through dead material, leaving jagged stubs instead of clean cuts.
Additionally, avoid hedge trimmers for shaping specimen plants or cultivars you’re training to a specific form. You need the precision of hand tools for that work. Hedge trimmers also struggle with branches thicker than your little finger—they bend and crush the wood rather than cutting cleanly.
Finally, never use a hedge trimmer for renovation pruning. If your camellia has become overgrown or leggy and needs hard cutting-back, that requires hand pruners, loppers, and a pruning saw. A hedge trimmer will shred the foliage and create a mess.
The Camellia Trimmer — Is the Long-Reach Telescoping Option Worth It?
There’s a specific product marketed directly at camellia growers: “The Camellia Trimmer,” a long-reach telescoping hedge trimmer available on Amazon and other retailers. It’s designed to reach the tops of tall camellia bushes without a ladder—a genuinely practical idea if you grow mature plants.
I tested one on my tallest camellias last spring. My ‘Elegans’ has reached nearly eight feet, and accessing the upper branches without a ladder is genuinely difficult with standard tools.
What Works About The Camellia Trimmer
The telescoping shaft extends reach considerably—roughly eight to ten feet depending on the model. The cutting head is small enough to navigate around branches. Battery-powered versions are lightweight enough that holding it extended overhead doesn’t become miserable after five minutes.
For maintaining the tops of mature plants and doing light shaping on tall camellias, this camellia trimmer Amazon option does exactly what it promises.
The Limitations I Found
Honestly? I wouldn’t choose it for shaping a specimen plant or for detailed pruning work. The extended shaft means less control over blade angle and cutting depth. For maintenance work on big, established plants, it’s great. For careful pruning, hand tools are still superior.
My verdict: if you have multiple camellias taller than seven feet and you’re committed to using a hedge trimmer for shaping, The Camellia Trimmer saves you from hauling out a ladder. It’s not a replacement for understanding timing or learning to use hand tools correctly. But it’s a reasonable purchase if ladder work genuinely scares you.
At its price point, I find it practical without being essential. I use mine for the tops of my tallest plants. Everything else gets hand tools.
Better Tools for Specific Jobs — Hand Pruners, Loppers, and Saws
A good camellia trimmer might be tempting, but hand tools are where real skill lives. Every serious camellia gardener needs at least three implements.
Hand Pruners (Secateurs)
Hand pruners are your daily tool. I use Felco No. 2 bypass pruners for 95% of my camellia work. They’re reliable, comfortable, and cut cleanly through stems up to about half an inch thick.
With hand pruners, you can see exactly what you’re cutting. You make precise cuts just above leaf nodes. You control the angle and depth. There’s no guessing—just intention and skill.
Always cut at a slight 45-degree angle, sloping away from the node. Never leave stubs. A stub dies back and invites disease. A properly made cut closes quickly and the plant moves on.
Loppers
Loppers handle branches between half an inch and one and a half inches in diameter. They give you more leverage and reach than hand pruners. For removing older wood or dealing with thicker stems, loppers are indispensable.
I reach for my loppers when I’m opening up the interior of an overgrown camellia or removing a branch that competes with the plant’s natural form. They’re slower than a hedge trimmer, but infinitely more controlled.
Pruning Saws
Branches over one and a half inches need a saw. I use a folding pruning saw with a curved blade. It cuts fast and creates clean wounds that heal properly.
For renovation work—cutting out dead wood or removing old branches to rejuvenate a tired camellia—a good saw is essential. You simply cannot do this work efficiently or cleanly with anything else.
Blade Hygiene
One practice I never skip: wiping my blades between plants with rubbing alcohol. Camellias can suffer from canker diseases that spread through pruning tools.
It takes thirty seconds. Grab a clean cloth, wet it with alcohol, and run your blades across it. That’s it. I do this religiously, especially if I’m moving between different plants or suspect disease.
Helen’s Pruning Toolkit and How She Uses It
After twenty-plus years and over two hundred named cultivars, I’ve settled on a simple system. Here’s exactly what’s in my pruning basket.
The Core Tools
Felco No. 2 hand pruners are my workhorse. My folding pruning saw with a curved blade handles everything larger. A pair of mid-sized loppers covers the middle ground. A cordless hedge trimmer manages light shaping on established plants. And yes, I keep that long-reach telescoping trimmer for my tallest camellias.
That’s genuinely all you need. I also keep a small cloth and rubbing alcohol in a ziplock bag.
How I Use Them Seasonally
Right after bloom ends—late April for japonicas, late January for sasanquas—I move through the garden with hand pruners first. I spend time looking at each plant. I remove dead wood, any diseased branches, and stems that cross or compete. That work takes thought and precision.
After the detailed hand pruning, I step back. If the plant needs general shaping and the edges are uneven, I bring out the hedge trimmer for a quick pass. That takes five to fifteen minutes depending on plant size.
For my tallest plants, the long-reach trimmer handles the upper canopy. Everything else gets hand tools.
This two-step approach means I get both precision and efficiency. Hand tools handle the thinking part. The hedge trimmer handles the shaping part. Nothing gets cut wrong, and the job stays manageable.
Maintenance and Storage
At the end of pruning season, I clean everything. Blades get wiped with alcohol, then lightly oiled to prevent rust. Handles get checked for splinters. Tools get stored indoors and dry.
Good tools last decades. Bad maintenance ruins them in a few seasons. Take care of your camellia trimmer and hand tools, and they’ll serve you through hundreds of plants.
Putting It All Together: Your Camellia Pruning Plan
Let me summarize the practical reality: yes, a hedge trimmer works on camellias. Absolutely. But success depends on three things.
First, timing is non-negotiable. Prune right after flowering ends. No exceptions. This single factor determines whether your camellias bloom next season.
Second, use the right tool for the job. Hand pruners for precision work and dead wood. Loppers for medium branches. A pruning saw for old wood. A hedge trimmer for light shaping on established plants only. The Camellia Trimmer for accessing tall plants safely.
Third, keep your blades clean. Wipe them with rubbing alcohol between plants. It takes thirty seconds and prevents disease spread.
If you take nothing else from this guide, remember my ‘Yuletide’ mistake. That lost blooming season taught me more than any successful pruning ever could. Respect the timing. Use the right tools. Take care of your equipment. Your camellias will reward you with years of gorgeous, reliable flowering.
A camellia trimmer is useful. But camellia knowledge is essential.
“` —