Every spring, I walk my garden and feel that familiar mix of excitement and mild guilt. The camellias are pushing out fresh growth, and I know it’s time to fertilize. For years, I fumbled through this — overfeeding here, forgetting entirely there — until my ‘Debutante’ japonicas started throwing chlorotic yellow leaves and my prized ‘Survivor’ reticulata barely bloomed. Learning how to fertilize camellias properly genuinely changed my results. If you’ve been guessing at this too, I want to save you those years of trial and error.
I maintain over 200 named cultivars across three USDA zones — 7b, 8a, and 8b — so I’ve had plenty of chances to get this both right and spectacularly wrong. Camellias aren’t heavy feeders, but they do have specific nutritional needs. Get those needs right and you’ll see denser growth, more buds, and deeper color. Get them wrong and your plants will quietly sulk for an entire season.
Why Camellias Need a Different Approach to Fertilizing
Most gardeners reach for a general-purpose fertilizer and call it good. With camellias, that shortcut can genuinely cause harm. Camellias are acid-loving plants. They thrive in soil with a pH between 5.5 and 6.5. Push outside that range — particularly above 6.5 — and your plant loses its ability to absorb iron and manganese, even if those nutrients are present in the soil.
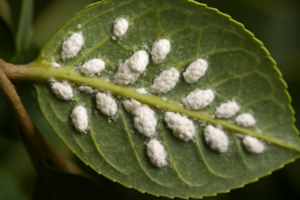
The result is interveinal chlorosis: leaves turn yellow while the veins stay green. It looks like a nutrient deficiency, but it’s actually a pH problem. I see this mistake constantly in new camellia growers. They add more fertilizer, which worsens the problem. Before you fertilize anything, test your soil pH. In my experience, that single step prevents more problems than any feeding schedule.
Camellias also have fine, fibrous root systems that are sensitive to salt burn from over-fertilizing. That’s why choosing the right product matters as much as timing and quantity.
What to Feed: Choosing the Right Fertilizer for Camellias
I strongly recommend using a fertilizer specifically formulated for acid-loving plants. Products labeled for camellias, azaleas, and rhododendrons are ideal. They’re designed to feed without raising soil pH. That’s a critical distinction from general-purpose fertilizers, which can be too alkaline for camellias over time.
Granular vs. Liquid Fertilizers
Granular slow-release fertilizers are my go-to for established plants. They deliver nutrients gradually over weeks, which suits camellias perfectly. Slow-release formulas also reduce the risk of salt burn. For my mature ‘Professor Sargent’ japonicas and the large ‘Francie L’ reticulatas along my back fence, I use a granular 10-5-4 acid-plant formula every spring.
Liquid fertilizers work well for younger plants or when you want a faster response. However, they require more frequent application and more careful measurement. I use diluted liquid fertilizer on my newer sasanqua transplants — varieties like ‘Setsugekka’ and ‘Yuletide’ — during their first couple of seasons while they establish. After that, I transition them to granular feeding.
Understanding NPK Ratios for Camellias
The three numbers on any fertilizer bag represent nitrogen (N), phosphorus (P), and potassium (K). For camellias, you want a formula with moderate nitrogen, lower phosphorus, and good potassium. Something in the range of 8-4-8 or 10-5-4 works well. High-nitrogen formulas push excessive leafy growth at the expense of flowers — exactly the opposite of what we want.
Phosphorus supports root development and bloom production. Potassium improves overall hardiness and disease resistance. For my zone 7b plants, that potassium component matters especially. Those camellias face occasional hard freezes, and well-fed, hardened tissue handles cold stress far better than lush, nitrogen-pumped growth.
How to Fertilize Camellias: Timing Is Everything
This is where most people go wrong — myself included, early on. The timing of camellia fertilization is tied directly to their growth cycle, not to a calendar date. Understanding that distinction makes everything else fall into place.
The Spring Feeding Window
Begin fertilizing in spring when you see new growth emerging. Look for the appearance of fresh, light-green shoots — that’s your signal. In my zone 8b garden, this typically happens in late February to early March. In my zone 7b plantings further inland, I wait until mid-March or even early April.
Don’t rush this. Fertilizing dormant plants doesn’t help them — it just wastes product and risks burn. The plant can only use nutrients when it’s actively growing. Wait for the growth signal, then apply.
For japonicas like ‘Governor Mouton’ and ‘Elegans Supreme,’ spring is the primary feeding window. These varieties bloom in late winter and early spring, so their growth flush comes right after flowering. That post-bloom period is ideal for a good feed to support the plant through the rest of the growing season.
The Summer Top-Up
Many camellias benefit from a second, lighter feeding in early summer — around June in most zones. This supports the development of next year’s flower buds, which set during summer. I apply roughly half the spring rate for this feeding. It’s a gentle nudge, not a full meal.
Sasanquas especially appreciate this summer application. Varieties like ‘Kanjiro,’ ‘Mine-no-yuki,’ and my personal favorite ‘Shishi Gashira’ bloom in fall and early winter. Their buds are setting all through summer, so consistent nutrition during that period pays real dividends come October and November.
When to Stop Fertilizing — And Why It Matters
Stop all fertilizing by late July. In zone 7b, I stop even earlier — late June is my cutoff. Here’s the reason: late-season fertilization, especially anything high in nitrogen, stimulates new soft growth heading into fall. That tender growth is highly vulnerable to frost damage. Hardening off naturally before winter is essential for camellias in colder zones.
I learned this the hard way with a young ‘Korean Fire’ camellia I was coddling. I fed it in August, it pushed a flush of lush new growth, and an early October frost burned it back badly. The plant recovered, but the lesson stuck. No feeding after midsummer — full stop.
How Much to Apply: Rates and Practical Measurements
Over-fertilizing camellias is far more common than under-fertilizing. These are not heavy feeders. More is not better. Always follow label rates and, when in doubt, go slightly below the recommended amount.
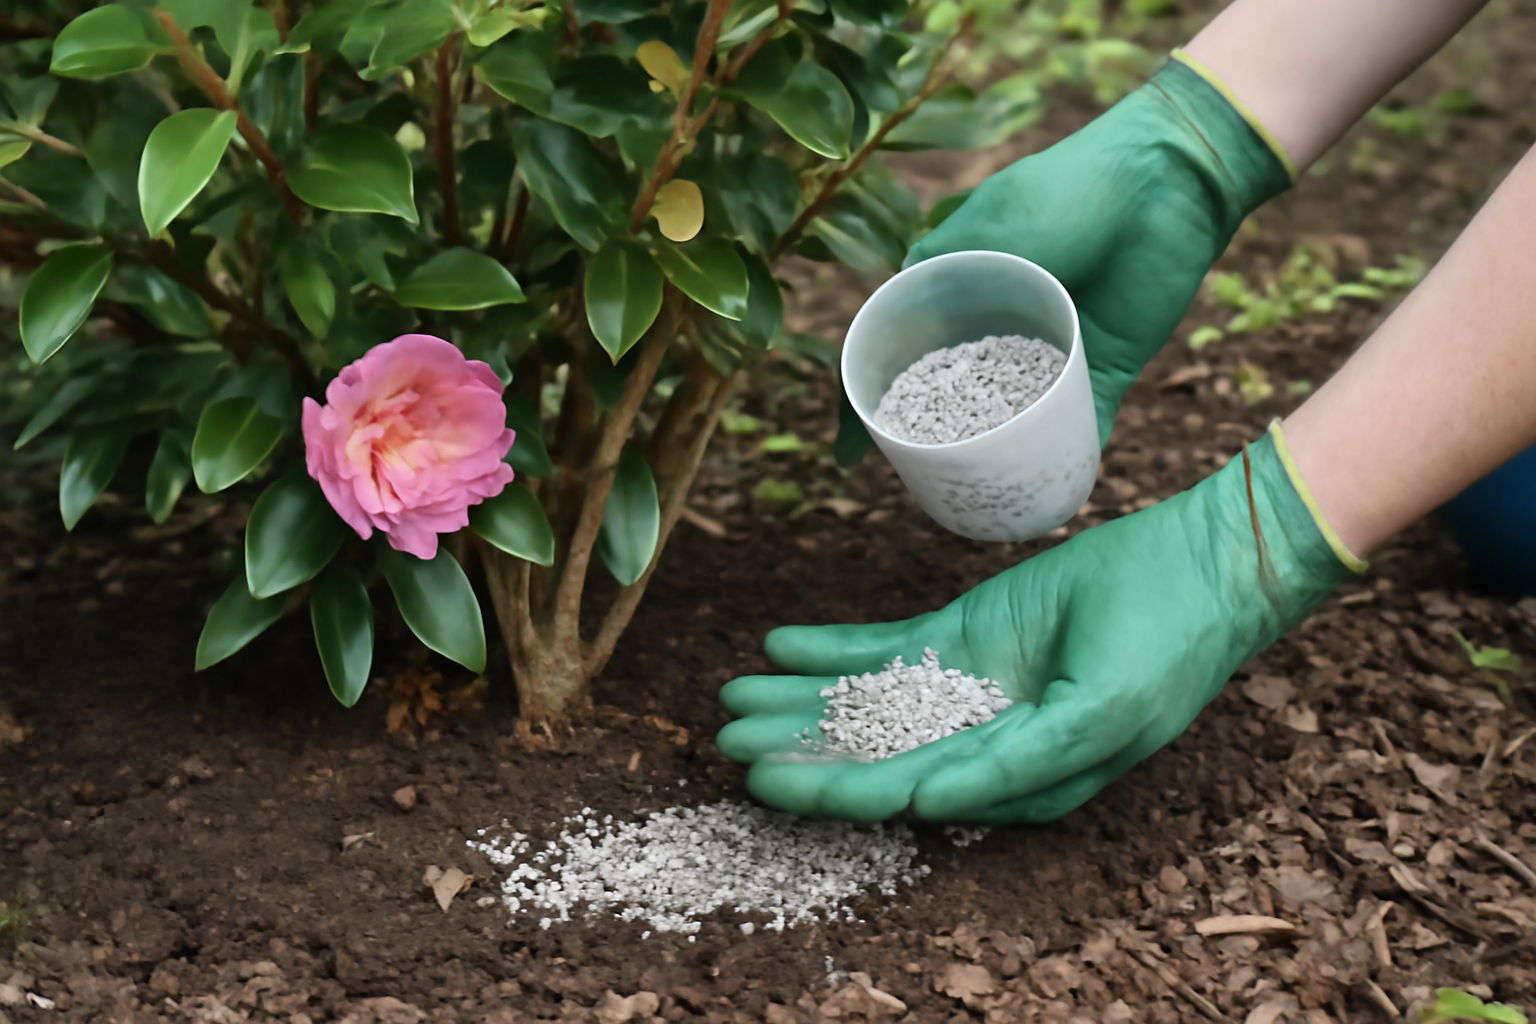
As a general guideline, apply about one tablespoon of granular fertilizer per foot of plant height for each feeding. A three-foot sasanqua gets roughly three tablespoons. A six-foot mature japonica gets about six tablespoons. Spread it evenly under the drip line — not against the trunk — and water it in thoroughly.
Adjusting for Plant Age and Condition
Young plants in their first year need very little fertilizer. I wait until a newly planted camellia has been in the ground for at least six to eight weeks before feeding at all. The roots need time to establish without the stress of concentrated nutrients nearby.
Established plants in good health can handle standard rates. However, stressed or newly transplanted specimens get half-strength treatment until they show vigorous new growth. For example, when I moved a large ‘Berenice Boddy’ japonica two seasons ago, I held off on full feeding for the entire first season. That patience paid off — she settled in beautifully and put on strong growth the following spring.
Container-grown camellias need more frequent, lighter feeding because nutrients leach out with every watering. I feed my potted ‘Bob Hope’ and ‘April Remembered’ japonicas with diluted liquid fertilizer every three to four weeks during the growing season, rather than relying on a single heavy granular application.
The Soil pH Connection: Don’t Skip This Step
I mentioned soil pH earlier, and it deserves its own section because it’s that important. Fertilizing camellias without knowing your soil pH is a bit like taking vitamins while eating a diet that prevents absorption. The effort doesn’t translate into results.
Test your soil before each growing season — or at minimum every two years. Home test kits are inexpensive and reasonably accurate. Your local cooperative extension service often offers more detailed testing for a small fee. Aim for a pH between 5.5 and 6.5. Below 5.5, manganese toxicity can become a problem. Above 6.5, iron and manganese deficiencies appear despite those nutrients being present in the soil.
Adjusting pH if Needed
If your pH is too high, sulfur-based soil acidifiers can bring it down gradually. Wettable sulfur is effective, but work slowly — pH adjustment takes time and repeated applications. Aluminum sulfate works faster but can accumulate to toxic levels if overused. I prefer sulfur for long-term soil management.
On the other hand, if your soil is already acidic — as much of my native zone 8b soil is — acid-forming fertilizers will maintain that range without additional amendments. This is one reason I prefer the camellia-specific granular formulas. They do double duty: feeding the plant and gently maintaining soil acidity at the same time.
Organic Fertilizers: A Gentler Option Worth Considering
Not everyone wants to work with synthetic fertilizers, and I completely understand that. Organic options can work beautifully for camellias. They release nutrients more slowly, carry virtually no salt-burn risk, and improve soil structure over time.
Cottonseed meal is my favorite organic choice for camellias. It’s naturally acidifying, relatively high in nitrogen, and breaks down slowly through the season. I work it gently into the top inch of soil under the drip line each spring. My ‘Nuccio’s Gem’ japonicas, which grow in a partially shaded bed with thin native soil, have responded particularly well to this treatment over the years.
Other good organic options include composted pine bark, fish meal, and feather meal. Avoid mushroom compost — it’s often too alkaline for camellias. Also steer clear of fresh manure, which can burn fine camellia roots and may spike nitrogen too quickly.
A Practical Fertilizing Schedule at a Glance
- Early spring (February–April depending on zone): Full-rate application of acid-plant granular fertilizer when new growth appears
- Early summer (June): Half-rate application to support bud development, especially for sasanquas
- Late July / cutoff: Final feeding; nothing after this point in most zones
- Zone 7b adjustment: Stop feeding by late June to allow hardening before early frosts
- Container plants: Diluted liquid every 3–4 weeks throughout the growing season
- New transplants: Wait 6–8 weeks after planting; first-season feeding at half strength only
How to Fertilize Camellias: Your Action Plan
If you take only one thing from this post, let it be this: timing and soil pH matter more than which specific product you choose. Get those two things right and your camellias will reward you generously. Learning how to fertilize camellias well isn’t complicated — it just requires paying attention to what the plant is doing, not just what the calendar says.
Start this season by testing your soil pH. Then pick up a quality acid-plant fertilizer — granular for established shrubs, liquid for young or container plants. Watch for that first flush of new spring growth, apply at the correct rate under the drip line, and water it in well. Follow up with a lighter summer feed if you’re growing sasanquas or reticulatas for fall and winter bloom.
After that, step back and let your plants do their work. Camellias are resilient, long-lived shrubs. With a sensible feeding program and the right soil conditions, many of my oldest plants — some over 30 years in the ground — still bloom as generously as ever. Yours will too.
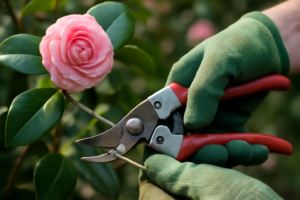
If you’re also thinking about when and how to shape your shrubs after feeding season, I’ve covered the full process in my post on pruning