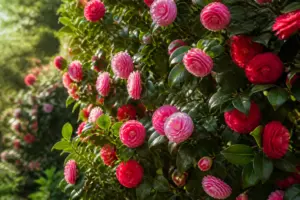
I’m Helen Pritchard, a lifelong gardener here in the Pacific Northwest, and I’ve been nurturing camellias for over two decades. With a collection of more than 200 named cultivars — including sasanquas, japonicas, reticulatas, and hybrids — I’ve seen my fair share of plant challenges. Today, I want to share a personal story about my ‘Survivor’ camellia and the lessons it taught me about diagnosing plant health issues. It’s a tale of persistence, frustration, and ultimately, success in the garden.
I’m crouched down next to my ‘Survivor’ camellia — the one I put in the ground seven years back — turning a leaf over in my fingers because something about it has been bothering me. The blade has drifted from that deep, glossy green I expect to a washed-out yellow-green, with the veins standing out darker against the fading tissue. Fresh growth this season is thin and half-hearted. Not a single bud had formed the previous autumn. I’d covered the fundamentals — solid drainage, afternoon shade, a mulch ring, a balanced spring feeding — and still the plant kept sliding backward right in front of me.
I nearly pulled it out of the ground on the spot. Instead I forced myself to settle one question first, having watched other growers botch this call in both directions: was I dealing with a soil pH imbalance, or was root rot setting in underneath? In the early going, the two can look almost impossible to tell apart, yet the correct response to one is exactly the wrong move for the other. Amend the soil chemistry for a plant that’s actually rotting at the roots, and you’ve burned through months for nothing. Cut back watering for what you assume is root rot when the real culprit is chlorosis, and the plant still won’t recover. Guess wrong on the diagnosis, and the treatment itself can be what finishes the camellia off.
Why Getting This Right Matters More Than People Assume
Iron chlorosis brought on by high soil pH and root rot caused by Phytophthora cinnamomi both leave you staring at the same declining, yellowing camellia. That’s as far as the overlap goes. A pH problem is fundamentally about nutrient access — the root system is intact and healthy, but the soil chemistry is trapping iron and manganese in forms the plant can’t pull up. You fix it by adjusting the chemistry, typically with sulfur, while keeping your normal watering routine. Root rot is a root-system failure, driven by a soil-borne pathogen that flourishes in waterlogged, poorly aerated ground. The fix there runs in the opposite direction entirely: more drainage, less water, because that pathogen needs saturated conditions to keep advancing. No soil amendment on earth cures Phytophthora, and no watering cutback undoes a pH lockup. Confuse the two, and you’ll burn an entire growing season without progress — or actively hasten the decline.
Spotting the pH / Iron Chlorosis Pattern
This was the pattern I’d already encountered before, and it’s what I eventually confirmed on my ‘Survivor.’ The giveaway is interveinal chlorosis — the tissue between the leaf veins bleaches to yellow while the veins themselves hold onto a deeper green, leaving the leaf looking almost netted. It tends to appear on the newest growth first. Crucially, the plant never wilts. It doesn’t sag or look thirsty; it simply looks faded and undernourished, and bud production stalls out. Dig gently near the root crown and you’ll find roots that are white or cream-colored, firm, and undamaged. When I finally ran a test on my own soil, the reading came back at 6.8 — perfectly fine for most garden plants, but well beyond the 5.5 to 6.5 window camellias actually need, and high enough to bind up the iron and manganese the roots would otherwise absorb.
Spotting the Root Rot Pattern
Phytophthora cinnamomi root rot plays by an entirely different set of rules, and it turns up constantly in camellia beds sitting in heavy clay or poorly drained ground. From above, the symptoms can superficially mimic chlorosis, but a handful of clues set it apart once you know to check for them:
- Drooping in soil that’s clearly damp. A plant fighting root rot often looks parched and limp even while the surrounding ground is soaked, since the compromised roots can no longer draw up water that’s sitting right there.
- Decline that plays favorites. Root rot tends to hit one branch or one side of the canopy hard while the rest of the plant still looks fairly normal, rather than fading evenly all over the way a pH issue typically does.
- Discolored roots and stem base. This is the most trustworthy check you can do in the field. Peel back bark near the soil line, or unearth a small feeder root: healthy tissue is white to cream, while roots hit by Phytophthora shift to reddish-brown or black and turn mushy or brittle instead of staying firm.
- A sour, musty odor coming from the root crown once the infection has progressed.
- A track record of wet ground — dense clay, sluggish drainage, a dip in the yard that never quite dries out, or irrigation running on autopilot regardless of recent rainfall.
Root rot shows a preference for ground that stays saturated after rainfall instead of draining out within a day or so. If your camellia sits in a spot where water visibly collects, or you’ve been irrigating on a rigid schedule without regard for what the weather’s already delivered, that background matters just as much as anything you see on the leaves.
My Step-by-Step Way of Telling Them Apart
Whenever a camellia starts to fade on me, I work through the same short checklist, always in this order:
- Check the soil moisture at the root zone. Push a finger or a moisture meter a few inches down near the root crown. If it’s consistently soggy, root rot moves to the top of my suspect list.
- Look at the pattern of decline. Whole-plant, even yellowing that leaves the veins dark points toward pH. One branch dying while the rest looks fine, or wilting that doesn’t resolve after watering, points toward root disease.
- Dig a little and look at the roots. This is the tie-breaker. White, firm roots with no odor mean the root system is healthy and your problem is almost certainly chemical, not biological. Brown or black, mushy roots confirm root disease regardless of what the leaves are doing.
- Test the soil pH. I still use my NewTest Soil Test Kit 4 Parameters: Professional Accurate for this step. It only tells you part of the story — it says nothing about root health — but if the roots checked out healthy in step 3 and the pH comes back above 6.5, you’ve confirmed a chemical problem rather than a biological one.
Here’s something I want to say plainly: don’t stop at a pH test and call your diagnosis finished. A soil test can only confirm or rule out pH — it tells you absolutely nothing about the condition of the roots below ground. I’ve talked with gardeners who tested their pH, found it a bit high, corrected it, and still lost the camellia months down the road because root rot had been the actual problem the entire time and the elevated pH reading was nothing more than a distraction.
The Testing Tools I Actually Reach For
Where they earn their keep
- These test strips handed me results in minutes, no mailing samples off and waiting days on end — I checked several spots around my camellia and watched the pH climb toward 6.8, which lined up exactly with the interveinal chlorosis I’d been seeing.
- Once I’d confirmed my soil had drifted too alkaline (and had already verified the roots were sound), I could apply sulfur with confidence and actually track whether the amendment was moving the needle instead of just crossing my fingers.
- The kit costs little enough that I test several beds with it and keep it on hand permanently, which has let me catch pH drift on other acid-loving plants before any symptoms even appeared.
Where they come up short
- The strips can’t match a digital meter for precision — if you’re splitting hairs between a 5.8 and a 6.0 reading, you’ll see enough variation between tests to wish you’d sprung for lab analysis instead.
- You genuinely have to follow the timing and the water-to-soil ratio as instructed, or the readings come out skewed; I wasted a couple of strips before realizing I’d been using tap water instead of distilled.
I almost talked myself out of buying a kit, convinced I could just eyeball the problem and buy sulfur speculatively — a much more expensive mistake in hindsight, and one that would have done nothing if the real cause had turned out to be root rot. NewTest Soil Test Kit 4 Parameters: Professional Accurate turned that gamble into an actual diagnosis.
Confirmed Root Rot? Here’s Your Next Move
No soil amendment cures established Phytophthora, and nothing marketed to home gardeners reliably reverses it either — certain products can hold the pathogen in check, but none of them regrow roots that have already rotted away. Your task shifts to shutting down the conditions that let it spread in the first place: fix drainage right away (regrade the site, install a drain, or shift future planting to a raised bed or berm), ease off or halt supplemental watering entirely, and pull mulch back from the crown so moisture isn’t trapped against it. With a younger plant, or one still in a container, it’s often more sensible to dig it out and start fresh somewhere with proper drainage than to fight for it in the original spot. Camellias have zero tolerance for waterlogged roots, and Phytophthora is precisely why every planting guide for this genus keeps repeating “well-drained soil” like a mantra.
Confirmed pH Problem? Here’s Your Next Move
This is the more fixable scenario — a chemical problem is a solvable problem. Elemental sulfur, worked lightly into the top few inches of soil and watered in, is still my first choice; I’ve had good results with both True Organic Prilled Sulfur for a slow, steady correction and Earth Science Fast Acting Sulfur Granules when a plant needs relief a bit faster. Expect it to take six to twelve weeks before you see the pH actually move, and retest before applying more rather than stacking applications on faith. I’ve laid out the full step-by-step process, application rates, and my ongoing maintenance routine in my complete camellia soil pH guide — worth reading once you’ve confirmed pH, not root rot, is your actual problem.
How the Story With My ‘Survivor’ Wrapped Up
When I finally dug in to check, the roots came up white and vigorous, and the soil test read 6.8. Put together, that told me exactly what I was dealing with: a chemical lockup, not a root system on its way out. I worked sulfur into the soil, retested at the six- and twelve-week marks, and by week twelve the reading had dropped to 6.1. New growth had already picked back up, coming in a rich, healthy green. That autumn, the plant bloomed for the first time in two years.
If one of your camellias is fading, fight the urge to guess your way through it. Check the roots, check the pH, and line the symptoms up against one of the two profiles above before you spend a dime or an hour treating the wrong condition. It amounts to maybe fifteen minutes of digging and testing, and it can save you an entire season of effort — or the plant itself.
About This Article

Written by Helen Pritchard. Helen Pritchard is a lifelong gardener in the Pacific Northwest who has grown more than 200 named camellia cultivars over two decades. She writes practical, experience-based guides to camellia care, from variety selection and pruning to troubleshooting yellowing leaves and bud drop. More about this site.
Verify this against a primary source
Specifics change, and your situation may differ from the one described here. These are the authorities worth checking directly:
- American Camellia Society — cultivar registration and culture guides
- USDA Plant Hardiness Zone Map — zone verification for your location
- Royal Horticultural Society — camellia cultivation and pest guidance