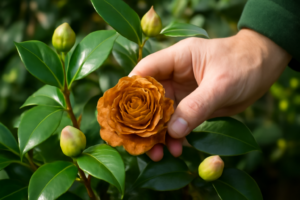
I still remember the moment I decided to try grafting camellias for the first time. I was staring at a leggy, root-knot-nematode-riddled Camellia japonica ‘Nuccio’s Gem’ that I desperately didn’t want to lose. The blooms on that plant were extraordinary — pure white, formal double, absolutely flawless. Losing it felt unthinkable. A fellow Master Gardener suggested grafting it onto a fresh, vigorous rootstock, and I thought: how hard can it be? Spoiler — it’s not as hard as you’d think, but it does require patience, precision, and a willingness to fail a few times before you succeed.
What Is Grafting Camellias, and Why Would You Do It?
Grafting is the process of joining a stem cutting (called the scion) from one plant onto the rooted stem (called the rootstock) of another. The two pieces fuse together and grow as a single plant. It sounds almost magical — and honestly, watching it succeed still gives me a little thrill after all these years.
So why graft instead of simply taking cuttings? There are a few excellent reasons. First, some camellias root extremely poorly from cuttings alone. Camellia reticulata cultivars like ‘Captain Rawes’ and ‘Cornelian’ are notorious for this. In my experience, getting a reticulata to root from a cutting is possible but frustratingly slow and unreliable. Grafting sidesteps that problem entirely.
Second, grafting gives the new plant a significant head start. The established rootstock already has a developed root system, so the scion gets immediate access to water and nutrients. As a result, grafted plants often establish faster and bloom sooner than rooted cuttings. That’s a big deal when you’re dealing with a camellia that might take three to five years to bloom from a cutting.
Third — and this is something I find genuinely fascinating — rootstock choice can influence cold hardiness. Grafting onto Camellia oleifera rootstock, for example, is widely used to push the hardiness of less cold-tolerant scions. This matters a great deal if you’re growing in Zone 7b like I do at my mountain property.
Choosing the Right Rootstock
Rootstock selection is one of the most important decisions you’ll make. Get it right, and everything else becomes easier. Get it wrong, and you’ll watch your graft fail even if your technique is perfect.
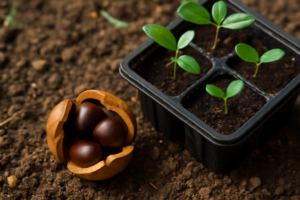
The most commonly used rootstocks for grafting camellias are seedling-grown Camellia japonica and Camellia sasanqua. Both are vigorous, widely available, and compatible with most scion material. For reticulata hybrids, I prefer using a robust japonica seedling — something unselected but healthy, with a pencil-thick stem.
If you’re grafting in Zone 7b or colder, consider Camellia oleifera rootstock. It’s the backbone of the cold-hardy breeding program at the U.S. National Arboretum. Plants like ‘Winter’s Star’ and the entire “Ice Angels” series were developed using this approach. That said, oleifera rootstock can be harder to source than japonica seedlings. Check with specialty camellia nurseries — many sell bare-root seedlings in late winter specifically for this purpose.
Whatever rootstock you choose, it should be actively growing and disease-free. I always inspect roots carefully before using any plant as rootstock. Root-knot nematodes, Phytophthora root rot, and scale insects on the rootstock will doom your graft from the start. Healthy roots, healthy graft — it’s really that simple.
Selecting and Preparing Your Scion Wood
Scion wood is the cutting you’ll graft onto your rootstock. Quality matters enormously here. I’ve learned — sometimes painfully — that weak or poorly timed scion wood produces weak grafts.
The best scion wood is semi-hardwood from the current season’s growth. You’re looking for stems that have just finished their growth flush and firmed up slightly — not soft and floppy, but not fully hardened old wood either. For most japonica cultivars in Zone 8a and 8b, that timing falls in late summer to early autumn, roughly August through October.
Each scion should be three to four inches long with two or three healthy buds. Remove the lower leaves, and trim the remaining leaves in half to reduce moisture loss. Work quickly once you cut the scion — I keep mine wrapped in a damp paper towel inside a zip-lock bag until I’m ready to graft. Exposed scion wood dries out faster than you’d expect.
For reticulata cultivars like ‘Buddha’ or ‘Shot Silk,’ I collect scion wood in the morning when the stems are fully hydrated. Hot afternoon conditions are not your friend here. However, if you’re working with a sasanqua variety like ‘Yuletide’ or ‘Setsugekka,’ the timing window is similar — late summer, semi-hardwood, morning harvest.
The Cleft Graft Method: Step by Step
There are several grafting methods used for camellias — splice grafting, approach grafting, and cleft grafting among them. Personally, I rely on the cleft graft most often. It’s forgiving for beginners, works well with slightly mismatched stem diameters, and gives me consistently good results.
What You’ll Need
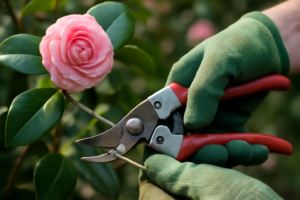
- A sharp grafting knife (dull blades are the enemy — I use a Victorinox grafting knife)
- Grafting tape or budding rubber strips
- A rooted rootstock plant in a four- to six-inch pot
- Prepared scion wood (as described above)
- A clear plastic bag or humidity tent
- Rubbing alcohol or a flame to sterilize your blade between cuts
The Process
Start by cutting the rootstock stem cleanly across, about three to four inches above the soil line. Use a smooth, single cut — don’t saw back and forth. Then make a vertical split straight down the center of the cut stem, about an inch deep. This is your cleft.
Next, prepare the scion. Trim the base into a long, thin wedge shape — both sides angled smoothly to a point, about an inch long. The goal is maximum cambium contact when you insert it. The cambium is the thin green layer just beneath the bark. This is where the magic happens. Cambium-to-cambium contact is everything in grafting.
Gently open the cleft and slide the scion in. Position it so the outer edge of the scion’s cambium aligns precisely with the outer edge of the rootstock’s cambium. You don’t need both sides to match — one side with good cambium contact is enough to make a successful graft. Wrap firmly with grafting tape from bottom to top, covering the entire union. Don’t leave gaps.
Finally, place a clear plastic bag over the entire grafted plant and seal it loosely at the base. This creates a high-humidity micro-environment that prevents the scion from desiccating before the union forms. Set the pot somewhere with bright indirect light — not direct sun. Direct sun through plastic will cook your graft instantly.
A Mistake I Made (That You Don’t Have To)
Let me save you some frustration here. Early in my grafting experiments, I was impatient about checking on my grafts. I’d peek under the bag every few days, lifting it to look at the union. Every time I did that, I disrupted the humidity and — I’m convinced — reduced my success rate significantly.
Leave it alone. Seriously. Seal the bag, set the timer for four weeks, and walk away. The graft union forms slowly and invisibly at first. You’ll know it’s working when you see the scion’s buds beginning to swell and push — that usually happens around the four- to six-week mark. Only then should you begin gradually venting the bag to acclimate the plant to ambient humidity.
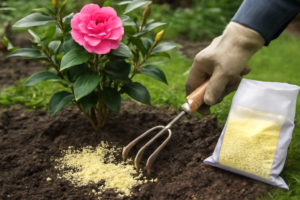
Another lesson I learned the hard way: don’t fertilize too soon. Wait until the graft has clearly taken and new growth is actively extending. Pushing fertilizer onto a freshly grafted plant stresses the union. I now wait a full eight weeks after confirmed take before applying any fertilizer — and even then, I start with a half-strength, balanced liquid feed.
Aftercare and What Success Looks Like
Once you’ve confirmed the graft has taken, transition the plant gradually to normal growing conditions. Remove the plastic bag over seven to ten days — open it a little more each day rather than yanking it off all at once. Sudden humidity changes will stress a newly grafted plant.
Keep the grafted plant in a sheltered, frost-free environment for at least one full growing season before transplanting outdoors. For my Zone 7b garden, that means the graft goes into a cold greenhouse for its first winter. In Zone 8b, you can often overwinter grafted plants in a protected outdoor spot if they’re well-established.
Watch carefully for rootstock shoots emerging below the graft union. These are vigorous and will outcompete your scion if left unchecked. Remove them immediately — right at the point of origin, not just snipped off at the surface. I check for these every couple of weeks during the growing season. It’s one of those small maintenance tasks that makes an enormous difference.
Soil conditions matter too, both before and after planting out. Camellias prefer a well-drained, acidic soil with a pH of 5.5 to 6.5. I cover soil preparation in detail in my post on planting camellias, but the short version is: get the pH right before you plant, and your grafted camellia will reward you for it.
Which Camellias Benefit Most From Grafting?
Not every camellia needs to be grafted. Many japonicas root easily from cuttings, and for common cultivars like ‘April Kiss’ or ‘Professor Charles S. Sargent,’ cuttings are perfectly adequate. However, grafting makes the most sense in a few specific situations.
- Camellia reticulata cultivars — Poor rooters that almost demand grafting. ‘Captain Rawes,’ ‘Cornelian,’ ‘Buddha,’ and ‘Shot Silk’ are all best propagated this way.
- Rare or irreplaceable cultivars — When you have just one plant of something precious and want to preserve it, grafting is faster and more reliable than hoping cuttings root.
- Cold-zone growing — Grafting onto C. oleifera rootstock genuinely expands what you can grow in Zone 7b and even Zone 7a.
- Vigour improvement — An older cultivar on its own weak roots can be dramatically reinvigorated on a strong rootstock.
On the other hand, if you’re simply looking to propagate a healthy sasanqua like ‘Narumigata’ or a reliable japonica like ‘Elegans,’ stick with cuttings. I covered that process in my post on taking camellia cuttings, and it’s a simpler starting point for most gardeners.
Ready to Try Grafting Camellias?
Grafting camellias is genuinely one of the most satisfying skills I’ve developed over my years with this genus. Yes, it takes practice. Your first attempt may not take, and that’s okay — mine didn’t either. However, once you see that first scion push new growth on a rootstock you grafted yourself, something clicks. You’ll want to do it again immediately.
Start small. Choose one precious reticulata cultivar or one plant that’s struggling on its own roots. Source a healthy rootstock seedling, gather your tools, and try the cleft graft this late summer. Follow the steps above, resist the urge to peek too soon, and give it time.
Camellias are patient plants. Grafting camellias rewards patience right back. If you have questions about rootstock sources, specific cultivar compatibility, or aftercare in your particular zone, drop them in the comments below — I read every single one and love talking through the details with fellow camellia enthusiasts.