Every February, I walk through my Zone 8a garden with my morning coffee, and the camellias are usually putting on their best show. Last winter, though, I stopped dead in front of my ‘Debutante’ — a pale blush japonica I’ve grown for fifteen years. Her blooms had turned a muddy, sickly brown seemingly overnight. Not the crisp, papery brown of frost damage. Something wetter. Something worse. That was my first serious encounter with camellia petal blight, and I’ll be honest: it spread to four more plants before I got it under control.
If you’re reading this, you’ve probably seen something similar. Your flowers look fine for a day or two, then collapse into a soggy, brown mess. It’s heartbreaking — especially when you’ve waited all autumn and winter for those blooms. The good news is that camellia petal blight is manageable once you understand what you’re dealing with.
What Is Camellia Petal Blight?
Camellia petal blight is caused by the fungus Ciborinia camelliae. It’s a nasty little pathogen that specifically targets camellia flowers — not the leaves, not the stems, just those precious blooms. That specificity is actually a useful diagnostic clue. If you’re seeing browning on petals but your foliage looks healthy, petal blight is absolutely worth suspecting.
The fungus overwinters in the soil as small, hard, black structures called sclerotia. In spring and late winter — right when camellias bloom — those sclerotia produce tiny mushroom-like fruiting bodies called apothecia. These release airborne spores that land on open flowers and infect them within hours under the right conditions.
Moist, cool weather is its ideal operating environment. In my Zone 8b beds, where winter temperatures hover in the 40s and 50s Fahrenheit with regular rain, the conditions are practically a welcome mat for this disease.
How to Identify Camellia Petal Blight: Key Symptoms
Getting the diagnosis right matters. I’ve seen gardeners treat for a dozen different problems when the real culprit was sitting in the soil all along. Here’s what petal blight actually looks like:
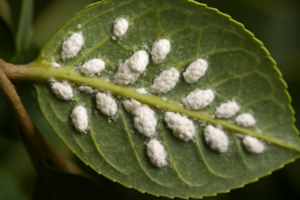
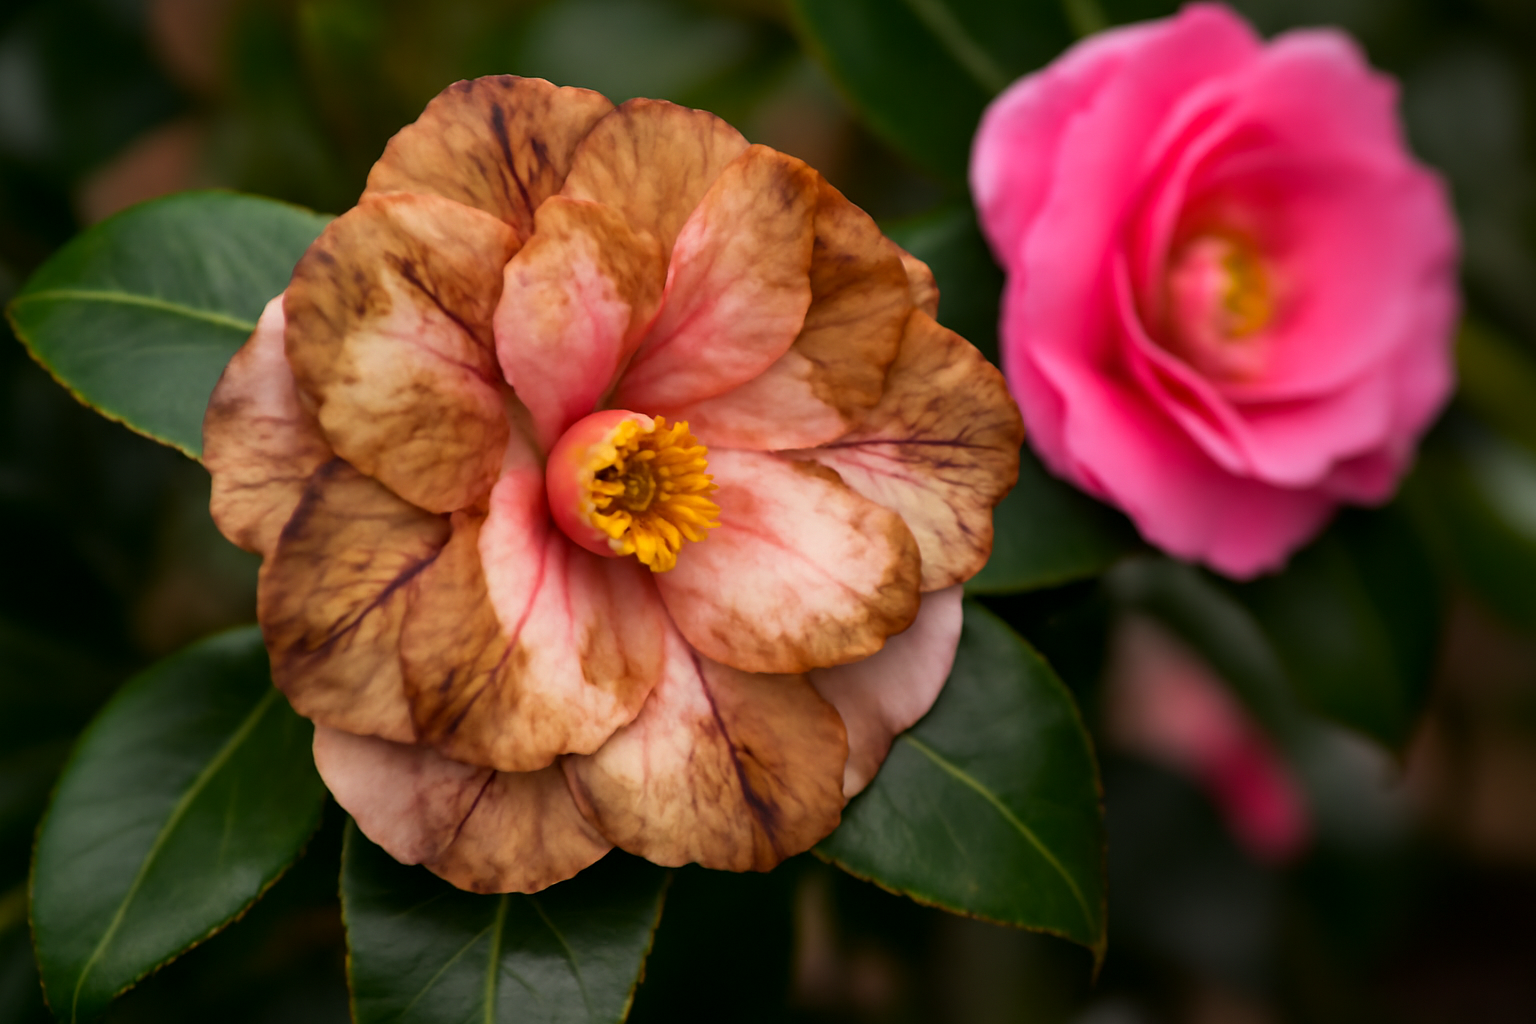
- Brown patches with a netted or veined appearance. Look closely at the browning tissue. Petal blight creates a distinctive brown discolouration with darker veining — almost like a brown leaf skeleton pattern on the petals.
- Rapid collapse of the entire flower. Unlike frost damage, which browns the outer petals and stops, petal blight progresses quickly inward until the whole bloom is affected.
- Mushy, wet texture at the base. Pick up a fallen bloom. If the base is wet and slightly slimy, that strongly suggests fungal activity rather than cold damage.
- A firm brown band at the flower base. In some infections, you’ll see a darker, firmer ring where the petals meet the calyx. This is another hallmark sign.
- Healthy foliage surrounding affected blooms. Petal blight does not affect leaves. If your leaves are browning too, you may be dealing with a separate issue like root rot or canker.
For comparison: frost damage tends to brown outer petals cleanly, starting at the tips. Wind damage creates dry, papery browning. Petal blight is wetter, faster, and more complete.
Which Camellia Varieties Are Most Affected?
Honestly? Every camellia I grow has some susceptibility. That said, large-flowered japonicas seem to suffer the worst. ‘Debutante,’ ‘Governor Mouton,’ and ‘Professor Charles S. Sargent’ have all shown blight in my collection during wet winters. Their big, full blooms hold moisture beautifully — which unfortunately also means they hold spores.
Sasanqua varieties, which bloom in autumn rather than winter, tend to escape the worst of it simply because of timing. My ‘Setsugekka’ and ‘Yuletide’ finish blooming before the peak fungal pressure arrives. Reticulata hybrids are a mixed story — their blooms are enormous, which increases surface area for spore landing, but their bloom timing varies enough that some years they escape unscathed.
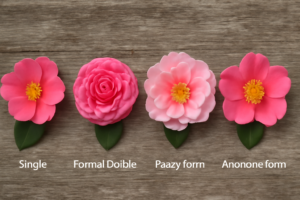
Single-flowered forms, in my observation, recover their display more quickly than doubles. With a single bloom infected and dropped, there are more buds to follow. A fully double form like ‘Midnight Magic’ can look devastated when just a few blooms go down.
The Mistake I Made (That You Don’t Have To)
Here’s my hard-won lesson. The first year I identified petal blight, I was diligent about removing infected blooms from the plants. I felt quite pleased with myself, actually. What I did not do was pick up every fallen bloom from the ground beneath the plants.
Those dropped blooms — sitting on the mulch, slowly decomposing — were forming sclerotia right there in my garden beds. I had essentially created a fungal nursery for the following season. By the next winter, I had significantly more pressure across more plants.
The lesson is this: removing infected blooms from the plant is only half the job. You must also collect every fallen flower from the ground and dispose of them away from your garden. Do not compost them. Bag them and bin them.
How to Stop Camellia Petal Blight from Spreading
There’s no single silver bullet here. In my experience, controlling camellia petal blight requires a combination of cultural practices and, in bad years, strategic use of fungicide. Let me walk you through what actually works.
Cultural Controls: The Foundations of Management
Remove spent and infected blooms promptly. I do a walk-through every two to three days during peak bloom season. Any flower showing browning comes off immediately. This reduces the spore load releasing into the air and landing on your other open blooms.
Pick up every fallen flower. As I mentioned above — this is non-negotiable. Get down and collect them. I use a small bucket and wear gloves. Dispose of them in sealed bags, not your compost heap.
Replace or remove surface mulch annually. Since sclerotia overwinter in the soil and mulch layer, refreshing your mulch each year reduces the reservoir of fungal material. I rake out the old mulch from my camellia beds in early spring and replace it with fresh pine bark or pine straw — both of which also help maintain the slightly acidic soil pH of 5.5 to 6.5 that camellias prefer.
Improve air circulation. Dense planting encourages the humid microclimate that Ciborinia camelliae thrives in. Thinning interior branches and maintaining spacing between plants can make a meaningful difference. I covered camellia pruning principles in a separate post on this site if you want more detail on that.
Avoid overhead watering during bloom season. Wet petals are an open invitation. If you’re irrigating, water at the base of the plant. Morning watering also allows any moisture to dry before cooler evening temperatures settle in.
Fungicide Options for Severe Infestations
Cultural controls alone won’t always keep up with a heavy blight year — especially if your neighbours also grow camellias and aren’t managing theirs. In those situations, fungicide applications can help limit damage.
Myclobutanil-based fungicides have shown efficacy against Ciborinia camelliae in research trials. Thiophanate-methyl is another option that some growers use with reasonable results. However, and this is important: these are protectant treatments, not cures. They need to be applied before infection occurs — ideally just as your first buds begin to open.
Timing varies by zone and variety. In my Zone 7b beds, where japonicas open in late February to March, I’ll consider a fungicide application in mid-February if the forecast shows a wet, mild stretch coming. In Zone 8b, where some japonicas open as early as January, I shift the calendar accordingly.
Always read product labels carefully and follow local guidelines. Fungicide resistance can build up over time, so rotating chemistries when possible is worth considering. I’d also encourage you to explore whether your local cooperative extension service has specific recommendations for your region — they’re an underused resource.
Soil-Applied Treatments: Worth It?
Some research has looked at soil drenches aimed at suppressing sclerotia development. Results have been inconsistent in home garden settings. Personally, I’ve had more reliable outcomes from aggressive removal of infected material than from any soil treatment I’ve tried.
On the other hand, if you have a bed with a severe history of blight, refreshing the top few inches of soil in addition to the mulch swap might reduce the sclerotial reservoir meaningfully. I wouldn’t rely on it alone, but as part of a broader approach it makes sense.
Can You Prevent Camellia Petal Blight Long-Term?
Complete prevention is probably unrealistic in regions where the fungus is already established — and Ciborinia camelliae is now widespread across camellia-growing regions of the southeastern US, Pacific Northwest, and UK. Spores travel on air currents. If camellias are grown within a mile of your garden, you’re likely getting some spore pressure regardless of what you do.
That said, “can’t prevent it entirely” is not the same as “nothing works.” Consistent sanitation over multiple seasons genuinely does reduce disease pressure. I’ve seen this in my own garden. The plants closest to my original outbreak still see some blight each year, but the severity has decreased substantially since I tightened up my removal practices.
Some gardeners choose varieties that bloom very early or very late in the season, partially sidestepping the peak spore release window. My ‘Kanjiro’ sasanqua, blooming in October and November in Zone 8a, has never shown petal blight in ten years of growing. Timing really does matter.
Selecting varieties with fewer petals — singles and semi-doubles rather than full doubles — can also reduce impact. Fewer petals means less surface area for spores to colonise, and single flowers that drop cleanly tend to leave less debris to manage.
My Practical Action Plan for Camellia Petal Blight
If you’re dealing with camellia petal blight right now, here’s exactly what I’d do — in order:
- Today: Walk your camellia beds. Remove every infected bloom from the plants and collect every fallen flower from the ground. Bag and bin them — do not compost.
- This week: Rake out surface mulch beneath affected plants and dispose of it. Apply a fresh 2-3 inch layer of pine bark or pine straw to replace it.
- Ongoing through bloom season: Check plants every two to three days. Remove and dispose of any browning flowers promptly. Keep fallen flowers off the ground.
- Before next bloom season: Consider a preventative fungicide application just as buds begin to show colour, particularly if you had heavy blight pressure this year.
- Long term: Review plant spacing for air circulation. Consider adding some autumn-blooming sasanqua varieties to extend your season with lower blight risk.
Camellia petal blight is genuinely frustrating. I won’t pretend otherwise. Watching a flower that took a whole year to produce collapse into a brown mush in two days never gets easier. However, with consistent management, you can keep it from ruining your entire season — and over time, you can meaningfully reduce the disease pressure in your garden.
The camellias are worth the effort. My ‘Debutante’ has given me three beautiful seasons since that first blight outbreak, once I learned to stay on top of sanitation. Your garden can recover too — it just needs a little help from you at the right moments.