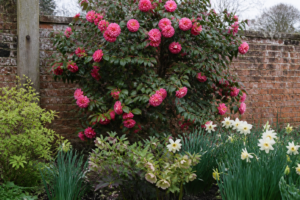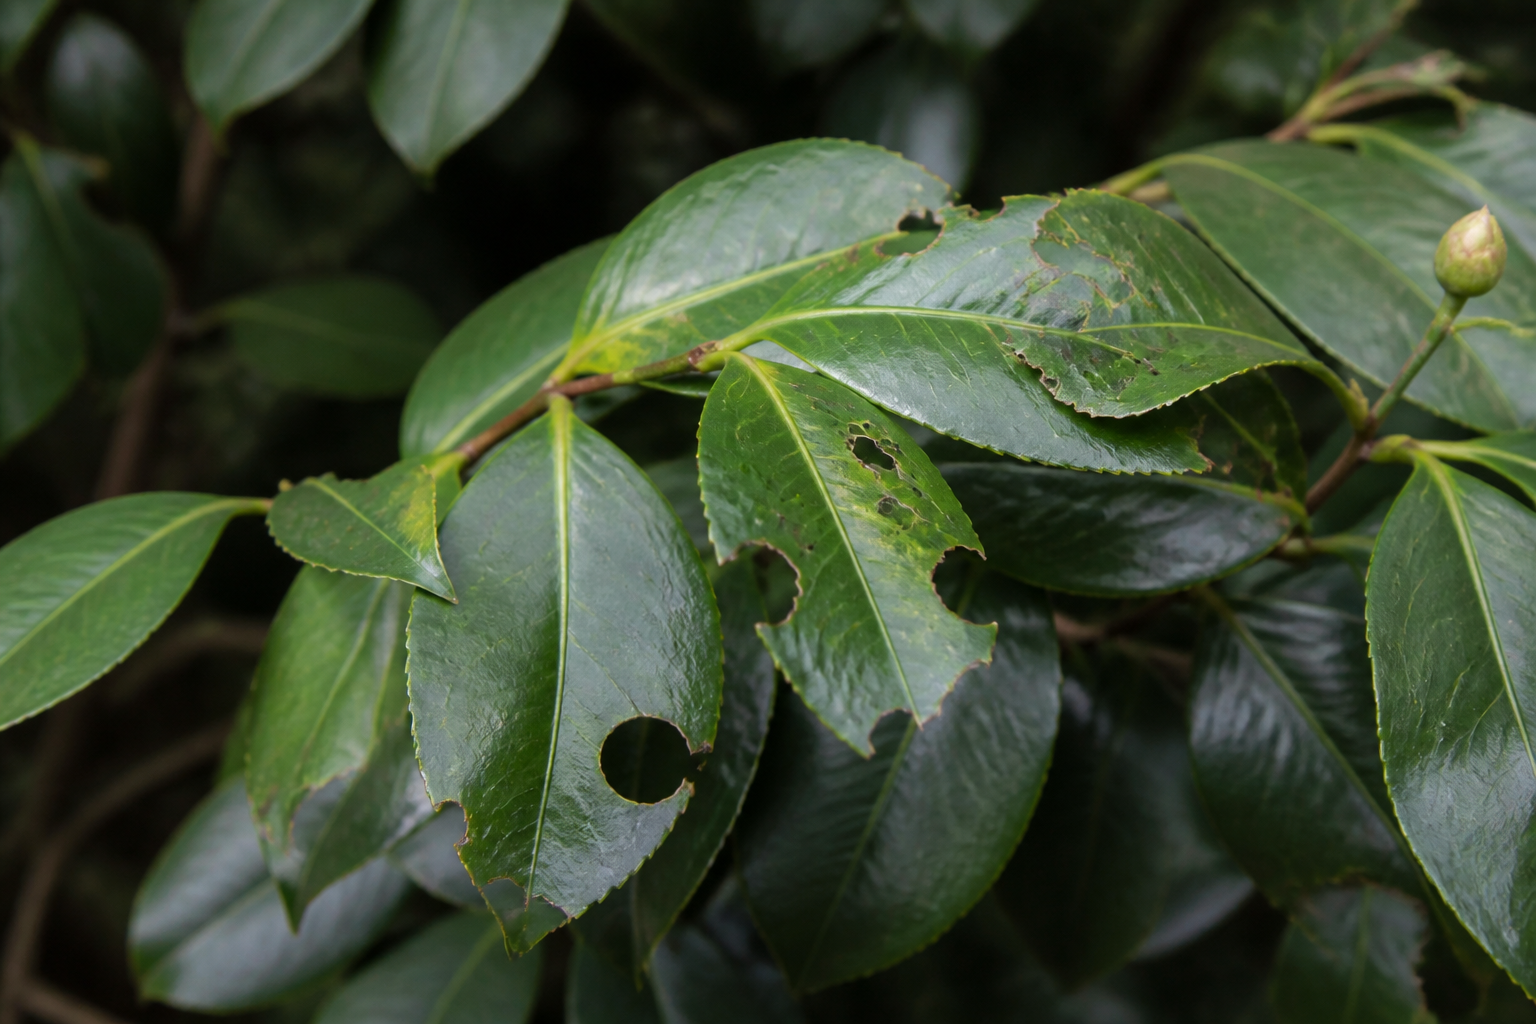
Last spring, I was deadheading spent blooms on my ‘Elegans’ camellia when I noticed something odd: tiny, perfect semicircles nibbled out of the leaf margins, like someone had used pinking shears on every other leaf. My first thought was thrips. My second was scale. Neither was right. What I was actually looking at—and what I’d been missing for two seasons—was the calling card of the vine weevil, one of the most destructive pests I’ve encountered in my twenty-plus years growing camellias across three USDA zones. But here’s the thing: those notches were almost beside the point. The real damage was happening underground, in the dark, where the grubs were systematically destroying the roots of my container plants. That moment taught me to read damage like a detective, working backward from what I could see to identify the actual culprit. And it’s a skill that saves time and heartbreak. If you’re asking “what eats camellia leaves,” you’re probably staring at your plants right now, trying to figure out what went wrong. This guide will help you match what you’re seeing to the pest responsible—and more importantly, tell you what to actually do about it.
Start With the Damage, Not the Pest
When I talk to other gardeners about their camellia troubles, most of them jump straight to “I think it’s spider mites” or “I read it might be aphids.” But that’s backward. Damage identification has to come first.
Here’s a critical distinction I need to make upfront: most of what people call “leaf eating” on camellias isn’t actually eating at all. Sucking pests—spider mites, tea scale, thrips, and aphids—damage leaves by puncturing cells and draining the contents. This creates silvering, yellowing, sticky residue, and stippling, but no actual holes or missing tissue. We’ve covered those pests thoroughly in our guides on camellia scale and camellia aphids, so I won’t repeat that ground here.
This guide focuses exclusively on pests that physically remove leaf tissue—the ones that leave you with actual holes, notches, ragged tears, or chewed edges. Once you can match the damage pattern to the pest, treatment becomes obvious. So take a breath, grab a leaf (or several), and let’s identify what’s actually going on in your garden.
Clean Notches Around the Leaf Edge: Vine Weevil
If you’re seeing clean, semicircular notches eaten from the edges and margins of your camellia leaves—like someone took a hole punch to them—you have vine weevil adults (Otiorhynchus sulcatus) visiting your plants at night.
The adults are unmistakable once you know what to look for. They’re about 9mm long, flightless, and matte black with faint ridges on their wing covers. All of them are female, by the way, which is why populations explode so quickly. I usually spot them by taking a torch out after dark and checking the lower leaves and stems. They’re sluggish and easy to hand-pick if you find them actively feeding.
The notching itself is genuinely cosmetic. A plant with notched leaves is not in danger. But—and this is crucial—if you see notching, the grubs are almost certainly in the soil. That’s where the real horror lives.
Why the Grubs Matter More Than the Notches
Adult vine weevil females lay eggs in the soil around host plants, usually in late summer and autumn. The eggs hatch into C-shaped white grubs that overwinter in the top few inches of soil. Come spring, those grubs start feeding on roots—and they’re voracious. In my experience, this is where container camellias become seriously vulnerable.
A plant in a pot has a finite root system. If vine weevil grubs get established in that rootball, they can demolish the plant’s ability to absorb water and nutrients. The typical scenario I see is this: everything looks fine through spring and early summer. Then in late August or September, despite regular watering, the plant suddenly wilts catastrophically. The leaves go limp, the stem feels soft, and within days the plant is dead or dying. That’s vine weevil grub damage. The roots have been so thoroughly eaten that the plant can’t sustain itself anymore.
Ground-planted camellias in established beds are more resilient—they can often outgrow the damage or compartmentalize the injured roots. But container plants? They’re toast if you don’t intervene.
The solution is beneficial nematodes applied as a soil drench. I use Steinernema kraussei for cooler soils (zones 7–8) and Heterorhabditis for warmer zones. Apply them in late summer when the new grubs are still small, and again in early spring. Follow the label rates carefully—nematodes are living organisms, and they need moisture and the right temperature to work.
Additionally, I check the rootball of any container camellia that wilts suddenly, even if I don’t see adult notching. If I find a mushy, grub-filled rootball, the plant is usually beyond saving, but removing it immediately prevents the grubs from pupating and cycling back into the soil. One more trick that works: sticky barrier bands wrapped around pot rims in autumn prevent flightless adults from crawling up into plants.
Ragged Holes and Slime Trails: Slugs and Snails
Slugs and snails create a very different damage pattern from vine weevil. Instead of neat notches, you’ll see irregular, ragged holes gouged out of the middle or edges of leaves. The giveaway is always the silvery slime trail—once you spot that telltale mucus track, identification is certain.
These pests favor soft, tender new growth and the lower leaves that sit closest to the soil. In my garden, they’re worst on container camellias and in wet spring weather. A plant sheltered under eaves or crowded against a wall where morning dew lingers is an invitation.
My preferred control method is simple but requires dedication: night patrols with a torch. You’ll find most slugs and snails actively feeding after dark, especially if it’s been damp. Hand-pick them into a container and dispose of them. It sounds tedious, but two or three nights of patrols can break an incipient population before it gets out of hand.
For larger infestations, ferric phosphate pellets are your friend. They’re pet-safe (unlike metaldehyde), and slugs die after eating them. Scatter them around the base of affected plants and keep them dry—wet pellets lose potency. Copper tape wrapped around pot rims also works as a deterrent; slugs won’t cross it.
Finally, remove their hiding places. Clear away loose mulch, dead leaves, and damp debris where they shelter during the day. Container plants in particular benefit from being raised off the ground on feet or benches, which cuts off direct access.
Rolled, Webbed, or Skeletonised Leaves: Caterpillars
If you find leaves rolled up and tied shut with silk, or leaves webbed together, or leaf tissue stripped away to leave just the veins (a condition called skeletonisation), you’ve got caterpillars. On camellias, this is usually one of two types: leaf rollers or loopers.
Fortunately for us, caterpillar damage on established camellias is rarely serious. A healthy plant can tolerate considerable defoliation and will simply push out new leaves. Young nursery plants and freshly planted specimens are more vulnerable, but even those usually recover quickly.
Hand-picking is effective if populations are light. Simply unroll the leaves and remove the caterpillars. If you have a heavy infestation, Bt (Bacillus thuringiensis) is a targeted, organic solution that kills caterpillars without harming other organisms. Spray it thoroughly to coat all leaf surfaces, and repeat after 7–10 days if needed.
In my experience, I rarely need to do more than monitor. By the time the damage is obvious, the caterpillars are often already pupating or moving on to other hosts. A light leaf-roll doesn’t need intervention at all.
Torn Leaves and Stripped Shoots: Deer and Rabbits
Deer browse camellias more often than people realize, especially in late winter when other food is scarce. The damage is distinctive: whole leaves and shoot tips torn off cleanly, with a ragged, irregular tear rather than a clean cut. The height of the browse matters: look for stripped foliage at 3–5 feet from the ground, which is the natural feeding reach of a standing deer.
Camellias are rated “occasionally severely damaged” by deer—not a preferred food, but not rejected either. In my three growing zones, I’ve noticed that Sasanquas with their smaller, finer foliage seem to get browsed less than the larger-leaved japonicas, but hungry deer in late winter will strip almost anything if they’re desperate enough.
Deer are ultimately a fencing problem. Repellents work, but deer habituate quickly—they learn the smell isn’t a real threat. Rotate between different repellent products every few weeks to keep them guessing. That said, a solid 6–8 foot fence is the only completely reliable solution if you have significant deer pressure.
Rabbit damage is similar but occurs much lower—below 2 feet—and the cut edges are typically cleaner and at a more precise 45-degree angle. Rabbits are usually a winter problem too, and fencing (or hardware cloth around individual plant bases) is the best deterrent.
Healthy Leaves but Buds That Never Open: Camellia Bud Mites
Here’s something I wish I’d known earlier: you can have absolutely pristine camellia foliage while your buds are slowly being destroyed by an invisible pest. That pest is the camellia bud mite, an eriophyid mite so small you need at least a 10× hand lens to see it. No leaf damage at all. Just buds that never, ever open.
I spent two full seasons blaming my watering routine for bud drop on a block of ‘Nobilissima’ camellias before I finally grabbed a hand lens and looked closely at the bud scales. What I found was heartbreaking: the scales were roughened and rusty-bronze in color, not the smooth green of a healthy bud. The mites had been building their population in that bed the entire time, and I’d been chasing my tail with soil moisture tests and fertilizer adjustments.
Bud mite damage accumulates over years. The first season, you might lose 20–30% of buds to poor opening or browning at the scales. By year three or four, if you haven’t addressed it, you can lose 80–90% of the season’s flower crop. The mites lay eggs inside the bud scales and feed as the buds develop, causing the scales to thicken, roughen, and seal the bud shut. Some buds abort entirely and drop before opening. Others open partially or not at all. Occasionally, you’ll see bronzed or distorted new growth on severely infested plants, but the real signature is bud failure.
This is a pest that compounds itself. Every infested bud is a nursery for the next generation. By autumn, as new flower buds form, the mites migrate into them and settle in for winter. They become active again as spring temperatures rise, causing fresh damage.
How to Tell Bud Mites From Bud Drop and Petal Blight
Bud drop can happen for several reasons, and it’s crucial to distinguish between them because treatments are completely different.
Drought-induced bud drop: Buds fall plump and green, completely intact. The plant was stressed for water at a critical time (usually when buds are sizing up in late summer or early autumn). The buds never had a chance to develop properly. Leaves will also show signs of water stress—dullness, slight wilting, or crispy edges. Fix the watering, and next season’s buds will develop normally.
Petal blight (Ciborinia camelliae): This fungal disease affects open flowers, not buds. The flower opens normally, looks beautiful for a day or two, then browns rapidly from the center outward, often with small round tan spots visible on the petals. By the next day, the entire flower is rust-brown and ruined. The buds themselves are fine—it’s the open flower that’s affected. Buds on the same plant remain healthy and may open as replacements.
Bud mite damage: The buds themselves are visibly abnormal. Look closely at the bud scales with a hand lens (10× magnification is ideal). Mite-damaged scales are roughened, bronze or rust-colored, and often thickened. Healthy scales are smooth and green. Buds may abort and drop without ever opening, or they may open partially with distorted or blackened petals. Leaf foliage looks completely normal.
Treating Camellia Bud Mites
Once you’ve confirmed bud mites, treatment requires patience and consistency. These mites don’t respond to systemic insecticides or most conventional sprays. Your tools are horticultural oil and sulfur, applied at the right times.
The critical window is autumn, as buds are forming and the mites are preparing to enter them for the season. Spray horticultural oil thoroughly in early October (zone 8 timing; adjust earlier for cooler zones) when you see new flower buds appearing but before they’re fully formed. Get good coverage on all sides of every bud. Repeat the application 10–14 days later to catch mites that are still mobile.
Then spray again in late winter—late February or early March—just as buds are breaking dormancy but before they open. At this point, mites inside the buds are becoming active. A second thorough oil application can reduce the population inside buds before they emerge.
Wettable sulfur is an alternative or supplement. It’s also effective against spider mites if you have a co-infestation. Check your product label to ensure it’s rated for camellias and safe to use during the bloom season (some sulfur formulations can damage flowers if applied during blooming). Horticultural oil and sulfur should not be mixed; apply them on separate schedules.
In addition to spraying, hand-remove and destroy any buds that show obvious rust-colored scaling or browning. This removes the population living inside those buds and prevents them from exiting and reinfesting new growth. It feels drastic when you’re doing it—you’re throwing away flowers—but it genuinely slows the mite buildup.
Realistic expectation: you won’t eliminate bud mites in one season. Populations that have built up over years take more than one season to knock back. But consistent treatment will reduce damage noticeably by year two, and by year three you should have most of your flower buds opening normally again.
Damage That Is Not a Pest at All
Not every mark or damage pattern on camellia leaves is caused by an animal. Several common plant problems get mistaken for pest feeding.
Sunscald: Leaves (usually on exposed west or south-facing sides) develop bleached, papery patches or holes where the tissue has died. This happens in cold climates when sun-warmed bark or leaves thaw too quickly after a hard frost, rupturing cells. There’s no bug involved. It’s purely environmental. Future damage is prevented by siting camellias with afternoon shade and using shade cloth in winter if you’re in a very cold zone.
Frost damage: New tender growth or flower buds blacken and become crispy after a late freeze. Leaves may drop or remain attached but completely necrotic. Again, no pest is responsible. Wait for new growth after the danger of frost has passed.
Leaf gall: Leaves develop thick, lumpy, distorted tissue, often reddish or bronze-colored. This is caused by eriophyid mites (different species from bud mites) or occasionally by a fungus. Gall-affected leaves are unsightly but don’t threaten the plant’s health. Remove severely affected leaves if desired; the tree will recover easily.
Petal blight: I mentioned this in the bud mite section, but it bears repeating: petal blight affects open flowers, not buds or foliage. The disease is fungal, soil-borne, and primarily a problem in cool, wet springs. Preventive measures include removing old flower petals and maintaining good air circulation around plants.
Your Diagnostic Checklist
When you walk your camellia beds and spot damage, work through this checklist:
- Are there clean semicircular notches along leaf margins? Vine weevil adults are feeding at night. Check for suddenly wilting container plants in late summer—the real problem is below ground.
- Do you see irregular ragged holes and slime trails? Slugs and snails. Do night patrols, use ferric phosphate pellets, and clear damp hiding spots.
- Are leaves rolled, webbed, or skeletonised? Caterpillars, likely harmless on established plants. Hand-pick or use Bt if populations are heavy.
- Are large sections of leaves and shoots torn away at 3–5 feet high? Deer are browsing. Install fencing or use rotating repellents.
- Do buds never open, showing rusty, roughened scales, while leaves are fine? Grab a hand lens and confirm bud mites. Treat with horticultural oil in autumn and late winter.
- Do you see bleached patches, blackened tissue, or distorted galls? Environmental damage or fungal gall. No treatment required—the plant will recover.
Remember: most leaf damage on camellias is cosmetic and doesn’t require intervention. A few notched leaves, a bit of caterpillar skeletonisation, or some snail holes won’t harm a healthy plant. Intervention is only necessary when damage is severe, persistent, or (as with vine weevil grubs or bud mites) threatens to compound over time.
Now you know what eats camellia leaves—and crucially, you can match what you’re seeing to the actual culprit. Go check your plants. A close look with a torch after dark or a hand lens in good daylight will tell you everything you need to know. Trust what you see, and you’ll rarely go wrong.
About This Article

Written by Helen Pritchard. Helen Pritchard is a lifelong gardener in the Pacific Northwest who has grown more than 200 named camellia cultivars over two decades. She writes practical, experience-based guides to camellia care, from variety selection and pruning to troubleshooting yellowing leaves and bud drop. More about this site.
Verify this against a primary source
Specifics change, and your situation may differ from the one described here. These are the authorities worth checking directly:
- American Camellia Society — cultivar registration and culture guides
- USDA Plant Hardiness Zone Map — zone verification for your location
- Royal Horticultural Society — camellia cultivation and pest guidance