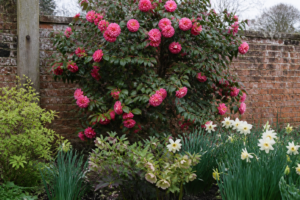
It was August, fifteen years into my camellia obsession, when I learned the cruelest lesson about drought. A bed of established plants—including a magnificent ‘Debutante’ that had been in the ground for eight years—looked utterly fine. The foliage was glossy. No wilting. No crispy edges. So when a particularly hot, dry spell swept through zone 8a, I let it slide, reasoning that mature camellias could handle a few weeks without rain. They looked fine, after all.
March arrived that next year, and my ‘Debutante’ set buds like it always did. Then, almost overnight, nearly every single bud dropped. I stood there staring at the bare branches, furious at myself. The plant had paid the price for that dry July and August in a language I didn’t hear until months later. That’s when I truly understood what it means when people ask: are camellias drought tolerant?
The Honest Answer on Camellia Drought Tolerance
No and yes. But mostly: it’s complicated.
An established camellia is moderately drought tolerant—considerably more so than most gardeners expect. However, a young one is not drought tolerant at all. The gap between those two states spans roughly three years. Anyone answering “yes” or “no” flatly is skipping the part that actually matters.
Here’s what I mean in practical terms: a camellia in its first year needs consistent moisture. Skip regular watering for two weeks in summer, and it will suffer noticeably. By year three, that same plant can tolerate occasional dry spells if it’s mulched and sited well. By year five or six, it becomes genuinely resilient. But—and this is critical—”resilient” does not mean “bulletproof.”
A mature camellia can survive a drought that would kill a young one. It will not, however, thrive through one. And it will absolutely remember a bad dry spell come budding time the following year. That’s the part nobody tells you about.
Why Shallow Roots Change Everything
Understanding camellia drought tolerance requires understanding how camellias root. They are shallow-rooted plants. Period. No apologies, no exceptions.
Rather than sending a deep taproot into the earth like an oak tree, camellias develop a dense, fibrous feeder mat that lives almost entirely in the top 12 to 18 inches of soil. This mat is remarkably efficient at capturing light rain and surface moisture. It’s why camellias thrive in woodland settings with dappled shade and constant leaf litter—that environment delivers water regularly to the shallow zone where the roots actually live.
That shallow mat, however, has no deep reserve to fall back on during drought. The roots cannot reach down to moisture that the deep-rooted neighbors might access. They are what they are: surface harvesters, not well-diggers. For a deeper dive into root architecture, see our post on camellia root systems.
So why does an established camellia cope better than a young one? Not because the roots go deeper. They don’t. Instead, the mature plant copes because:
- The feeder mat is wider and denser, covering more ground to catch moisture.
- Surrounding mulch keeps the soil cooler and retains moisture longer.
- The canopy shades the soil, reducing evaporation significantly.
- Years of growth mean more woody stems to buffer the plant’s water demands.
None of that changes the fundamental fact: shallow roots are vulnerable roots. They are also why I made my August mistake. I assumed “established” meant “invincible.”
The Symptoms of Drought Stress, in Order
Drought stress does not arrive suddenly. It creeps in stages. Knowing these stages matters because the earlier you catch it, the easier the recovery.
I’m listing them in the order they actually appear, not the order gardeners usually notice them:
Stage 1: Dull, Grey-Green Leaves That Lose Their Gloss
This is the earliest sign. Most gardeners miss it entirely because the plant still looks “okay.” The leaves are present. Not brown. Not wilting. But that characteristic camellia shine—that glossy, almost lacquered appearance—fades. Leaves take on a slightly dull, greyish tone.
This happens before the plant is truly distressed. It’s a whisper, not a shout. If you water deeply at this stage, the gloss returns within days. I’ve trained myself to run my hand across the foliage in July and August, specifically because this is the moment to act.
Stage 2: Leaves Folding Inward Along the Midrib
A few days into dry conditions, leaves begin adopting a water-conserving posture. They fold upward or inward along the center vein, creating a tented or boat-like shape. This happens most noticeably in afternoon heat.
Here’s the key: if the plant recovers by morning, transpiration has not yet done permanent damage. The plant is thirsty but not yet harmed. Water it thoroughly, and it will unfold. This is still a rescue situation.
Stage 3: Wilting That Does Not Recover Overnight
This is the moment when afternoon heat stops being routine and becomes crisis. Leaves wilt in the daytime heat, and they stay wilted even after the evening cools. The plant no longer has enough available moisture to recover.
You’re still in a critical window, but you’re no longer in “gentle correction” territory. The plant needs water today, not tomorrow. Soak slowly and deeply.
Stage 4: Marginal Leaf Scorch
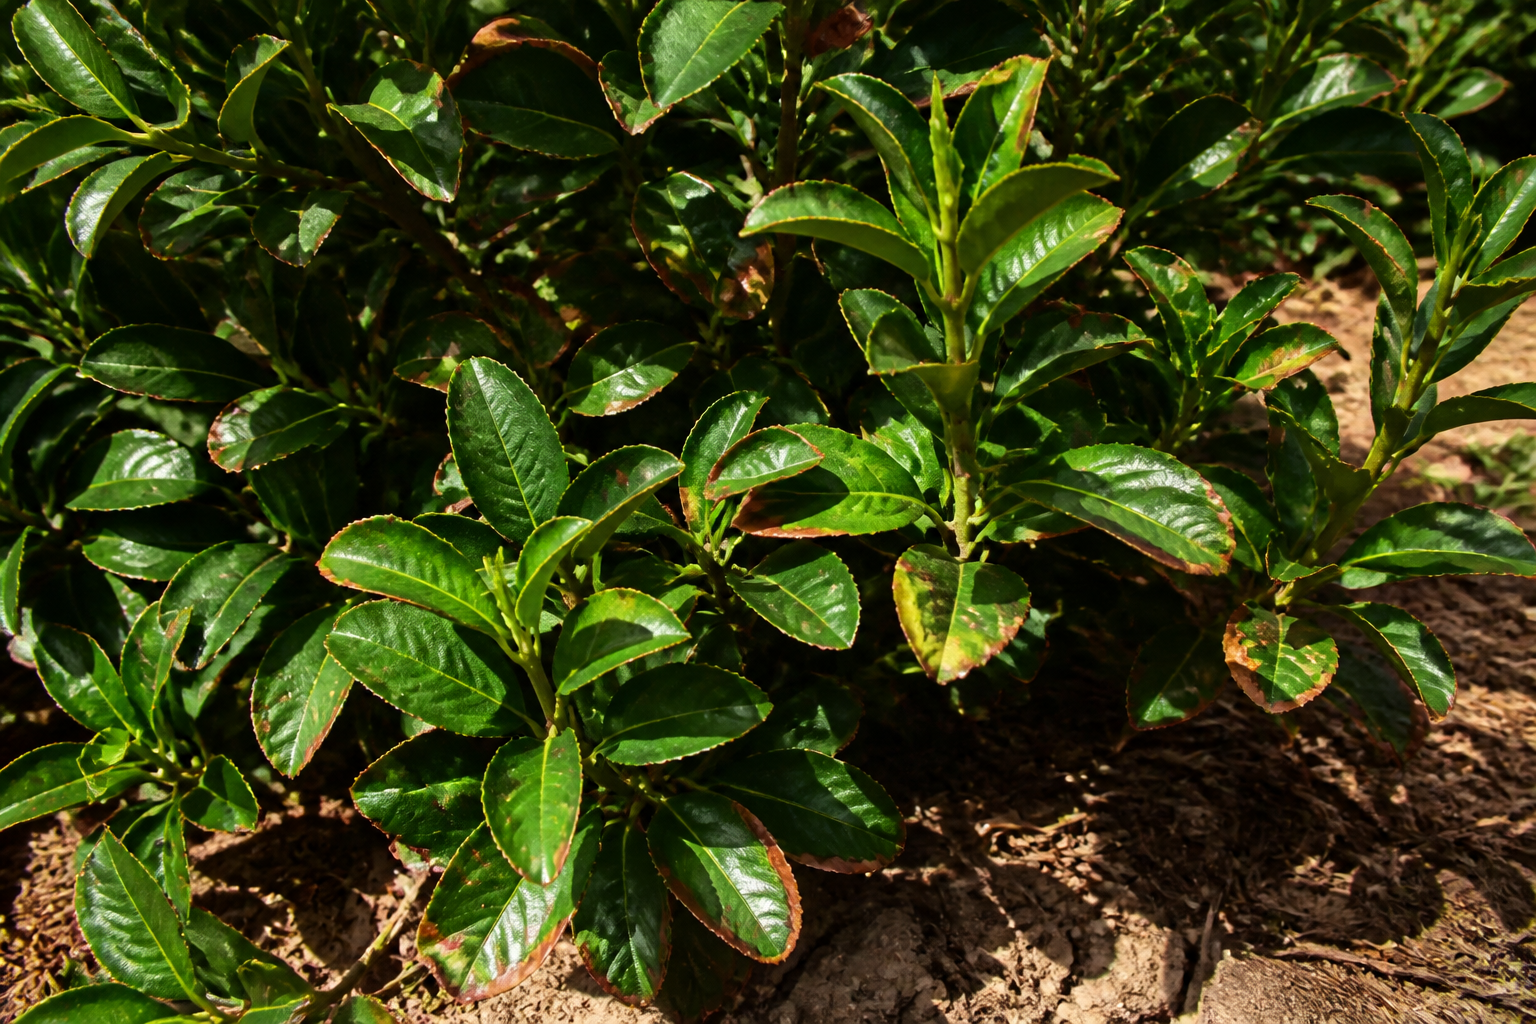
Brown, crisp, papery edges appear, working inward from the leaf tip and margins. There’s a distinct, sharp boundary between the dead brown tissue and the still-living green tissue beyond it. This is irreversible damage to those specific leaves.
Camellia leaf scorch caused by drought looks like the leaf tissue literally surrendered first at the edges, where transpiration is most intense. The plant shed those outer cells to save the rest of the leaf.
Stage 5: Sudden Leaf Drop of Interior Foliage
If drought deepens, the plant begins shedding older interior leaves aggressively. Entire lower branches may drop their foliage within days. The plant is reducing its own water demands by dropping the load it cannot support.
This is a survival mechanism. It’s also a sign that the plant has been severely stressed. Recovery will take months, not weeks.
Stage 6: The Following Spring—Bud Drop
Here’s where my ‘Debutante’ taught me the hardest lesson. Camellia buds are formed in July and August, during summer growth. A plant that experienced drought stress during those months has already set fewer buds. But often, those remaining buds begin to abort in winter or early spring.
You won’t see obvious wilting or brown leaves. The plant will look recovered. Then budbreak time arrives and buds fall, and you realize the damage was done months earlier. This delayed consequence is why that dry August matters so profoundly.
Is It Drought, Root Rot, or Sunscald?
Drought stress is common. But it’s not the only camellia condition that produces wilting, crispy leaves, and distress. Misdiagnosing the problem often makes things worse. So let’s be very clear about what distinguishes drought from its dangerous lookalikes.
Drought Stress vs. Root Rot
This is the most dangerous misdiagnosis possible. Drought and root rot can produce almost identical symptoms: wilting, dull leaves, marginal scorch, leaf drop. The instinct when you see this is to water more. If the actual problem is root rot, watering more will kill the plant.
Here is how to tell them apart, and I mean this literally: check the soil moisture at 6 inches deep before you reach for the hose.
- Drought: Soil is dry. You push a finger down 6 inches and find no moisture. The roots, if you carefully excavate one, are white or pale and firm to the touch.
- Root rot: Soil is wet or waterlogged, even though you haven’t watered recently. The roots, if visible, are brown or black, mushy, and smell faintly sour or rotten. See our root rot diagnosis post for the full picture.
The wilting looks similar because in both cases, the roots cannot deliver water to the leaves. But in drought, water is absent from the soil. In root rot, water is present but the roots cannot absorb it because they’re dead.
This single distinction saves lives. Check soil moisture first. Everything else follows from that.
Drought Scorch vs. Sunscald
Sunscald produces browning that looks superficially similar to drought scorch. However, sunscald appears as bleached tan patches in the leaf blade itself, not at the margins. It occurs on the sun-facing side of the plant and on exposed upper leaves only. It happens on plants in too-bright light, not because of dry soil.
Drought scorch works inward from the edges. Sunscald appears as internal patches. That’s your diagnostic line.
Drought Stress vs. Salt or Fertiliser Burn
Salt or fertiliser burn also produces crispy brown margins. But it typically appears relatively uniformly across the plant, often soon after feeding. The edges crisp up within a few days of applying fertiliser, particularly if the plant was dry when you applied it.
Drought scorch develops gradually as water stress accumulates. The timeline is weeks, not days. And it’s accompanied by wilting and dull foliage long before margins turn brown.
Winter Desiccation vs. Drought Scorch
In winter, cold wind and frost can desiccate camellia foliage, producing brown leaf edges that look like drought scorch. However, this occurs in cold weather, on the windward side of the plant specifically, and without accompanying soil dryness. The soil is often quite moist; the problem is exposure, not moisture availability.
Drought scorch happens in warm weather when soil moisture is genuinely absent. Timing and context tell the story.
How to Build a Drought-Tolerant Camellia
I don’t build drought tolerance in my camellias by choosing tougher varieties—though that helps. I build it through a practical program of watering strategy, placement, and patience. These actions compound over years into real resilience.
Deep, Infrequent Soaking Rather Than Light, Frequent Watering
This is the foundation. Shallow, daily sprinkles train roots to stay shallow. The feeder mat never has incentive to push deeper into the soil profile. Deep, infrequent soaking encourages roots to follow moisture downward, creating a slightly deeper reserve.
I soak my younger camellias thoroughly once or twice weekly in summer, delivering water slowly with a soaker hose or drip line. The goal is to wet the soil 12 to 18 inches deep, not to merely dampen the surface. This takes time—30 to 45 minutes per plant—but the result is a more resilient root system.
2 to 3 Inches of Mulch, Always Kept Off the Trunk
Mulch does three critical things: it keeps soil cooler, reduces evaporation, and insulates the root zone against temperature extremes. I use bark mulch or aged wood chips and maintain it consistently. The mulch should blanket the soil out to the drip line, but never touch the trunk itself—that invites rot.
In my experience, a well-mulched camellia can survive a dry spell that would stress an unmulched one of the same age.
Afternoon Shade Cuts Water Demand Nearly in Half
Full sun camellias, particularly japonicas and reticulatas, transpire far more aggressively in summer than those receiving afternoon shade. Siting a camellia where it gets morning sun but afternoon protection from a tree or fence reduces its water needs dramatically.
This is why woodland-origin camellias thrive in dappled shade. Evolution designed them for that niche. Working with their preference, not against it, builds genuine drought tolerance.
Never Let the Plant Go Dry During July and August
Even if the plant looks perfectly fine. Even if it’s not wilting. Those two months are when next year’s buds are being set. A plant under water stress in July and August will set fewer, smaller buds—and those remaining buds are more likely to abort in spring.
This is the rule I learned from my ‘Debutante.’ I check soil moisture weekly from July 1 through August 31, every year, without exception. If the top 3 inches are dry, I water. The plant does not need to be distressed to suffer future consequences.
Accept Slower Growth in a Dry Year
The instinct is to fertilise through drought stress, hoping to keep the plant growing vigorously. Resist it. Nitrogen encourages tender new growth that demands water the plant doesn’t have. A stressed camellia should not be pushed.
Instead, allow slower growth, maintain moisture as best you can, and resume feeding once conditions normalise. A year of modest growth beats a dead plant.
Sasanqua vs. Japonica in a Dry Summer
Not all camellias are equally drought tolerant, even among established plants. Sasanquas and japonicas differ noticeably in their ability to handle heat and dry conditions.
Sasanquas are the tougher of the two. They have smaller, thicker, more leathery leaves and a denser, more compact growth habit. A mature sasanqua in afternoon shade can handle extended dry periods that would stress an equivalent japonica. Varieties like ‘Yuletide’ and ‘Setsugekka’ are genuinely tough plants.
Japonicas show scorch sooner. Their larger, thinner leaves transpire more aggressively in heat. A japonica’s elegant foliage is also its vulnerability in drought. They demand more consistent moisture and appreciate afternoon shade more urgently than sasanquas.
Reticulatas are the most demanding of all. Large leaves, vigorous growth, and heat sensitivity make them the least drought tolerant. A reticulata needs reliable moisture and protection from full sun to thrive. In a dry year, they struggle.
If you live in a region prone to summer drought, sasanqua cultivars are your friends. If you must grow japonicas or reticulatas, invest in shade and mulch.
Rescuing a Camellia That Is Already Suffering
If you’ve identified drought stress at stage 3 or beyond, the plant needs rescue, not routine care.
Soak Slowly and Deeply
Do not blast the surface with the hose. Place the hose at the soil line and allow water to soak in slowly for 30 to 45 minutes. A soaker hose or water basin is ideal. Slow soaking allows the dense shallow root mat to actually absorb moisture rather than having it run off.
Repeat every 3 to 4 days until the soil is consistently moist at 6 inches deep and the plant shows clear signs of recovery—gloss returning to leaves, wilting ending, new growth beginning.
Do Not Fertilise a Stressed Plant
Even though the instinct is to feed it. Fertiliser stresses an already-stressed plant. Wait until the plant has recovered and is showing new growth before resuming any feeding program.
Do Not Prune Off Scorched Leaves Immediately
Those brown-edged leaves are still photosynthesising on their living portions. They also shade the stems, protecting them from additional heat stress. Leave them on the plant until new growth is well underway and the plant has clearly recovered. Then prune them out.
Expect a Full Season of Recovery
A severely drought-stressed camellia will not bounce back in days or weeks. Expect 3 to 6 months of gradual recovery. Growth may be modest. The plant may not flower well the following season. That’s normal. In the second season after the stress event, the plant usually returns to normal vigor.
Why Potted Camellias Are Never Drought Tolerant
I need to be direct about this: a camellia in a container is never drought tolerant, no matter how established. The confined root zone has no deep reserve whatsoever. It’s entirely dependent on you.
A potted camellia in a hot summer can need water daily. Leave it unwatered for two weeks—even if you have an established specimen—and it will likely die. The soil dries from all sides simultaneously, and there is nowhere for roots to search for deeper moisture.
If you grow camellias in containers, plan on daily monitoring during summer heat. Use a large pot with excellent drainage. Mulch the surface heavily. Site it in afternoon shade. And do not assume that an old, woody potted camellia can fend for itself. It cannot.
The July and August Rule
So, are camellias drought tolerant? The honest answer remains: established ones are moderately so. Young ones are not. But more importantly, all camellias are vulnerable during bud-setting season, which falls in July and August.
That’s the rule I follow now, without exception. Every plant in my collection gets a soil moisture check weekly from July 1 through August 31. If it’s dry, it gets water. If it’s moist, it waits. I don’t rely on rain and I don’t assume that a large, healthy-looking plant can fend for itself.
The cost of that attention is fifteen minutes a week. The cost of not paying it is buds that never open. I know which I prefer.
About This Article

Written by Helen Pritchard. Helen Pritchard is a lifelong gardener in the Pacific Northwest who has grown more than 200 named camellia cultivars over two decades. She writes practical, experience-based guides to camellia care, from variety selection and pruning to troubleshooting yellowing leaves and bud drop. More about this site.
Verify this against a primary source
Specifics change, and your situation may differ from the one described here. These are the authorities worth checking directly:
- American Camellia Society — cultivar registration and culture guides
- USDA Plant Hardiness Zone Map — zone verification for your location
- Royal Horticultural Society — camellia cultivation and pest guidance