
This post contains affiliate links. As an Amazon Associate, I earn from qualifying purchases at no extra cost to you.
Transplanting camellias has always made me nervous. After more than two decades of growing them here in Zone 8b, I’ve learned that even a healthy plant can sulk for a full season after being moved. Last spring, I had to relocate four established camellias to make room for a new garden path. That’s when I started seriously researching Bio-Tone starter transplanting camellias and whether a biological fertilizer could actually make a difference during that stressful establishment window.
The four plants I was moving weren’t small. Two were mature Camellia japonica ‘Kramer’s Supreme’ specimens I’d been nurturing for nearly twelve years. The other two were Camellia sasanqua ‘Setsugekka’ shrubs that had finally hit their stride after three years of slow growth. Losing any of them felt unacceptable. I needed more than luck on my side.
I’d transplanted camellias before with mixed results. Sometimes they bounced back quickly. Other times, they dropped leaves, stalled out, and took two full seasons to look normal again. Something had to change about my approach. That’s what pushed me toward trying a biological starter fertilizer for the first time.
Why I Chose Bio-Tone Starter Plus Over Other Options
I’d used synthetic starter fertilizers before with mixed results. High-phosphorus options like superphosphate can encourage root growth, but they don’t do anything to support the soil biology that camellias genuinely depend on. Camellias thrive in acidic soil — ideally between pH 5.5 and 6.5 — and the microbial life in that range is critical for nutrient uptake.
A trusted friend in my local camellia society mentioned she’d had great success using a mycorrhizal-based starter. That sent me down a research rabbit hole. I landed on the Espoma Organic Bio-Tone Starter Plus 4-3-3 Natural & Organic Starter Plant Food with Both Endo & Ecto Mycorrhizae; 4 lb. Bag; The Ultimate Starter Fertilizer – Pack of 2.
What caught my attention specifically was the inclusion of both endo and ecto mycorrhizae. Most cheaper products include only one type. Ectomycorrhizae colonize the root surface and are particularly useful for woody shrubs. Endomycorrhizae penetrate root cells and improve water and phosphorus absorption at a deeper level. For acid-loving woody plants like camellias, having both felt like the right call.
The 4-3-3 NPK ratio was also appealing. It’s gentle enough not to burn tender new roots. That matters a lot when you’re working with a plant that has just had its root system disturbed. A high-nitrogen formula right after transplanting can push tender top growth the plant can’t yet support.
First Impressions: Packaging and Product Quality
The pack of two 4-pound bags arrived well-sealed and in good condition. Opening the first bag, I noticed the granules had a rich, earthy smell — not unpleasant, but distinctly organic. This is a good sign. It tells you the biological ingredients are present and active, not processed into oblivion.
The granule size was uniform and easy to work with. I’ve used some organic fertilizers that clump badly or have an inconsistent texture that makes measuring difficult. That wasn’t an issue here. The granules scattered evenly and incorporated into the soil without any fuss.
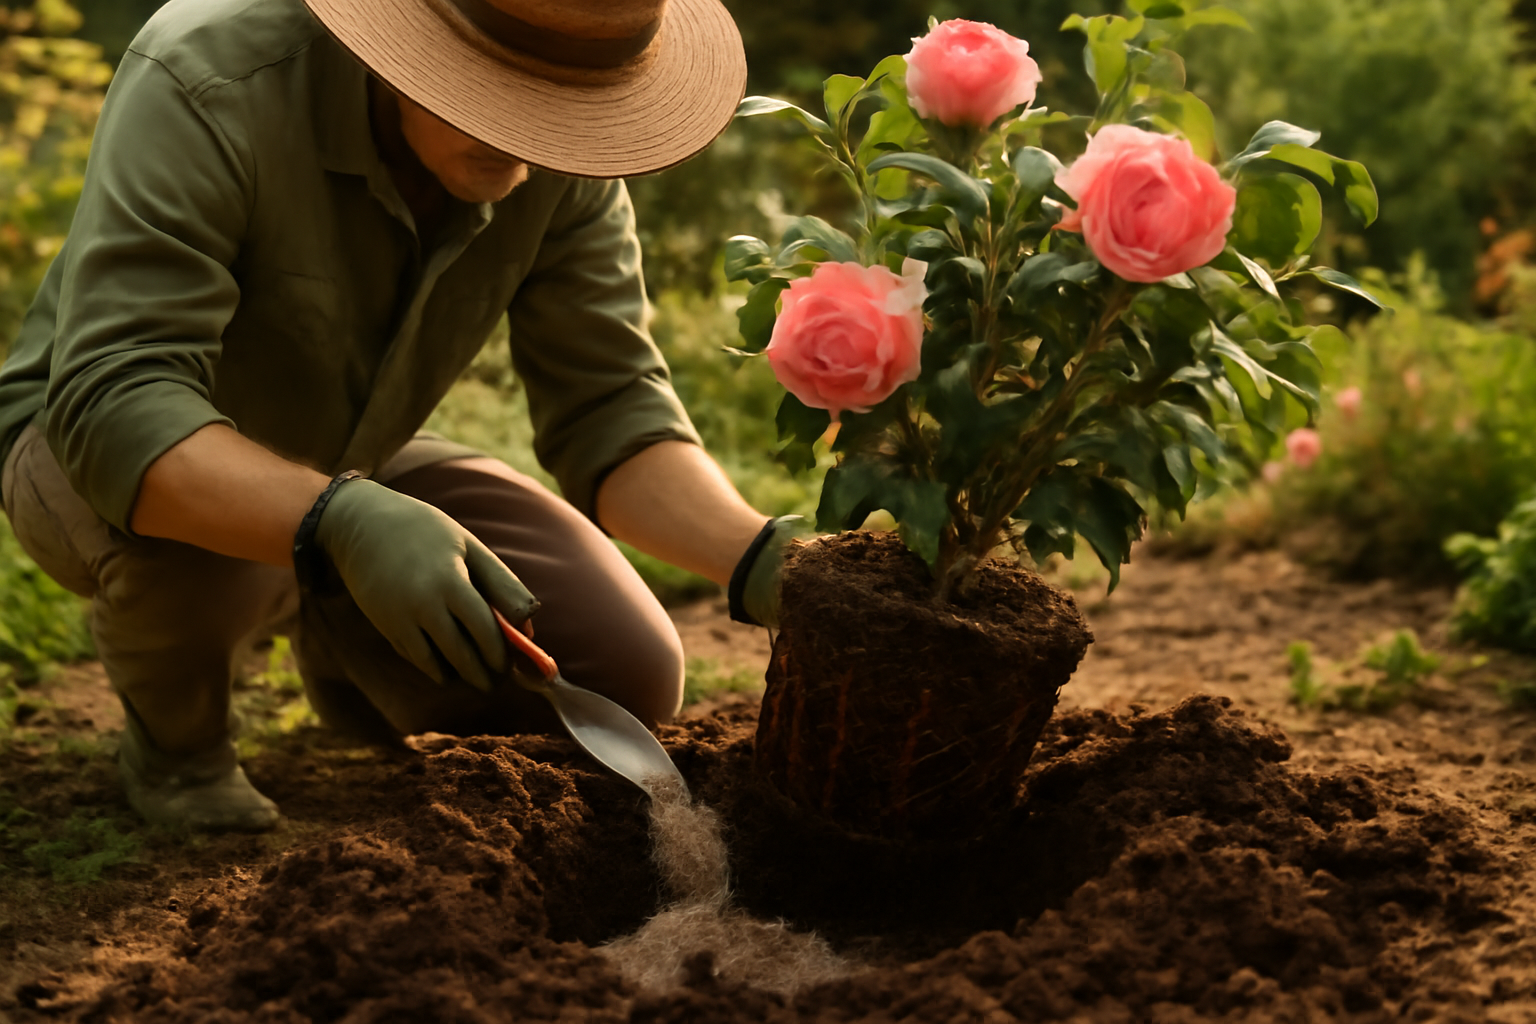
Instructions on the bag were clear. For transplanting shrubs, the recommendation was to mix granules into the backfill soil and add some to the planting hole. The rates were specific enough to follow with confidence. I appreciated that the label also mentioned keeping the product away from direct root contact at the base of the stem — a detail that matters with camellias, which are sensitive to crown rot.
My Testing Approach for Transplanting Camellias
I transplanted all four camellias in early March. Soil temperatures here in Zone 8b were just beginning to warm, hovering around 55°F. That timing was intentional. Cooler soil temperatures slow moisture loss and give roots a chance to establish before summer heat arrives.
My native soil is a heavy clay-loam with a pH that tends to drift toward 6.8 — slightly too alkaline for camellias. For each planting hole, I amended the backfill with pine bark fines and peat moss to bring it closer to the target range of 5.5–6.5. I then mixed in the Bio-Tone granules at the recommended transplanting rate.
Specifically, I used approximately three tablespoons per plant worked into the bottom of the hole, plus additional granules blended through the backfill soil. After planting, I watered each shrub deeply and applied a 3-inch layer of pine bark mulch, keeping it away from the stems.
I did not apply any other fertilizer for the remainder of the season. That was an intentional choice. I wanted to isolate the impact of the Bio-Tone as much as possible. Consistent watering through dry spells was the only other variable I controlled closely.
Over the following six months, I tracked new growth flushes, leaf color, and any signs of transplant stress — specifically yellowing, leaf drop, or wilting beyond the first two weeks.
What Actually Changed: Honest Results with a Timeline
Here’s where I want to be genuinely useful rather than just enthusiastic. The results were good — but they weren’t magical, and they didn’t happen overnight.
Weeks 1–3: Holding Steady
All four plants dropped some leaves in the first two weeks. That’s normal transplant shock and I expected it. However, the leaf drop was noticeably less dramatic than what I’d experienced in previous transplanting seasons without a biological starter. Each plant held most of its foliage. That alone was encouraging.
Weeks 4–8: New Growth Appears
By week five, both ‘Setsugekka’ sasanquas were pushing new growth from multiple nodes. That surprised me. In my past experience, sasanquas transplanted in spring rarely push meaningful new growth until late summer. Seeing fresh, bright green tips at week five felt like a genuine win.
The ‘Kramer’s Supreme’ japonicas were slower. One showed new growth at week six. The other — the larger of the two — stayed dormant-looking until almost week nine. That period of waiting tested my patience. I started second-guessing myself around week eight, wondering if I’d made a mistake or damaged the root system during the move.
Months 3–6: Strong Recovery Across the Board
By midsummer, all four plants were actively growing. The slower ‘Kramer’s Supreme’ eventually produced two strong new growth flushes and by August looked indistinguishable from the other specimen. Leaf color was deep, glossy green — a reliable indicator that nutrient uptake is happening efficiently.
Come fall, both ‘Setsugekka’ plants bloomed. That may not sound remarkable, but in my experience, camellias transplanted in spring rarely have the energy to bloom that same fall. The fact that they did suggests the root systems had established well enough to support reproductive growth — not just survival.
The japonicas set visible buds before winter dormancy. That’s a positive sign heading into next spring. As a result, I’m more confident than I would normally be about their long-term establishment.
The Downsides You Should Know Before Buying
No product earns an unqualified endorsement from me. Here are the honest limitations I encountered.
First, the smell. It’s earthy and organic, which I don’t mind. However, if you’re gardening in a small or enclosed space, it can be noticeable for a day or two after application. This isn’t a major issue, but worth knowing.
Second, mycorrhizal inoculants require living, active soil to work properly. If your garden beds have been heavily treated with fungicides or sterilized with solarization, the mycorrhizal component may be less effective. For best results, the soil biology needs to be reasonably healthy to start.
Third, this product will not rescue a plant that has been severely damaged during transplanting or is already in serious decline from disease or pest pressure. Bio-Tone is a starter and a soil health supporter — not a miracle cure. Manage your expectations accordingly.
Finally, the pack of two is genuinely generous for most home gardeners transplanting a few shrubs. You may find you have product left over, and the shelf life, while reasonable, isn’t indefinite. Store it in a cool, dry place and use it within a season or two for best results.
Final Verdict: Is Bio-Tone Starter Worth It for Transplanting Camellias?
After six months of testing, my answer is a clear yes — with appropriate expectations. Using the Espoma Organic Bio-Tone Starter Plus 4-3-3 Natural & Organic Starter Plant Food with Both Endo & Ecto Mycorrhizae; 4 lb. Bag; The Ultimate Starter Fertilizer – Pack of 2 during Bio-Tone starter transplanting camellias made a measurable difference in how quickly my plants recovered and how well they performed through their first season in a new location.
I’d rate it 4.5 out of 5 stars. The missing half-star is for the slow response in my larger japonica, which kept me anxious for two months. In fairness, that’s likely more about the plant’s age than the product’s limitations.
Buy This If You:
- Are transplanting established camellias and want to minimize transplant shock
- Prefer organic and biological fertilizer approaches over synthetic options
- Are planting new camellias — japonicas, sasanquas, or reticulatas — from containers or bare root
- Garden in USDA Zones 6–10 where camellias are commonly grown
- Want a product that supports long-term soil health, not just a quick green-up
Consider Something Else If You:
- Need fast, dramatic results within a few weeks
- Are working with severely damaged or diseased plants that need targeted treatment first
- Garden in heavily sterilized or fungicide-treated soil where mycorrhizal activity is compromised
- Only need a single-bag quantity and don’t want to store the remainder
A Note on the Single-Bag Alternative
If the pack of two feels like more than you need, there is a single-bag option available. The Espoma Organic Bio-Tone Starter Plus 4-3-3 Natural & Organic Starter Plant Food with Both Endo & Ecto Mycorrhizae; 4 lb. Bag; The Ultimate Starter Plant Food is the same formula in a single 4-pound bag. It’s a practical choice if you’re only transplanting one or two shrubs and don’t want product sitting on the shelf. That said, if you have multiple camellias to move — or plan to do any other shrub planting this season — the two-pack offers better value per pound. I’d recommend it without hesitation for anyone doing a larger project.